Pages
▼
Saturday, January 16, 2010
Our little "Home of the Buffaloes"
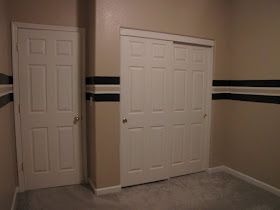
Nebraska fans beware... no entry allowed! This room is a room solely for the University of Colorado Buffaloes fan.
Fight CU down the field
CU must win
Fight, Fight for victory
CU knows no defeat
We'll roll up a mighty score
Never give in
Shoulder to Shoulder
We will Fight, Fight
Fight, Fight, Fight
In our new home my Hubby wanted to have a room all to himself and so we decided he could get an office/man cave. These are the final pictures of my paint job for him.
Over the last few years I have been collecting bits and pieces of CU history and we have them all saved to put up in a room like this. Now that it is complete, we will be unpacking these boxes and decorating away!!! He loves the new look for his room. There are still a few surprises up my sleeves. I have more in store for him but those ideas will remain a secret until they are ready to be relieved. Until then Check out these pics and let me know what you think. (By the way... the next room for me to work on is my scraproom!!!! I can't wait!!!)
Have a blessed day!!!
Monday, January 11, 2010
"You are scraping your house!" - Off the Page Project Entryway
After showing this to one of my friends he stated... "You are scraping your house!"
I have not been scrapbooking lately since our move. Mainly due to the fact that my stuff is still in boxes so I thought I would share with you all the creative things I have been doing around my house. The walls were in dire need for attention. There were eight kids and three adults living here with white contractor grade flat paint in every room. If you look closely there are places in the "BEFORE" pic that has three colors; cream, white and gray on the walls, where the previous owners tried to "touch up" paint.
The design on the side was free handed and the ceiling was created on a piece of paper... scanned into the computer and printed out in a larger size then used as a template.
How it was done:
1) The paints are Olympic semi gloss from Lowe's... the base coat is called Sandpiper and the darker flourish is a mix of their Covered Wagon color and some white (all are left over paints from the kitchen and living room).
2) I drew the flourish on the wall with a pencil, using a home made compass created from a shoelace and two pencils to create the larger curves. I would wrap the shoelace around one of the pencils to make the smaller curves.
3) Hand painting with an art brush the Covered Wagon color that was mixed with some white.
4) After painting the flourish I "distressed the corners with just white paint and a scrub brush to add some streaks and distressing textures.
5) Then I took the Covered Wagon color and mixed it with a faux finish glaze (a translucent medium about 1/2 glaze and 1/2 paint.) I applied the glaze with an old rag. Just kinda washed it onto the wall making sure there were no dark spots left behind.