Pages

Saturday, February 11, 2012

Chipboard Organization Challenge #5

Saturday Challenge #5 Week #2 - Chipboard

Chipboard is one of those more difficult things for me to organize. I have everything from letters and numbers to tons of other designs. Some in natural chipboard and some colored and glittered. So what do you do with pieces as small as 1/2" all the way to 12"x12"?

Well let me see if I can help.

First we need to ask ourselves a couple of questions.

  • 1) Do you cover your own chipboard or purchase only the prefinished colored ones?
  • 2) Do you have graphic designs as well as alphas?
  • 3)Do you have so many you can sort them by themes?

SORTING: Lets begin by deciding how you want to sort the naked or finished chipboard...

I suggest separating your alphas and numbers from your graphics. Organize your alphas and numbers in order for easy access.

Sorting graphics...

Finished Chipboard Collectors -
If you only purchase prefinished chipboard it might work for you to sort the graphics by color, MFG or theme (remember what way works best for you with the rest of your room).

Finished and Non Finished Collectors -
Here is where it can get complicated. For me no matter what finish is on the chipboard I search by shape. If it doesn't match then I just refinish it. If you don't refinish the chipboard that is already prefinished then I would suggest separating it from the naked chipboard. However for me I will be separating by types of shapes, for example... I put all my swirly chipboard together, all my flowers together. How you sort these graphics will be determined by what you have.

STORAGE SOLUTIONS: WHAT TO PUT THEM IN?

Binders:
Binders Page protectors:
Jars -

Drawers -
Tool organizer {A - Alpha Storage} By KellyCali


Canisters -

Cropper hopper in a basket in a cube - http://www.scrapbook.com/gallery/?m=image& id=142029...


Cute galvanized tins, if you have the room... http://www.scrapbook.com/gallery/?m=image& id=131387...


Now if you sort your chipboard into baggies you can make them like the one above or You can file them in a drawer, on a clip-it-up, in a basket or store them flat in a cropper hopper (separated by baggies). If you do the decorative baggie solution then maybe make one or two extra empty bags so you have them to match.

Link the photos of your organization in the comments below. Please feel free to ask any question or discuss any problem areas you may have on this subject. 

 The Key here is to LEAVE ROOM TO GROW!!!
Photobucket


PS. If you like what you see then follow me.

Friday, February 10, 2012

Valentines day Cards made with Authentique Paper, Book Pages and Helmar Adhesives

Dear readers,
Thank you for stopping by today! I am so happy I get to share with you some unique valentines day cards i created for CHA. Helmar adhesives were used to create these and they were displayed in the Helmar booth. Happy Helmar Day!


The photo above used Authentique papers ... LOVE IT! I used Helmar 450 Quick Dry on the ribbon trim and Zap Dots for the layers on the heart and Happy Together sticker.


I just love the idea of the "One and only Love" implied here! The pink twine is from May Arts. Each hart has a Helmar Zap Dot behind it to bring dimension to the card.


This "Love" card was created with men in mind. Once again Authentique Papers were used with Tim Holtz stamps. Once again These L O V E stickers were raised with Helmar Zap Dots and the book pages were adhered with Helamr Permanent Adhesive Runner


 Authentique paper is stunning with these tangerine poppies and the teal. The Helmar 450 Quick Dry was used for the ribbon and to secure the sticker saying. Helamr Permanent Adhesive Runner was sued for the Poppy paper and some Helmar Acid Free Glue around the fussy cutting of the poppy paper.

Leave a comment below to let me know if you like them or if you have any Valentines cards that you want to share leave a link for me to check them out! Have a wonderful day!
Photobucket

Friday Photos and Fun Challenge - Organize it!

CHALLENGE #5 Week #2 - FRIDAY PHOTOS AND FUN CHALLENGE - Photos & Memorabilia


For the full Photo and Memorabilia Challenge please see this post: http://gracesscrapattic.blogspot.com/2012/02/challenge-2-week-1-friday-photos-and.html

SET A GOAL: Remember how we talked about setting goals for this challenge so it would be done by the end of the month? Well... share with us what your goal is... how is it going and should you re-evaluate it.

FRIDAY FUN CHALLENGE: Only use this as a reward to getting your photo goal for the day done! I have spies everywhere and I will know if you don't! LOL... j/k.

This one is about two things...

Tick-Tock, the time slips by when we are creative, do you have a clock on your wall? No, not the tiny one on the corner of the computer screen or on your phone. A clock that is visible from just about anywhere in your space? This challenge is to get a clock and alter it... or make one. I don't care. If you don't have time to alter it then please just get one for your room. Steal it out of the kitchen if you have to.

You have the choice to alter a clock or any other item this week. The catch is it has to be for your space. It could be something you will use to organize other things in, something for your wall, a sign for your room or just something pretty for your desk. You just have to find something to alter. That is the creativity challenge. But please, make sure you get a clock!
 Photobucket

Wednesday, February 8, 2012

Challenge #4 - Week #1 - Organize your Tools

Challenge #4 - Wednesday - Week #1: Tools (This includes cutting, die and embossing machines, punches, paper trimmers, brushes, scissors, cropadials, tool kits etc.)

TOOLS AT YOUR DESK: What tools do you use 100% on every page? Exacto knife, bone folder, files, paper piercing tools, cropadial (finally totally stoked mine is the orange one and not pink cause it matches my room now...LOL), compass, adhesive eraser, bone folder, etc... These can be stored in a drawer, on a shelf or on your desk the key is to try to keep them in arms reach.

DESK TOP STORAGE SOLUTIONS:


Pegboard:
http://www.scrapbook.com/gallery/?m=image& id=242155...

http://www.scrapbook.com/gallery/?m=image& id=227246...

Tool Caddy:
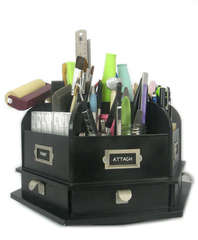
Altered Making Memories Carousel By Jill

Baskets and buckets:

Pen Holder full By Hanging By A Moment
http://www.scrapbook.com/gallery/?m=image& id=207749...

http://www.scrapbook.com/gallery/?m=image& id=199858...

Home made (for those handy with real tools): http://www.scrapbook.com/gallery/?m=image& id=161339...

CUTTING AND EMBOSSING MACHINES:


These need table top space. If you don't store them on the table top you at least need a sheared space you can use when you bring the machine out to use it. The dies and cartridges need to be stored close at hand to the machine. If you have electrical cartridges store them in a dry, temperature controlled, dust free environment. The cricut needs storage for the tools and a place to store the mats flat as well.

Cricut: The biggest thing about this machine is that it needs room to work. Make sure you have a clearance in front and behind for the mat to go in and out.
http://www.scrapbook.com/gallery/?m=image& id=226609...

Cartridges and books:
Space saver: http://www.scrapbook.com/gallery/?m=image& id=258816...

http://www.scrapbook.com/gallery/?m=image& id=258022...

In boxes: http://www.scrapbook.com/gallery/?m=image& id=173015...

Sizzix:
Machine needs a flat surface with enough room to operate it.

Dies:
Cubby and shelf storage: http://www.scrapbook.com/gallery/?m=image& id=228940...

http://www.scrapbook.com/gallery/?m=image& id=153177...

http://www.scrapbook.com/gallery/?m=image& id=163798...

http://www.scrapbook.com/gallery/?m=image& id=101273...

Thincuts container: http://www.scrapbook.com/gallery/?m=image& id=229450...

Cuddlebug: Similar storage to the Sizzix. Please share your ideas.

Spellbinders:
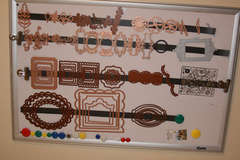
Magnet strips: Spellbinder Die Storage By Mother Goose

CD cases: http://www.scrapbook.com/gallery/image/scrapro om/331037...

CD book case (this one is well organized and portable) - http://www.scrapbook.com/gallery/image/scrapro om/281807...

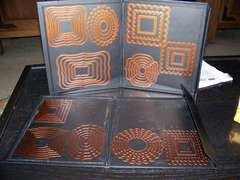
Magnetic Storage book: Quickutz Storage - Nestabilities By CreativeJamie

PUNCHES:

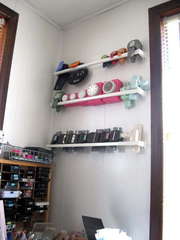
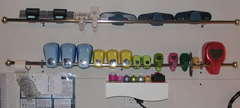
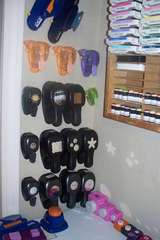
Can be stored just about any where! They are durable though they are bulky.

Towel rack or curtain rods:
punch storage By Scrappin Kitty

Punch storage By Mercytiara

Baskets:
http://www.scrapbook.com/gallery/?m=image& id=199858...

http://www.scrapbook.com/gallery/?m=image& id=391769...

Thumbtacks (Cheap and ingenious): Punches By Rosita

In a drawer:
http://www.scrapbook.com/gallery/?m=image& id=146730...

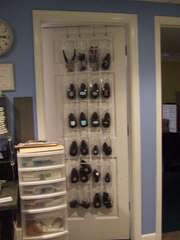
Door hanging shoe rack:
Punch storage By Jopadiet

On a shelf: http://www.scrapbook.com/gallery/?m=image& id=138264...

CropinStyle Punch Pall: http://www.scrapbook.com/gallery/?m=image& id=875359...

PAPER TRIMMERS:

Paper trimmers must have a flat surface to work correctly. They can be stored else where but when operating them they need to be on a hard table top. Some paper trimmers come with decorative blades that can be switched out. These blades and extra strait edge or perforated replacement blades need a storage place out of reach of little ones.

Bind - it - all... the only thing about these for storage is to make sure you have the room to use it where you want to. It would be nice like all machines if you don't use it that often to have a cover for it or a bag to store it in, but not necessary as long as you clean it occasionally with some air in a can.

Lamination Machines - I could not find anything about home lamination Machines. I know the refill material is usually heat sensitive so I would suggest to store that in a cool place. You few that have one might want to check your product guide to see if there are any specifications.

OTHER: Did I miss anything? Lamination machines etc... does anyone have those?

Lets Do this!!! (I have a lot of work to do... new machine and where the cricut goes is a disaster! LOL!)
Photobucket

Monday, February 6, 2012

CHA 2012 Folded book projects with My Minds Eye and Helmar

Hello readers!
Today I am going to briefly share with you two of my projects I created for the Helmar booth at CHA Winter 2012.

The bird house was created with the lost and found line from my minds eye and some wonderful Helmar Acid Free Glue and Helmar 450 Quick Dry.  Folding and tearing book pages seems to be consuming my life lately LOL!

This next piece was also created for Helmar's booth but it was also donated to Charity Wings Organization for the carnival raffle at CHA Winter 2012. The winner of the raffle for this item was from the Neatherlands... I'm an international artist baby! LOL. Just kidding... but I thought that was pretty cool.


Photobucket

Challenge #3 - Week #1 - (Monday) Color Altering Items

Challenge #3 - Week #1 - (Monday) Color Altering Items - Inks, pens, mists and paints.

This is the day we sort out our colors! Any color altering items or ink.

Color Altering Items Challenge #2 By Hanging By A Moment

Lets discuss and figure out what we are going to do with these items.


  • Pens - Storing Scrapbook Pens and Markers (quoted from scrapbook.lifetips .com)
    "One of the most important things to remember when storing pens and markers is to store them horizontally so that the ink flows evenly. Most people may be inclined to buy containers that stand vertically, but storing them this way will make all the ink flow to one end. If the ink is at one end of the pen or marker they may not last as long or work as well. Storage drawers will allow the markers and pens to be stored horizontally. You can leave your markers in their original box and store them in a desk drawer or plastic organizer drawer.

    Another suggestion is to buy a marker storage case that holds pens and markers; these cases are portable and make it easy to keep all of your coloring and writing utensils in the same place for quick access."

    Once you have decided where to store them you will need to TEST every pen quickly to make sure they still work. Trash the ones that don't! Make a list in your binder of ones that need to be replaced.

    Sort pens by: Color or color families

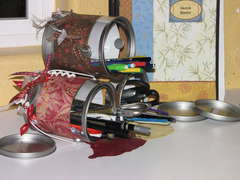
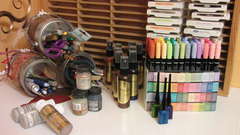
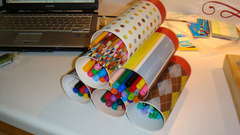
    Storage Solutions: Organized within a drawer, wine bottle holder, Altered Cylinder containers form the kitchen.

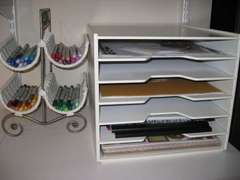
    ZIG Pen Storage and In-Progress Paper Shelves By Reyasunshine

    PVC PIPES - http://www.scrapbook.com/gallery/image/scrapro om/257893...

    Mason Jars - http://www.scrapbook.com/gallery/?m=image& id=222965...

    Crystal Light Containers: My Alteration Project! By Vh678

    Plastic 1$ pen boxes: http://www.scrapbook.com/gallery/?m=image& id=377743...

    Acrylic cups: http://www.scrapbook.com/gallery/?m=image& id=377743...

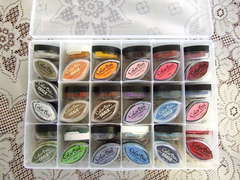
  • Ink pads and refills - (quoted from Scrapjazz)
    "Ink pads are best stored flat. Each pad is filled with liquid ink, and this ink can travel throughout the pad over time if not stored properly. For example, if you stored your ink pads vertically, over time the ink would drop to the bottom edge of the pad, and you would no longer be able to get a fully-inked image when you tried to use the full surface of your ink pad. For this same reason, it is highly recommended that you store your ink pads upside down (unless you have Stampin' Up they already are designed to do this). This will keep the ink flow at the surface of the pad, rather than allowing the ink to seep down to the bottom. This is especially important for dye-based ink pads, as this ink is thinner than some other inks and will migrate through the pad at a faster rate. Ink pads containing thicker inks, such as pigment ink, can be stored face up."

    How to sort your in pads? - By color, manufacture, ink type or size

    Storage solutions:


    Wooden Cassette holder - (top half of photo, its fuller now I will get a new pick when I am done with this challenge) Color Center By Hanging By A Moment

    Cat Eye Storage *response to forum thread* By Kanary

    custom built holder, store bought rotating caddies, or simply stack on a shelf (make several smaller stacks. This will make it easier to access without towers of inks toppling down when you need the bottom color.)

    Ink pads can be cumbersome at your workstation. Most people store them off to the side. Why not have a reference guide at your table so you know exactly what color you will need?

    This is a MUST SEE IMAGE of a great Color Swatch for your Inks.


  • Mists/Paints - These can be stored or displayed nicely on a shelf. Putting them in a color order would make it appealing. If you have the mini misters you can store them on a counter top in the store bought holder or have your resident handy man drill some holes into a block of wood and don't forget to alter it to match your space decor.

    Shadow Box storage: http://www.scrapbook.com/myplace/index.php?mod=gallerie...

    Mini Mister holder: http://www.scrapbook.com/gallery/?m=image& id=253612...

    Drawer Sorage: Though I love the organization of this option I don't like not seeing the colors of the mists. Maybe if you put a dot sticker (used for yard sale pricing, found at Walmart) You can spray it as a sample and stick it to the top of the lid.

    Shelf Unit... simply maid yet holds so much!


  • Other (?) - Did I miss anything? Please bring it to my attention.

REMEMBER:
Always leave room for your stuff to grow!!! Especially you collectors!

Have fun and hey! Maybe you can alter something to store your pens in... Get creative!Photobucket