Friday, March 12, 2010

Challange #4 - Tools and Machines

Challenge #4: Tools (This includes cutting, die and embossing machines, punches, paper trimmers, brushes, scissors, cropadials, tool kits etc.)

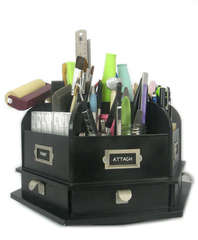
TOOLS AT YOUR DESK: What tools do you use 100% on every page? Exacto knife, bone folder, files, paper piercing tools, cropadial (finally totally stoked mine is the orange one and not pink cause it matches my room now...LOL), compass, adhesive eraser, bone folder, etc... These can be stored in a drawer, on a shelf or on your desk the key is to try to keep them in arms reach.

DESK TOP STORAGE SOLUTIONS:

Pegboard and more Pegboard:

Tool Caddy:


Baskets and buckets

Home made (for those handy with real tools)

CUTTING AND EMBOSSING MACHINES:

These need table top space. If you don't store them on the table top you at least need a sheared space you can use when you bring the machine out to use it. The dies and cartridges need to be stored close at hand to the machine. If you have electrical cartridges store them in a dry, temperature controlled, dust free environment. The cricut needs storage for the tools and a place to store the mats flat as well.

Cricut

Cartridges and books:
Space saver

Stack-able container

In boxes

Sizzix:
Machine needs a flat surface with enough room to operate it.

Dies:
Cubby and shelf storage

CD Tower Storage

Shoe Cubby

Wooden Shelf

Thincuts container

Cuddlebug: Similar storage to the Sizzix. Please share your ideas.

PUNCHES:

Can be stored just about any where! They are durable though they are bulky.

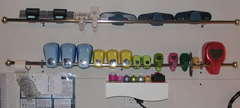
Towel rack or curtain rods:


Baskets
:

Fruit Basket

Thumbtacks (Cheap and ingenious):

In a drawer

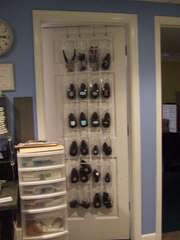
Door hanging shoe rack:


On a shelf

CropinStyle Punch Pall

PAPER TRIMMERS:

Paper trimmers must have a flat surface to work correctly. They can be stored else where but when operating them they need to be on a hard table top. Some paper trimmers come with decorative blades that can be switched out. These blades and extra strait edge or perforated replacement blades need a storage place out of reach of little ones.

OTHER:
Did I miss anything? Lamination machines etc... does anyone have those?

There are many ways to do this so you need to pick what is right for you. Here are my storage solutions for these tools.

MY DESK TOP TOOLS: This is a "gag" paint spill so it is completely movable! All these colors are on my walls.


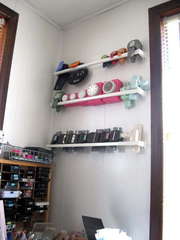
MY CUTTING MACHINE AND SUPPLIES: When organizing always leave room to grow.


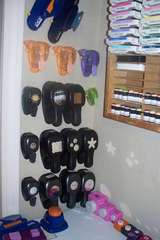
MY PUNCHES: Be careful using large racks. Punches are heavy you need proper support.


MY PAPER TRIMMER: Fits so nicely just under the top of my desk ready and at my fingertips.


I hope you all have a fun weekend working on these and had time to play catch up in my tardiness of posting this challenge.

Wednesday, February 10, 2010

Scraproom Organization Challenge #3

Challenge #3 - In Progress Projects, finished projects and albums

I don't know about you all but I have a lot of in-progress projects. Some are mini albums some are pages (since it usually takes be 2 days to get a layout completed with interruptions). I almost always have a project like invitations or V-day cards for my son's class in the works too. I am NOT a chronological scrapbooker so I am bouncing back and forth between all the different albums I am working on.

So lets get this under control.

Step #1 - Identify what type of in-progress projects you have going on a regular basis.

Step #2 - Are these short term in-progress projects or long term? For example a layout would be a short term project. A baby album or school album would be a long term. You might have both.

Step #3 - Separate the items you have purchased exclusively for that project from your stash.

Step #4
- Get organized - Choose a storage option...

a) Ziploc Gallon baggies - Works for smaller temporary projects like layouts etc. You can keep these baggies in a drawer. Or you can get a pretty file box and alter it if it doesn't match. Most kits come organized like this and can also be stored with this method for an easy project on the go.

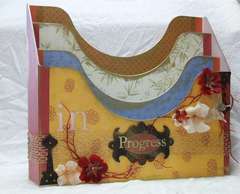
b) Page Planners - Mine are from Creative memories but the ones listed below are cropper hopper brand. These are perfect for keeping the items for you pages together. I use them to pre-plan my page and have them ready to go. They are great for social and solo scrapbookers alike. As I am working on the layouts or pre-planning them. I store these folders in this unit on my desk.


(this in-progress type holder would also work with the Ziploc baggy option)

c) Cropper hoppers plastic container - stack nicely and can hold supplies for almost an entire album. These probably work best for mini albums or larger themed albums. These are ideal for people who like to take projects like this to crops.

d) 12x12 storage boxes - they look like photo boxes but lager. These also are great for mini albums and themed album pages and supplies. Unlike the cropper hopper they are cheaper yet they don't stack. They also can be altered easier. But they are harder to take out to crops.

e) A drawer- lots of the plastic drawer organizers you buy at M's and JA's are large enough to be able to use the drawers like a 12 x 12 storage box or the cropper hopper, without the mobility. These also work great for those solo scrappers. Keeping the projects in a drawer gives you quick and easy access to your project and to put it away. You could organize a baby album keeping all together.

Anyone else have and wonderful ideas on how to organize this? :heart: Please share.

Monday, February 8, 2010

Two of a kind

I made my first layout and card in my new scraproom this weekend. The room is not fully unpacked and far from being organized, but I could not resist and it was for my Design Team I am part of on The Scrappiest Sketch #51.


Here is the coordinating card I created from the scraps of this layout...


I hope you all have a wonderful day and have time to be creative. HAPPY SCRAPPING!

Challenge #2 - Adhesives

Challenge #2 - Adhesives

Things to know:

The key here is to always make sure that what ever adhesive you are using you need to make sure it is Acid Free. (This includes you glitter glue!!) No point in working so hard creating a beautiful album of fabulous pages for your family to have forever just to run those pages over time with the wrong adhesive. Here are 10 different types of adhesives. If you have not herd of some please ask and I would be happy to share. There are probably more out there too so let's enlighten each other on the wonderful world of things that stick.

(excerpts of an article on http://www.xomba.com/10_types_scrapbooking_adhesives )

"*Dimensional- usually a foam center between two pieces of adhesive; gives dimension to your page, be it photos or embellishments.

*Dots (also called tabs) - small pieces of adhesive, usually found in a roll or on cards, that are perfect for attaching small embellishments like buttons, chipboard letters, or acrylic items.

*Liquid - often quick drying with an even consistency, good as a multi-purpose adhesive for scrapbooking.

*Multi-purpose - handles multiple types of media used in scrapbooking (paper, fabric, chipboard, embellishments); a good choice for a beginner.

*Permanent - when you want your photos and embellishments to stick forever, permanent is the way to go. Comes in a variety of formats (including dots, liquids, glue sticks, and sheets), and cannot be moved. Ever.

* Re-positionable - allows you to move pieces of your layout for a short amount of time before they become affixed to the page. This also comes in a variety of forms.

*Runners (also called tape runners) - easy application, allows for control over the amount used. These also work on a variety of media types.

*Sheets - used to create stickers, often used with a machine. When used with a machine, great for die-cuts and paper letters.

*Spray - use for "invisible" hold, for items like vellum or transparencies.

*Stick - easy application, works well with a variety of surfaces and media. A very good choice for a beginning scrapbooker."

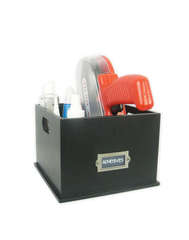
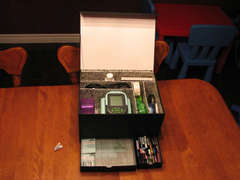
Storage Solutions: Basket or drawer on or in your desk, Hanging them up on the wall in front of you, photo box

Storage Crate:

Adhesive shelf: http://www.scrapbook.com/gallery/?m=image&id=2544059&type=searchwords&s=adhesive+storage&types=1,3,5

Desk organizer:
The key with storing these is to have them within arms reach NO ONE can create any paper crafts without adhesives.

Tips:
Check for any that might need refills soon. Add them to your shopping list.

Clean up all tips and ones that have adhered themselves to something. Make sure they are all in ready to use condition.

For liquid glue - like glitter glue can have bubbles in it when you are trying to apply it to your work. To keep this from happening so much try storing it upside down... JUST MAKE SURE IT IS FULLY CLOSED so it does not leak... YIKES!!

Saturday, February 6, 2010

I SCRAPED MY WALLS!!!

Hello everyone I am here to share with you the only creative thing I have been working on lately. Here is it... are you ready... My NEW Scraproom paint job!!!
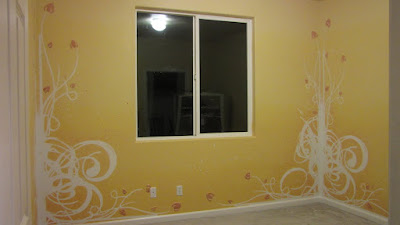
Yup there it is... and this picture does not do it justice. I have to say I am very happy with the way it turned out. I have never chosen orange (my least favorite of the basic colors) ... err... Butternut squash as a color for the walls before and I have to admit the only reason I went with shades of orange is because it is (in color theory) the color that inspires creativity the most out of all the basic colors.

There are six shades of orange in this room from the floor to the center of the ceiling. All blended one into the other. There are hints of red blended over the orange in the corners too. Splatters of red, antique gold and white on the walls. The leaves and flowers are 3D (about 1/4" thick) and covered with a mix of the antique gold and red. The flourishes were created by using four large 8' x 4' masks I created from some clip-art printed poster size and contact paper. Here are the pics to show the steps...
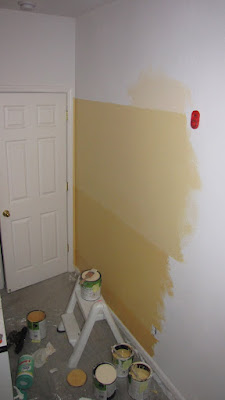
The base coats of six shades of orange... If you try this fading finish please learn from my mistakes and DO NOT leave a crisp clean line to try to fade later... make if a fuzzy line as your brush runs out of paint. (pic on left)

The next pic is of the mask I created. I designed a flourish for the corners of each wall, (two designs per corner of the room one for each side of the corner). This was done by printing sections of the design in poster form off the computer. Then spraying the backing of the contact paper with spray adhesive. Gluing the papers in order onto the contact paper. Then cutting out the flourish design. Sticking it onto the primed wall, lining it up in the corners. It worked best when I only cut a 4x2 image of 4 sheets of 8 1/2" x 11" paper. This pic shows eight sections... turned out to be to much to handle when it was sticky and trying to line it all up on the wall. Trust me ... do it 2x2 not 4x2. When applying the mask make sure you use a brayer or some other tool to help press it onto the wall and get the best seal as possible. (pic above)

After the mask was in place I created the 3D templates. Using foam core board I cut out the leaves and flowers that printed with the images. (pic above)

This other one shows part of the mask on the wall, look closely it is white on white. It also shows the 3D template in action with some color changing drywall Spackle that I used to fill the template. After filling it I let them dry for about 20-30 min and then ran an exacto knife around the edges to loosen the grip the putty had on the template. Then created some more and repeated the process. This 3D image took about 24-30 hrs to dry. Then it needed to be primed and painted to match the base color that was going in that section of wall. There are 14 flowers and 24 leaves in the entire room. (lower left pic) This was worse then watching paint dry. All and all it took me several days to just get this far. But I have to say it was totally worth it! (pic above)
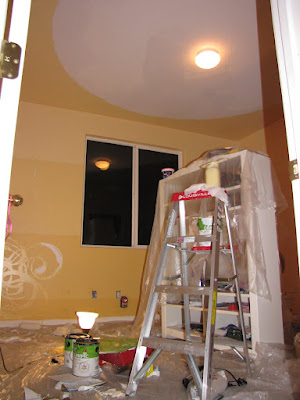
This next pic shows how we divided up the fading on the ceiling. On the walls it was striped and the ceiling we did circles for a more natural look since the light is centered they compliment each other.

To draw the circles on the ceiling we used the light as an anchor and tied a sting around it then measured out where we wanted the circle to be. Tied a pencil on the other end of the string and drew around the room using the ladder to reach. Keeping the pencil at the same point tied to the sting. Like a campus. It worked great for creating guidelines and in the end looks perfect with the lighting.

To fade or blend each shade of orange I took the darker color and added some faux finishing glaze to it, about 3/1 glaze and paint (read the label and test it in a corner first). I painted it over the line, just above the matching color, for about 1' above the line and 3"-4" below it. Then wiped it off a bit around the edges with a cheese cloth (found at your local hardware store). This thinned out the glaze and helped blend the colors. I repeated this 4 more times, each time mixing a new color shade with glaze and then painting and wiping off. When you add a glaze to paint it extends the dry time creating a larger window of "open time" on the wall where you can play with the paint before it will dry. This step too about 24-30 hrs to completely dry with no tacky spots. Possibly having to repeat it due to my strait, crisp and clean lines I painted when switching shades.
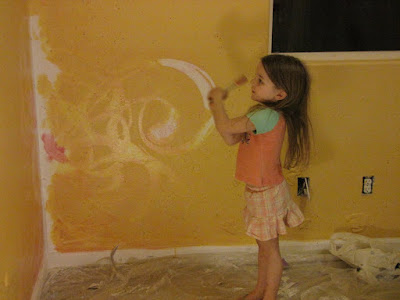
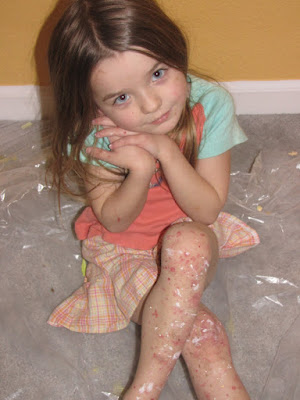
Once I was satisfied with the blending and fading my daughter and I had some fun. We tossed and flinged three different colors of paint onto the walls, red, antique gold and white. Splattering and giggling it was great to allow her to be a part of the most complex design I have ever painted.

After it was all said and done she looked tore up! She had more paint on her then she got on the walls! The antique gold looked like a muddy brown mess and then the red looked like chicken pox and the white looked like calamine lotion for the chicken pox. It was so cute I had to grab a pic of her... she chose to pose this way... LOL. (pic below)
I know this post is long but I promise you it is almost done.

After flinging the paint onto the wall we began to peel off the contact paper mask. It reveled beautiful white flourishes in primer... so I had to paint it with a white. Tedious? Yes but necessary. Like almost every textured surface when tape is used there is never a clean edge.
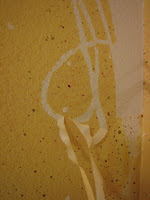
The orange had been sucked under in several spots and parts needed repair where the delicacy of the mask did not allow it to stick while being painted and glazed over. (small pic on the right)

I then added the red and gold glaze mixture to the flowers and leaves. After this step I looked back from the door and decided it was done. So time to clean up and get a fresh white coat of paint on the thoroughly covered, multi colored base boards. It was now time to move in the furniture and begin to unpack my nine boxes of scrapy stuff!
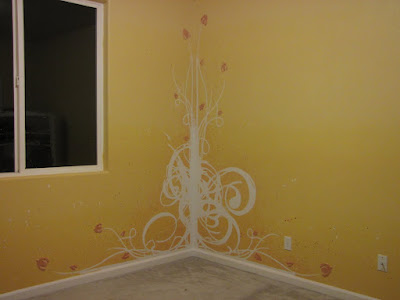
I hope you enjoyed this post and I will be posting more once the room is unpacked, decorated and ready for some scrappy business. Have a blessed day!
Photobucket