Monday, March 22, 2010

This week's Scrappiest Sketch and LO

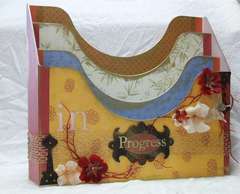
There is some scrappin' going on over at thescrappiest.blogspot.com Check out this cut little layout I did with this week's sketch #57, by Mrs. Liz! Thanks Liz for the inspiration!


Tuesday, March 16, 2010

Challenge #5 Pattern Papers and Card Stock

Every single one of us has it... but is it working for you the way you have it organized?

THE KEY TO GOOD PATTERNED PAPER ORGANIZATION IS TO: have it organized to match your train of thought.


HORIZONTAL OR VERTICAL?
(click here for full article)

"Scrapbook Paper Storage Idea #1: Horizontal Paper http://www.scrapbook.com/gallery/?m=image&id=2579363&type=searchwords&s=paper+storage&types=1,3,5

Most scrapbook stores will store their paper horizontally because they have the room for rows and rows of shelves and racks. Now, most of us don't have room for all those shelves, but horizontal storage is still a possibility with 12" x 12" plastic snap top cases. You can buy them individually or as part of a three-drawer or six-drawer cart, so you can make the most use out of your vertical space. "

Racks

Wire cubes


Cubes

"Scrapbook Paper Storage Idea #2: Vertical Paper
http://www.scrapbook.com/gallery/?m=image&id=2580403&type=searchwords&s=paper+storage&types=1,3,5

Depending on your preferences, you can use traditional magazine storage files for 8.5" x 11" paper (or on your scrapbook table to store scrap paper), but you will have to get special storage files for 12" x 12" scrapbook paper. Vertical paper storage is best for cardstock or other papers that you will be accessing frequently because you can just slide the storage file out and pick the paper you need.

These paper holders also come with dividers, so you can store multiple colors within a singe file! Just one thing to keep in mind is that you will need very tall shelves if you plan on using these vertical storage files in a bookshelf."

Baskets

Cubes vertical


Files


HOW TO ORGANIZE IT - Now that you have thought about WHAT to store them in lets talk about HOW...

Cardstock - seem simple enough, by color right or brand? But what about those patterned papers? Do you Separate your cardstock from your patterned paper? Or would it work better for you if you had all the pink patterned paper then pink cardstock together?

Patterned Papers -

1) By color - Are you the type that reaches for the color first when you need something in your scraproom? Within each color do you organize it from lighter to darker colors?

Cropper hoppers by color:


http://www.scrapbook.com/gallery/?m=image&id=1300547&type=searchwords&s=paper+storage&start=600&types=1,3,5

http://www.scrapbook.com/gallery/?m=image&id=2104481&type=searchwords&s=paper+storage&start=240&types=1,3,5

2) By Brand & MFG - do you have a great memory for brands. Do you think to your self when you are scrapping..."that rust and white flourish paper from the Everafter line that Cosmo Cricket put out would be perfect!" If so they by Brand and collection would be the way for you to organize.

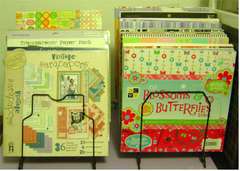
Great way to organize by collection and brand if you like to keep them in their stacks...


3) By Theme and Pattern - Are you a graphic scrapper? One who knows they need a stripe or a polka-dot paper to balance out the floral you just picked as the background paper. Or do you scrap by theme a lot. Maybe you create a lot of mini albums or you prefer ballet shoe paper for your little princesses recital page.

There ya go... these are the best ways to organize it... now you can do it in sub categories... say you want to organize it by Brand but within each brand you want it by theme or color. Maybe it is by color first and within that color it is by pattern and theme. That works too but one of these three will be the Main way you will organize with a possible sub category.

Consider size - do you sort the scraps (if you separate these from your full sheets we will go over how to store them latter this week) into your full sheets or maybe you buy 6x6 paper. Do you sort it into your 12x12? That is up to you. Just keep in mind that when you are working on a 12x12 page you can't always use the 6x6.

THINGS YOU SHOULD KNOW...

1) never store in direct sunlight preferably a cool, dry place

2)Store it completely separate from other supplies. If you mix them you are undoubtedly asking for creasing or tearing.

3)When looking for storage make sure that you choose a container that fits a 12x12 piece of paper or a 8x8, if that is your size preference. Keeping the paper fitting snugly will keep it from getting bent or damaged.

4)If you keep it organized it will lead to an easier scrapbooking experience. So make sure you keep it organized.[/list]

You can store them on shelves without organizational units. Keep in mind though that they will slip easily and have a chance of making a mess. Storing horizontally with out organizers creates the same problem. When you need one near the bottom all the others will begin to fall and it becomes one large balancing act.

**** Don't have the cash to fork out for these organizers? Try these almost free solutions -

Horizontal


Vertical


Step by step instructions: http://www.wescrap.com/scrapbooking-resources/tutorials/altered-art/168-creating-decorated-verticle-paper-storage-boxes

JUST TO DROOL OVER....


MY STORAGE SOLUTIONS:


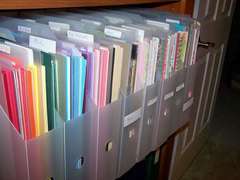
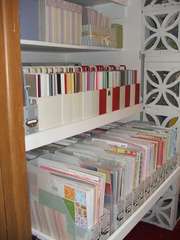
I chose to sort by color. Each color has it's own vertical cropper hopper. The Patterned Paper is first then the Cardstock with a cropper hopper divider in-between. I am loving this system... if I am creating a blue page I can snag my Patterned paper and Cardstock all at one time. Streamlining the way my brain thinks and coordinating it with the organizational choices in my room. Perfect!


Challenge #1 Week #2 - Patterned Paper/ Cardstock

Sunday, March 14, 2010

How to re-create the paint spill pen holder...

I have been getting a lot of questions about my spilled paint pen holder. It takes several days so you will need to be patient but the end result is so cool I am very happy with the project. The thing I love most (besides the kick I get out of people thinking I really spilled paint on my desk) is how it is totally movable and I can put it anywhere!

You will need...

1) Press'n Seal or Cling wrap

2) Masking tape

3) Three pint size paint cans

4) A Hot Glue gun

5) Three colors of latex paint

6) Lots of small scraps of ribbon that coordinate

7) Decorative papers to create labels

8) A circle punch (I needed a 1/2") to cut the paper label to fit around the base of the handle where it connects to the can.


Directions:


1) Chose a flat clean surface (I used our spare bathroom counter top).

2) Line the counter top with press'n seal or cling wrap (I used press'n seal because it stays in one place by itself, if you use cling wrap you might want to tape the edges to the counter to keep it smooth and flat) make sure it is flat with no bubbles or creases.

3) Glue the two bottom can's together in the front and the back,(if you are going to stack them. I used hot glue.

4) Place them in the center back of the covered counter top.

5) Paint the inside of the can so it looks like a solid color with no spots you can see through. Only paint the bottom 1/3 or so as it lays on the counter. (See Photo below)

6) Dribble and pour a little of the paint colors at a time. Make sure you do them all at this point so they can touch... mix and dry together. Also make sure it is thick. This takes days to dry so make sure it is not disturbed.


7) After you can no longer see any soft or wet spots test a side of the paint and peel it back off of the press'n seal. There still might be areas where the paint is still wet under the middle of the puddle or under the cans. Wait another day or turn the cans upside down and let it dry thoroughly.

8 ) Once dry you can decorate all the cans and glue the top can to the other two. (don't do this before because when you have to turn the cans upside down to dry the bottoms you will have problems with the third one on top.

If you have any questions please feel free to ask. Thanks for reading and visiting my blog. Have a wonderful day.

Friday, March 12, 2010

Challange #4 - Tools and Machines

Challenge #4: Tools (This includes cutting, die and embossing machines, punches, paper trimmers, brushes, scissors, cropadials, tool kits etc.)

TOOLS AT YOUR DESK: What tools do you use 100% on every page? Exacto knife, bone folder, files, paper piercing tools, cropadial (finally totally stoked mine is the orange one and not pink cause it matches my room now...LOL), compass, adhesive eraser, bone folder, etc... These can be stored in a drawer, on a shelf or on your desk the key is to try to keep them in arms reach.

DESK TOP STORAGE SOLUTIONS:

Pegboard and more Pegboard:

Tool Caddy:


Baskets and buckets

Home made (for those handy with real tools)

CUTTING AND EMBOSSING MACHINES:

These need table top space. If you don't store them on the table top you at least need a sheared space you can use when you bring the machine out to use it. The dies and cartridges need to be stored close at hand to the machine. If you have electrical cartridges store them in a dry, temperature controlled, dust free environment. The cricut needs storage for the tools and a place to store the mats flat as well.

Cricut

Cartridges and books:
Space saver

Stack-able container

In boxes

Sizzix:
Machine needs a flat surface with enough room to operate it.

Dies:
Cubby and shelf storage

CD Tower Storage

Shoe Cubby

Wooden Shelf

Thincuts container

Cuddlebug: Similar storage to the Sizzix. Please share your ideas.

PUNCHES:

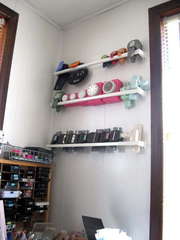
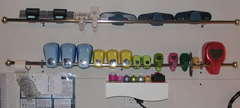
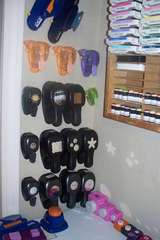
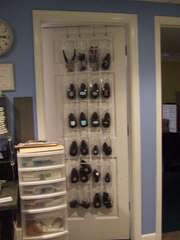
Can be stored just about any where! They are durable though they are bulky.

Towel rack or curtain rods:


Baskets
:

Fruit Basket

Thumbtacks (Cheap and ingenious):

In a drawer

Door hanging shoe rack:


On a shelf

CropinStyle Punch Pall

PAPER TRIMMERS:

Paper trimmers must have a flat surface to work correctly. They can be stored else where but when operating them they need to be on a hard table top. Some paper trimmers come with decorative blades that can be switched out. These blades and extra strait edge or perforated replacement blades need a storage place out of reach of little ones.

OTHER:
Did I miss anything? Lamination machines etc... does anyone have those?

There are many ways to do this so you need to pick what is right for you. Here are my storage solutions for these tools.

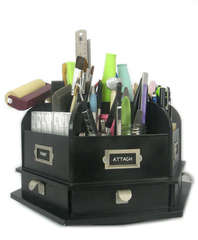
MY DESK TOP TOOLS: This is a "gag" paint spill so it is completely movable! All these colors are on my walls.


MY CUTTING MACHINE AND SUPPLIES: When organizing always leave room to grow.


MY PUNCHES: Be careful using large racks. Punches are heavy you need proper support.


MY PAPER TRIMMER: Fits so nicely just under the top of my desk ready and at my fingertips.


I hope you all have a fun weekend working on these and had time to play catch up in my tardiness of posting this challenge.

Wednesday, February 10, 2010

Scraproom Organization Challenge #3

Challenge #3 - In Progress Projects, finished projects and albums

I don't know about you all but I have a lot of in-progress projects. Some are mini albums some are pages (since it usually takes be 2 days to get a layout completed with interruptions). I almost always have a project like invitations or V-day cards for my son's class in the works too. I am NOT a chronological scrapbooker so I am bouncing back and forth between all the different albums I am working on.

So lets get this under control.

Step #1 - Identify what type of in-progress projects you have going on a regular basis.

Step #2 - Are these short term in-progress projects or long term? For example a layout would be a short term project. A baby album or school album would be a long term. You might have both.

Step #3 - Separate the items you have purchased exclusively for that project from your stash.

Step #4
- Get organized - Choose a storage option...

a) Ziploc Gallon baggies - Works for smaller temporary projects like layouts etc. You can keep these baggies in a drawer. Or you can get a pretty file box and alter it if it doesn't match. Most kits come organized like this and can also be stored with this method for an easy project on the go.

b) Page Planners - Mine are from Creative memories but the ones listed below are cropper hopper brand. These are perfect for keeping the items for you pages together. I use them to pre-plan my page and have them ready to go. They are great for social and solo scrapbookers alike. As I am working on the layouts or pre-planning them. I store these folders in this unit on my desk.


(this in-progress type holder would also work with the Ziploc baggy option)

c) Cropper hoppers plastic container - stack nicely and can hold supplies for almost an entire album. These probably work best for mini albums or larger themed albums. These are ideal for people who like to take projects like this to crops.

d) 12x12 storage boxes - they look like photo boxes but lager. These also are great for mini albums and themed album pages and supplies. Unlike the cropper hopper they are cheaper yet they don't stack. They also can be altered easier. But they are harder to take out to crops.

e) A drawer- lots of the plastic drawer organizers you buy at M's and JA's are large enough to be able to use the drawers like a 12 x 12 storage box or the cropper hopper, without the mobility. These also work great for those solo scrappers. Keeping the projects in a drawer gives you quick and easy access to your project and to put it away. You could organize a baby album keeping all together.

Anyone else have and wonderful ideas on how to organize this? :heart: Please share.