Showing posts with label acrylic. Show all posts

Wednesday, May 21, 2014

"Troisième Presenting" a Canvas Diptych - Peacock & Ballet Inspired

Good morning everyone!  Today I am very excited to show you a painting project.

My daughter is my biggest fan to say the least. She makes me smile, giggle, feel loved and I adore her like any mother would. I have been wanting to do an art piece for quite some time for her room that she could keep forever. We are military so painting her walls is something she can't keep with her.

"Troisième Presenting"

An Acrylic Painting with Pastels on Canvas

Troisième Presenting 2' x 4' (Click on image to see larger)
This painting was inspired by my daughter, her face, her body, her eyes and her passions. She loves to dance and for almost two years now she has loved peacocks and everything that has to do with peacocks. It started with a Peacock Princess Costume for Halloween in 2012. Then her love for the bird and colors moved into making Peacock Ornaments for her little Christmas tree she gets to keep in her room. I started to see a trend in her clothing choices from pink to peacock colors as well. In 2014 her birthday party was an international theme with the focus on India and the colors of a peacock. Now we have moved to a new home, in a new state and one thing we did for the kids was let them redecorate their rooms to help them get excited about our family's transition. Can you guess what she chose? She calls it...

 "Vintage Peacock" 

Troisième Presenting Diptych Piece #1
Troisième Presenting Diptych Piece #2

This painting was created to go in her room, solely inspired by her. It is called "Troisième Presenting" because her arms are in the third position for ballet (bringing in her love for dance) and the representation of a peacock plumage in all it's glory with the hair, peacock feather stencils from The Crafters Workshop, the colors chosen and the peacock feather in her hair.

Close Up of "Troisième Presenting"
My daughter had input through almost every step of the process this piece went though. She even made the suggestion to lightly color in the eyes to match hers, a beautiful light blue.
"Troisième Presenting" close up of half of face
The peacock thing has gotten out of control here, but out of control is how we have fun in our family. I too went as a peacock for Halloween the following year using her tail we extended with longer feathers. I have made a Peacock Tutu Halloween Costume with coordinating hair piece. I have made an adult sized peacock tail for a local art gallery owner. Her peacock costume inspired an entire altered dress, pair of wings and a peacock crown that was created for +Elena Lai Etcheverry at +Charity Wings for the Live Stream from CHAW (The Winter Craft and Hobby Association Trade Show). The Peacock Couture Outfit was again used during the CHA Gift Lounge at the 64th Emmy Awards. It is currently entered into a craft awards called "The Craftys". You can go vote for it there though the 26th of May.

http://thecraftys.com/peacock-couture-wings-tail-crown-altered-dress/

I created this piece while taking two online Bloom Girl classes from Jamie Dougherty. They were her Bloom Girl Workshop 2 class and her Bloom Girl Elements class. I highly recommend +Jamie Dougherty 's classes. She gives thorough instructions and support. She teaches how to use acrylic paints, PanPastels, India Ink and other products properly within her project.


http://www.jamiedoughertydesigns.com/#!bloom-girl-elements/c22xvhttp://www.jamiedoughertydesigns.com/#!blank/c1isx

Thank you all for your time. If you desire to learn how to make such a project then please check out these classes. I would love to know your thoughts about this project as well, please be so kind to leave me a comment below and follow me here on my blog or on Facebook on my artist page L. Grace Lauer Artist.
Photobucket
Mixed Media Artist and Paper Crafter
Coordinator for Party Time Tuesdays Challenge Blog

Saturday, March 30, 2013

Bloom Girl Workshop Project #4

Meet Amania (means faith)

I picture her looking up to heaven seeking answers to help guide her though the rough time she is having. With a sudden peace sweeping over her.


Bloom Girl Workshop Sketch #4.  I just love looking at the beginning sketches and the final projects. If you want to learn how to create these beauties please check out Jamie Lynn Dougherty's workshops. (You can see the first bloom girl I created by clicking here)

Of course the mixed media flowers and embellishments would not be secure without the use of my Handy Dandy Helmar 450 Quick Dry! It's the only thing I trust to use on something like this.


Please leave me a comment below with your thoughts. Have a wonderful day!

Photobucket
Certified Helmar Educator

Sunday, March 4, 2012

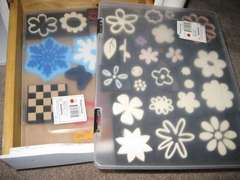
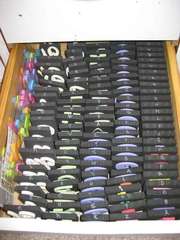
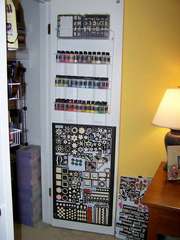
How to organize your stamps and care for them too

Hello Organizers,

Ok so I know I said there were only two left but as I was reviewing last years I saw a challenge we threw in at the end that was not listed and posted in the front... It was for "in progress projects" I will post it on Monday. Here is this weekend's challenge:

Challenge #16 - Week #4 - STAMPS, Rubber, Foam and Acrylic

I can here everyone groaning as I type lol. There are several ways to store your stamps. First though lets look into the three main types of stamps out there.

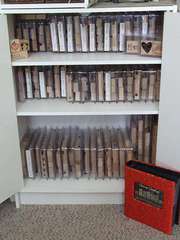
Rubber - These stamps come in four ways, mounted on wood, mounted on a plastic roller wheels, unmounted with cleaning backs, and unmounted with no foam or sticky backs. With rubber stamps you will be looking for storage with wood or unmounted. The wood mounted stamps can be removed off of the wood blocks and stored with your unmounted stamps if you prefer even the ones mounted on wheels.

Acrylic - Come unmounted in a plastic packaging.

Foam - Usually come mounted on foam blocks or the shape is large and thick with no block. Either way I have not heard of unmounting these to use like the acrylic or rubber stamps. These are generally much thicker and take up more space.

Here is an article from Blade Rubber Stamps with some key tips on how to care and store them...


    "How to Store and care for Your Rubber Stamps

    TYPES OF STAMP
    Stamps are available in two formats: mounted to a wooden block, or unmounted in sheets. These sheets can be cut up and either mounted to re-positionable foam, or else painted on the back with a re-positionable adhesive, eg: Stamporium Ultimate Adhesive, then used with an acrylic block. Stamps are available in two types: traditional rubber (pink, red or grey) or polymer (which is translucent).

    LOOKING AFTER YOUR STAMPS

    The two main points:

    Never wash a mounted stamp under the tap - the rubber can come off the cushion. However, if the rubber does come off, don't panic - stick the image back on using rubber solution glue.

    Never leave a rubber stamp out in the sun - this makes the rubber brittle and it can perish over time.

    CLEANING STAMPS

    Stamp-cleaning mats are excellent - just wet under the tap and re-use over and over. Dry off on kitchen towel.

    Alchol-free baby wipes are excellent for cleaning stamps, hands, and also to remove most inks from the handle of the stamp (the block). Finish by blotting with kitchen towel.

    Filthy, ink-clogged stamps can be cleaned with an old toothbrush - either dampened with plain water or with a designated stamp cleaner. Rinse off by wiping with damp kitchen roll, a damp flannel or old towel, then dry with kitchen roll.

    Absolutely disgustingly gunged stamps? Use Staz-On cleaner - this will remove virtually any ink build-up. Finish by wiping with damp kitchen roll etc, as above.

    Polymer stamps can become a little sticky after cleaning: simply dust with baby powder.

    STORAGE OF MOUNTED STAMPS

    Store stamps flat, rubber side down, or else standing on edge (as in a stamp shop) facing away from the sun.

    DON'T throw them into a pile in a box where the rubber or polymer is distorted by the blocks of other rubber stamps pressing down on them. This will create a permanent dent in the surface. Also, don't store in wire baskets (for the same reason). Once damaged in this way, you will find the damage is permanent.

    You can layer stamps on top of each other but not too many or, again, you may distort the rubber. Keep the big (heavy) ones at the bottom and make sure the rubber is supported. Personally, I think two layers is enough.

    A good stop-gap for storing stamps are pizza boxes (clean, unused ones) but again, not more than 2 or 3 on top of each other, or there will be too much weight on the bottom layer.

    Huge block stamps can be difficult to store: investigate the option of deep drawers or cardboard boxes which can then be stored on a shelf. Block stamps are expensive and need to be kept out of the sun - on all surfaces! An easy, cheap option whilst you are searching for the perfect storage solution is use an old box - one that held detergent tablets. These have a small flap, which can be tucked inside or fastened with self-adhesive Velcro tabs. They are the right dimensions and made of very strong cardboard, so are stackable. If you don't like the appearance of the box, paint it or collage scrapbook papers over the top.

    Clear nail varnish painted on the wood around the stamp helps to keep it clean, if ink stains really worry you.

    If you get do ink on the block of the stamp, just get over it! A stamp is a tool, and made to be used - don't get too worried about it, or you will be too afraid to use it.

    STORAGE OF UNMOUNTED STAMPS

    Unmounted stamps are popular as they take up much less space. Store the acrylic handles in a drawer and use over and over.

    WITHOUT ADHESIVE

    If you prefer to use your UMs without adhesive (using glue stick on the back, and washing off when you clean your stamps) storage is very easy.

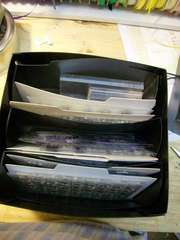
    Stamp the image onto the front of an envelope, and tuck the stamp inside. Store upright in a card file box, by category.

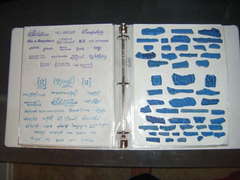
    Too big? Use giant envelopes, and store flap-side upwards in a ring binder.

    WITH ADHESIVE OR EZ MOUNT

    The back of the stamp will be sticky, or clingy (to adhere to the acrylic blocks used as handles).

    Stick onto the front of transparency sheets, with the index (image) sheet behind, so that you can identify your stamps, and store in a ring binder.

    OR: Use a photo album (the sort where you peel away the protective sheet). Place the index sheet on the cardboard under the protective sheet, smooth back down, then stick the stamps on the front, over the index sheet so that you can see which stamp is which. Simple!

    Don't put too many stamps in each binder, or they will be too heavy to stand up. Again, the aim is to keep the stamps clean and out of the sun."


"Keep Away From Cardboard

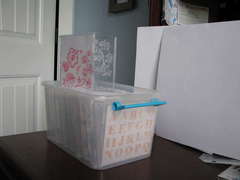
    Avoid storing them in contact with cardboard, it will cause the rubber to dry out more rapidly and reduce the life of your stamps. Plastic baskets, plastic shoe boxes, and plastic silverware organizers are good for using in drawers to protect your stamps. You can also use a tackle box, the depth of the drawers is ideal for most stamps, and you can remove dividers by scoring them with a blade to make more wide open drawers."

By QueenBeeCrafts


Storage solutions:


Mounted:


Here is a way to store your mounted stamps in crates. http://www.scrapbook.com/gallery/?m=image& id=252371...

Single stamp storage for wood: http://www.scrapbook.com/gallery/?m=image& id=243874...

stamp storage By J3Mel

Mini stamp storage in Cropper hopper drawers... http://www.scrapbook.com/gallery/?m=image& id=250120...

Wall shelf unit: http://www.scrapbook.com/gallery/?m=image& id=232774...

Jars??? - Yup - http://www.scrapbook.com/gallery/?m=image& id=209188...

Baskets: http://www.scrapbook.com/gallery/?m=image& id=204051...

http://www.scrapbook.com/gallery/?m=image& id=203724...

Cabinet Alphabetical by size of container:
Stamp Catalog and shelf unit By Hanging By A Moment


Unmounted: Here is a video that explains several types of storage for unmounted stamps. She explains how to store them in Baggies, laminated sheets in binders and in CD jewel cases. How to make your own laminated sheets to store in the binders without a laminator or purchasing them at a store. http://www.youtube.com/watch?v=zjflQYXwS10

Unmounted Stamps Storage (EZ Cling) By Yadee87 She has explained nicely how to do this with Avery page protectors.

This blog shows a method of storing unmounted stamps in a large photo box by categories and on cardstock cards she created with contact paper. http://mynextthirtyyears.com/sharing-my-newly-orga nized...

inside cm clear stamp storage By Mrs. Tristan

If you don't want to remove them from MFG packaging here is an option with a binder... http://www.scrapbook.com/gallery/?m=image& id=255637...

CD Cases: http://www.scrapbook.com/gallery/?m=image& id=237130...

http://www.scrapbook.com/gallery/?m=image& id=232774...

http://www.scrapbook.com/gallery/?m=image& id=225914...

CD in a basket: http://www.scrapbook.com/gallery/?m=image& id=223229...

My Stamp Storage 1 By Becki Jo

Zutter Bind it All kit: http://www.scrapbook.com/gallery/?m=image& id=235108...

Foam:

Cases: Foam Stamp Storage - 2009 By Reyasunshine

Drawers:

Foam Alpha Stamp Storage - 2009 By Reyasunshine

http://www.scrapbook.com/gallery/?m=image& id=184743...

PEG BOARD: http://www.scrapbook.com/gallery/?m=image& id=168138...

Plastic drawers: http://www.scrapbook.com/gallery/?m=image& id=107159...

Plastic drawers in baskets: http://www.scrapbook.com/gallery/?m=image& id=801551...

Magnets:
Scraproom Re-org - Photo 9 By Deend31

Clip it up in Baggies: http://www.scrapbook.com/gallery/?m=image& id=122714...

Indexes or Catalogs:


Indexes: The video talked about creating an index for your stamps. This is a great idea and making one for each CD case or your binders will be time consuming but worth it. Have fun with this and color them too. I will be doing this for my unmounted collection that has grown so much recently. Then I will be doing what I did with the catalog. Since it is hard to see the acrylic image sometimes I have to stamp them first for an index.

Catalog: I created a catalog for mine wood stamps. It took less time and was cleaner too then stamping every image however it was more pricey, adding the cost of printing the photos and the standard 4x6 photo album it is stored in. Though I love this solution for my mounted stamps because the stamps are organized by alphabetical and yet in the catalog I have them sorted by type, alpha, floral/nature, holiday, sentiments... etc. I took the photos of the sets and photo edited in the name and a boarder. At the time I did not have a photo editing program so I added the name in MS Paint. Uploaded it to wal-mart's photo printing site and added a boarder from their selection.

Here is a photo of my system.

Stamp Catalog and shelf unit By Hanging By A Moment

Photo of Stamp set for Catalog By Hanging By A MomentPhotobucket
 Pin It

Friday, June 3, 2011

Crafty Couponing... an entirely different type of Extreme

I am so excited to share this project with you today. After crafting all boy stuff in May for my son's birthday party I finally can get back to my own style and create what makes me really happy! I have two major hobbies crafting and couponing! Yup, I just love to save me some money on groceries so I can spend it on crafty goodies! I have to say when I saw the Lawn Fawn stamp set Sew Lovely I knew I had to use it to make my "Craft Fund" binder... er... coupon binder. LOL.

I think I will be the most stylish couponer out there. Let me show you a bit about this binder that I just love!
This Lawn Fawn stamp cluster is sew cute! The dress is created with a simple paper piecing technique and the button was simply stamped over the circle that was there from the patterned paper. I then colored over it with an opaque gold pen to hide the other lines from the paper. Did I mention I loved this Lawn Fawn set?
This is all just stamped on the patterned paper I chose for the cover. It was stamped using a mask over the paper pattern (the old world flourish). This will allow for the stamps to look like they were behind the pre-printed patterned paper images. Several masks were also used to make all of the spools and the sewing machine look like they are on top and in front of each other. Then I simply just colored it in with coordinating color markers. This truly is sew lovely! Now let's look inside!
Here it is... This binder started as a used binder. It had two pockets on each side. Each change of paper is so the pockets are still useable. The stamps in there are the same as the stamps on the outside but some different techniques. To recover the binder I used Helmar's 450 Quick Dry Adhesive... it works great gluing to plastics and paper. Tip: work in small areas... it dries really fast!

Check out this boarder! I love Lawn Fawn's acrylic stamps for this reason! I was able to make a nice rectangular boarder in a snap! The paper piecing is a little different here using an extra layer of paper. I have used the Helmar Acrylic Sealer to seal over all the paper piecing layers. This will help seal them in so that they don't start pealing off with all the wear and tare that this binder is expecting to get. I also used it all over the cover too to help protect it. I love that stuff!

After putting so much work into this binder I was really worried about it falling apart like most plastic binders do. So I reinforced the binding on the inside with some canvas ribbon. I stamped it with more of Lawn Fawn Stamps from the Sew Lovely set to decorate the binding. Also I used Helmar 's Acid Free Glue to adhere the ribbon to the binder this will help strengthen the binding with a flexible bond.

Here you can see the ribbon well. I adhered it to the front and inside using the Helmar's Quick-fix Adhesive Runner with its permanent bond it was just perfect! Nice smooth edges and oh my, it was so easy and quick to use! Love it!!

Would you like to see what the binder looked like before I altered it? YIKES!!!

Here it is again after! It makes me happy!

Like I mentioned before my other passion is saving money. Do you want to know how much I spent making this binder. Here is my supply list and how much I spent...

Helmar Products: FREE (Thanks Helmar once again! I am honored to be a part of your DT)

Lawn Fawn Stamps: FREE (Thanks Lawn Fawn for your generosity as a Helmar Preferred Partner!)

Stampin Up Paper Pack: FREE (a demonstrator friend gave it to me for a thank you for helping her out)

Brocade Template: FREE (Thanks to the Crafters Workshop, also a Helmar Preferred Partner)

Binder: Used - FREE

Cricut Cartridge: $14.60 (almost 300 images = $0.05 each) I used six letters totaling = $0.30

Pens/Markers: Gold pen $.99 (on clearance), Red SW marker $1.67 (discounted)

Ribbon: Canvas - 2" = $0.25, Black Satin - 7" = $1.51

Total Cost: $4.72 not bad...

Having the most stylish coupon binder in my coupon swap group... PRICELESS! Thanks for reading about my new favorite project and I hope you have a happy, scrappy day!

Photobucket