Challenge #16 - Week #4 - STAMPS, Rubber, Foam and Acrylic
I can here everyone groaning as I type lol. There are several ways to store your stamps. First though lets look into the three main types of stamps out there.
Rubber - These stamps come in four ways, mounted on wood, mounted on a plastic roller wheels, unmounted with cleaning backs, and unmounted with no foam or sticky backs. With rubber stamps you will be looking for storage with wood or unmounted. The wood mounted stamps can be removed off of the wood blocks and stored with your unmounted stamps if you prefer even the ones mounted on wheels.
Acrylic - Come unmounted in a plastic packaging.
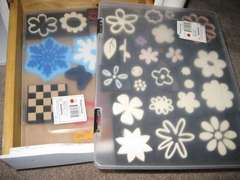
Foam - Usually come mounted on foam blocks or the shape is large and thick with no block. Either way I have not heard of unmounting these to use like the acrylic or rubber stamps. These are generally much thicker and take up more space.
Here is an article from Blade Rubber Stamps with some key tips on how to care and store them...
"How to Store and care for Your Rubber Stamps
TYPES OF STAMP
Stamps are available in two formats: mounted to a wooden block, or unmounted in sheets. These sheets can be cut up and either mounted to repositionable foam, or else painted on the back with a repositionable adhesive, eg: Stamporium Ultimate Adhesive, then used with an acrylic block. Stamps are available in two types: traditional rubber (pink, red or grey) or polymer (which is translucent).
LOOKING AFTER YOUR STAMPS
The two main points:
Never wash a mounted stamp under the tap - the rubber can come off the cushion. However, if the rubber does come off, don't panic - stick the image back on using rubber solution glue.
Never leave a rubber stamp out in the sun - this makes the rubber brittle and it can perish over time.
CLEANING STAMPS
Stamp-cleaning mats are excellent - just wet under the tap and re-use over and over. Dry off on kitchen towel.
Alchol-free baby wipes are excellent for cleaning stamps, hands, and also to remove most inks from the handle of the stamp (the block). Finish by blotting with kitchen towel.
Filthy, ink-clogged stamps can be cleaned with an old toothbrush - either dampened with plain water or with a designated stamp cleaner. Rinse off by wiping with damp kitchen roll, a damp flannel or old towel, then dry with kitchen roll.
Absolutely disgustingly gunged stamps? Use Staz-On cleaner - this will remove virtually any ink build-up. Finish by wiping with damp kitchen roll etc, as above.
Polymer stamps can become a little sticky after cleaning: simply dust with baby powder.
STORAGE OF MOUNTED STAMPS
Store stamps flat, rubber side down, or else standing on edge (as in a stamp shop) facing away from the sun.
DON'T throw them into a pile in a box where the rubber or polymer is distorted by the blocks of other rubber stamps pressing down on them. This will create a permanent dent in the surface. Also, don't store in wire baskets (for the same reason). Once damaged in this way, you will find the damage is permanent.
You can layer stamps on top of each other but not too many or, again, you may distort the rubber. Keep the big (heavy) ones at the bottom and make sure the rubber is supported. Personally, I think two layers is enough.
A good stop-gap for storing stamps are pizza boxes (clean, unused ones) but again, not more than 2 or 3 on top of each other, or there will be too much weight on the bottom layer.
Huge block stamps can be difficult to store: investigate the option of deep drawers or cardboard boxes which can then be stored on a shelf. Block stamps are expensive and need to be kept out of the sun - on all surfaces! An easy, cheap option whilst you are searching for the perfect storage solution is use an old box - one that held detergent tablets. These have a small flap, which can be tucked inside or fastened with self-adhesive Velcro tabs. They are the right dimensions and made of very strong cardboard, so are stackable. If you don't like the appearance of the box, paint it or collage scrapbook papers over the top.
Clear nail varnish painted on the wood around the stamp helps to keep it clean, if ink stains really worry you.
If you get do ink on the block of the stamp, just get over it! A stamp is a tool, and made to be used - don't get too worried about it, or you will be too afraid to use it.
STORAGE OF UNMOUNTED STAMPS
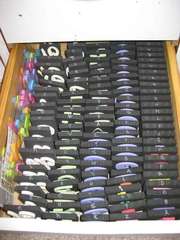
Unmounted stamps are popular as they take up much less space. Store the acrylic handles in a drawer and use over and over.
WITHOUT ADHESIVE
If you prefer to use your UMs without adhesive (using glue stick on the back, and washing off when you clean your stamps) storage is very easy.
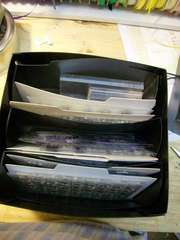
Stamp the image onto the front of an envelope, and tuck the stamp inside. Store upright in a card file box, by category.
Too big? Use giant envelopes, and store flap-side upwards in a ring binder.
WITH ADHESIVE OR EZ MOUNT
The back of the stamp will be sticky, or clingy (to adhere to the acrylic blocks used as handles).
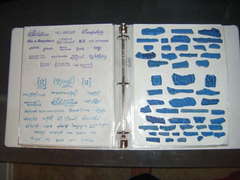
Stick onto the front of transparency sheets, with the index (image) sheet behind, so that you can identify your stamps, and store in a ring binder.
OR: Use a photo album (the sort where you peel away the protective sheet). Place the index sheet on the cardboard under the protective sheet, smooth back down, then stick the stamps on the front, over the index sheet so that you can see which stamp is which. Simple!
Don't put too many stamps in each binder, or they will be too heavy to stand up. Again, the aim is to keep the stamps clean and out of the sun."
"Keep Away From Cardboard
Avoid storing them in contact with cardboard, it will cause the rubber to dry out more rapidly and reduce the life of your stamps. Plastic baskets, plastic shoe boxes, and plastic silverware organizers are good for using in drawers to protect your stamps. You can also use a tackle box, the depth of the drawers is ideal for most stamps, and you can remove dividers by scoring them with a blade to make more wide open drawers."
By QueenBeeCrafts
Storage solutions:
Mounted:
Here is a way to store your mounted stamps in crates. http://www.scrapbook.com/gallery/?m=image&id=2523717&type=searchwords&s=stamp+storage&start=20&types=1,3,5
Single stamp storage for wood: http://www.scrapbook.com/gallery/?m=image&id=2438741&type=searchwords&s=stamp+storage&start=40&types=1,3,5
Mini stamp storage in Cropper hopper drawers... http://www.scrapbook.com/gallery/?m=image&id=2501209&type=searchwords&s=stamp+storage&start=20&types=1,3,5
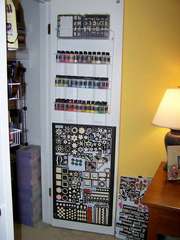
Wall shelf unit: http://www.scrapbook.com/gallery/?m=image&id=2327747&type=searchwords&s=stamp+storage&start=60&types=1,3,5
Jars??? - Yup - http://www.scrapbook.com/gallery/?m=image&id=2091889&type=searchwords&s=stamp+storage&start=120&types=1,3,5
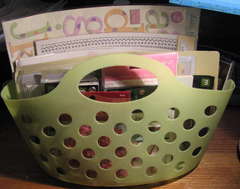
Baskets: http://www.scrapbook.com/gallery/?m=image&id=2040513&type=searchwords&s=stamp+storage&start=140&types=1,3,5
http://www.scrapbook.com/gallery/?m=image&id=2037243&type=searchwords&s=stamp+storage&start=140&types=1,3,5
Cabinet Alphabetical by size of container:
Unmounted: Here is a video that explains several types of storage for unmounted stamps. She explains how to store them in Baggies, laminated sheets in binders and in CD jewel cases. How to make your own laminated sheets to store in the binders without a laminator or purchasing them at a store. http://www.youtube.com/watch?v=zjflQYXwS10
She has explained nicely how to do this with Avery page protectors.
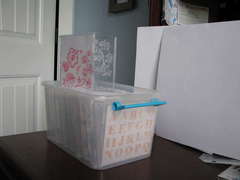
This blog shows a method of storing unmounted stamps in a large photo box by categories and on cardstock cards she created with contact paper. http://mynextthirtyyears.com/sharing-my-newly-organized-acrylic-stamp-storage
If you don't want to remove them from MFG packaging here is an option with a binder... http://www.scrapbook.com/gallery/?m=image&id=2556377&type=searchwords&s=stamp+storage&start=20&types=1,3,5
CD Cases: http://www.scrapbook.com/gallery/?m=image&id=2371305&type=searchwords&s=stamp+storage&start=40&types=1,3,5
http://www.scrapbook.com/gallery/?m=image&id=2327743&type=searchwords&s=stamp+storage&start=60&types=1,3,5
http://www.scrapbook.com/gallery/?m=image&id=2259143&type=searchwords&s=stamp+storage&start=80&types=1,3,5
CD in a basket: http://www.scrapbook.com/gallery/?m=image&id=2232297&type=searchwords&s=stamp+storage&start=80&types=1,3,5
Zutter Bind it All kit: http://www.scrapbook.com/gallery/?m=image&id=2351083&type=searchwords&s=stamp+storage&start=60&types=1,3,5
Foam:
Cases:
Drawers:
http://www.scrapbook.com/gallery/?m=image&id=1847439&type=searchwords&s=foam+stamp+storage&types=1,3,5
PEG BOARD: http://www.scrapbook.com/gallery/?m=image&id=1681383&type=searchwords&s=foam+stamp+storage&types=1,3,5
Plastic drawers: http://www.scrapbook.com/gallery/?m=image&id=107159&type=searchwords&s=foam+stamp+storage&start=60&types=1,3,5
Plastic drawers in baskets: http://www.scrapbook.com/gallery/?m=image&id=801551&type=searchwords&s=foam+stamp+storage&start=40&types=1,3,5
Magnets:
Clip it up in Baggies: http://www.scrapbook.com/gallery/?m=image&id=1227149&type=searchwords&s=foam+stamp+storage&start=20&types=1,3,5
Indexes or Catalogs:
Indexes: The video talked about creating an index for your stamps. This is a great idea and making one for each CD case or your binders will be time consuming but worth it. Have fun with this and color them too. I will be doing this for my unmounted collection that has grown so much recently. Then I will be doing what I did with the catalog. Since it is hard to see the acrylic image sometimes I have to stamp them first for an index.
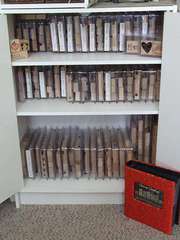
Catalog: I created a catalog for mine wood stamps. It took less time and was cleaner too then stamping every image however it was more pricey, adding the cost of printing the photos and the standard 4x6 photo album it is stored in. Though I love this solution for my mounted stamps because the stamps are organized by alphabetical and yet in the catalog I have them sorted by type, alpha, floral/nature, holiday, sentiments... etc. I took the photos of the sets and photo edited in the name and a boarder. At the time I did not have a photo editing program so I added the name in MS Paint. Uploaded it to wal-mart's photo printing site and added a boarder from their selection.
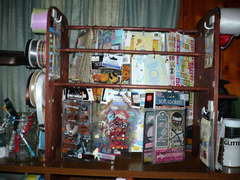
Here is a photo of my system.
Saturday, February 26, 2011

Friday, February 25, 2011
CHALLENGE #15 Week #4 - IT's FRIDAY PHOTOS AND FUN CHALLENGE
CHALLENGE #15 Week #4 - IT's FRIDAY PHOTOS AND FUN CHALLENGE - Photos & Memorabilia
For the full Photo and Memorabilia Challenge please see (Page 33)
SET A GOAL: What is your goal for today? To finally get started on the photos? To get one box done? To organize your digitals? Geter DONE!
NEW FRIDAY FUN CHALLENGE: Today is the final Friday Fun so I want you to be creative in your own way. Choose to make your space better by doing something for it.
Here are some ideas but you can make what ever you want:
1) A Layout to hang on the wall of one of your favorite photos.
2) Alter a storage container on your desk
3) Turn a frame into a photo/idea board
4) Make a sign for your space.
5) Add words to your wall. Maybe an inspiring saying.
Just for some ideas. Can't wait to see what you all come up with!
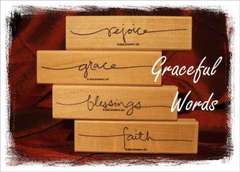
Thinking outside the box... an altered item inspired layout sketch
Sometimes you just need to think outside the box. This was created with the inspiration of a layout sketch from My Mind's Eye Blog. This project stands close to two feet tall and it will decorate my scraproom with one of my favorite photos of me and the hubby.
 With the help of some fantastic products like Wonder Film, P K Glitter Glitz, Powder Keg Embossing Powder, P K Ritzy Ditzy Glitz and MME's Bohemia line of patterned papers. Not to mention the wonderfully amazing Cricut Machine!
 Notice the stamped flourishes. They are embossed with Powder Keg Embossing Powder by PK Glitz. The Wonder Film and the cricut provided this fabolusly sticky damask base for the gold glitter over the red letter.
 This sweet 3D bird was created from two the these in 2D. The accordion flower behind this brown frame had these sweet little blue birds on them. I cut them out and then used the cricut to cut out the scalloped circle I then turned into the large 11" flower.
Hope you enjoyed this project as much as I will enjoy it in my scraproom.
~ Happy Scrapping! ~
Wednesday, February 23, 2011
Scraproom Makeover - Glitter/Glitter Glue/ Flocking/Bling and Powders
CHALLENGE #14 WEEK #4 - Glitter, Glitter Glue, Flocking, Embossing Powders, Micro Beads etc.
I am not sure if you all know but I am a glitter fanatic! LOL. To put it lightly. I have over 100 shades of glitter and embossing powders. I have almost 40 different colors of glitter glues. I am a bit obsessed about the sparkle I think ... LOL.
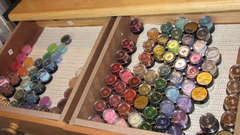
Shimmer Powders and Flocking - No special way you need to store these accept away from moisture but that is true for about 99% of all scrapbooking supplies. They do look pretty and can be stored nicely on display. Try finding an old, small metal cookie sheet at the local thrift store. Paint or alter it a bit and put thin magnets on the bottom of the powder containers. Hang it on the wall up above the work space. Or Stack them and store them on a shelf. Maybe even store them in a nice basket that you can keep handy.
Note: if storing in a box, basket or drawer... turn them upside down. Not for he reasons you do inks but so you can see the colors inside the jars, instead of the white/black lids.
Glitters and Glitter Glues - I LOVE glitter... there are so many options for storing regular glitter many have been mentioned above in other items. The glitter glue however works best, with the least amount of bubble explosions on your page, if you store them upside down.
Storage Options:
Tool rack, Velcro them to a clear flier display protector
Hanging under a shelf: here is what I did last year for my storage solution.
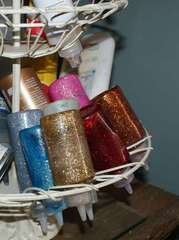
Vintage Rack:
MM Shelves (I'm drooling over her products!)
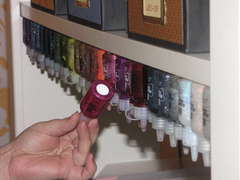
Lipstick holder
Storing your glitter jars, embossing powders and flocking in a drawer:
Drawer
In pill/bead organizers
Bin
Shoebox (I would turn the glitters upside down also):
Embossing supplies - Now normally the embossing tool would be placed in with the tool category but if you want to create a mini embossing center and organize it in with your embossing supplies then I would suggest you do what works for you. I created a drawer for all my supplies and organized it all within that drawer. A Basket would work well or if you want a counter top embossing center we can discuss better ways to display these items.
Storage Solutions:
Embossing Center (really it is my color center):
Decorative Box
Other (?) - Did I miss anything? Please bring it to my attention.
REMEMBER: Always leave room for your stuff to grow!!! Especially you collectors!
I am not sure if you all know but I am a glitter fanatic! LOL. To put it lightly. I have over 100 shades of glitter and embossing powders. I have almost 40 different colors of glitter glues. I am a bit obsessed about the sparkle I think ... LOL.
Shimmer Powders and Flocking - No special way you need to store these accept away from moisture but that is true for about 99% of all scrapbooking supplies. They do look pretty and can be stored nicely on display. Try finding an old, small metal cookie sheet at the local thrift store. Paint or alter it a bit and put thin magnets on the bottom of the powder containers. Hang it on the wall up above the work space. Or Stack them and store them on a shelf. Maybe even store them in a nice basket that you can keep handy.
Note: if storing in a box, basket or drawer... turn them upside down. Not for he reasons you do inks but so you can see the colors inside the jars, instead of the white/black lids.

Glitters and Glitter Glues - I LOVE glitter... there are so many options for storing regular glitter many have been mentioned above in other items. The glitter glue however works best, with the least amount of bubble explosions on your page, if you store them upside down.
Storage Options:
Tool rack, Velcro them to a clear flier display protector
Hanging under a shelf: here is what I did last year for my storage solution.
Vintage Rack:
MM Shelves (I'm drooling over her products!)
Lipstick holder
Storing your glitter jars, embossing powders and flocking in a drawer:
Drawer
In pill/bead organizers
Bin
Shoebox (I would turn the glitters upside down also):
Embossing supplies - Now normally the embossing tool would be placed in with the tool category but if you want to create a mini embossing center and organize it in with your embossing supplies then I would suggest you do what works for you. I created a drawer for all my supplies and organized it all within that drawer. A Basket would work well or if you want a counter top embossing center we can discuss better ways to display these items.
Storage Solutions:
Embossing Center (really it is my color center):

Decorative Box
Other (?) - Did I miss anything? Please bring it to my attention.
REMEMBER: Always leave room for your stuff to grow!!! Especially you collectors!
Monday, February 21, 2011
CHALLENGE #13 Week #4 - Stickers/rub-ons/bling
CHALLENGE #13 Week #4 - Stickers/rub-ons/bling
If it has a paper backing and requires you to peel & stick or rub it on it is time to clean it up and organize it.
I seriously have stickers from ... 15 years ago... I NEED TO PURGE. Please feel free to join me with this one.
Stickers/rub-ons/ bling - only have one storage issue. THEY MUST BE STORED FLAT. If you choose vertical storage or horizontal these are items that can not be bent. It usually is easier to keep them stored in the original package too. Just for safe keeping, to make sure nothing begins to peel off an image you may need later while it is jumbled around without the protective packaging.
You will be needing to decide how to sort them...
Stickers/Rub-ons - Themes is probably best. One sheet of stickers usually does not have just one color. But one sheet usually has just one theme on it.
Bling - This could be sorted by color, size or shapes/styles what ever you search for fist. There are the individual bling dots (for lack of a better term) the flourishes and the shapes like stars, flowers, etc. and the Alphas and letters.
Storage Options:
Clip it up options:
Store bought:
Mini - http://www.scrapbook.com/gallery/?m=image&id=2561279&type=searchwords&s=sticker+storage&types=1,3,5
Wall mount rod - http://www.scrapbook.com/gallery/?m=image&id=2601855&type=searchwords&s=clip+it+up&types=1,3,5
Swing wall arm mount -
Table top:
http://www.scrapbook.com/gallery/?m=image&id=2561281&type=searchwords&s=clip+it+up&start=20&types=1,3,5
Home made:
Bubble gum machine - http://www.scrapbook.com/gallery/?m=image&id=2594225&type=searchwords&s=clip+it+up&types=1,3,5
I think this is home made: http://www.scrapbook.com/gallery/?m=image&id=2568755&type=searchwords&s=clip+it+up&start=20&types=1,3,5
For larger bags O' goodies:
Rod style:
http://www.scrapbook.com/gallery/?m=image&id=2544077&type=searchwords&s=clip+it+up&start=20&types=1,3,5
:evil: - http://www.scrapbook.com/gallery/?m=image&id=2491849&type=searchwords&s=clip+it+up&start=40&types=1,3,5
Trailer park style... hey you said it not me Dana: http://www.scrapbook.com/gallery/?m=image&id=2492061&type=searchwords&s=clip+it+up&start=40&types=1,3,5
Paper Towel rack:
Last but not least... CLIP IT UP HEAVEN... MUST SEE! - http://www.scrapbook.com/gallery/?m=image&id=2318993&type=searchwords&s=clip+it+up&start=60&types=1,3,5
How to make your own Clip it up clips...
things you need: http://www.scrapbook.com/gallery/?m=image&id=2530471&type=searchwords&s=clip+it+up&start=20&types=1,3,5
How to connect: http://www.scrapbook.com/gallery/?m=image&id=2530473&type=searchwords&s=clip+it+up&start=20&types=1,3,5
Bulletin Board with page protectors:
http://www.scrapbook.com/gallery/?m=image&id=2320501&type=searchwords&s=sticker+storage&start=20&types=1,3,5
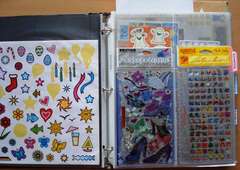
Binder with page protectors:
http://www.scrapbook.com/gallery/?m=image&id=2151845&type=searchwords&s=sticker+storage&start=60&types=1,3,5
http://www.scrapbook.com/gallery/?m=image&id=1399005&type=searchwords&s=sticker+storage&start=140&types=1,3,5
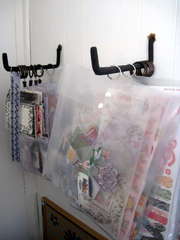
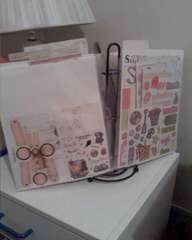
Not quite a clip it up but a space saver:
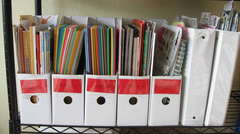
Vertical paper holders:
http://www.scrapbook.com/gallery/?m=image&id=1862121&type=searchwords&s=sticker+storage&start=100&types=1,3,5
In a drawer (be very careful with this don't let them slide around brace it from the back of your stash to prevent them from laying down so they don't get mixed up and start peeling the stickers... messy) http://www.scrapbook.com/gallery/?m=image&id=1770873&type=searchwords&s=sticker+storage&start=120&types=1,3,5
Files:
http://www.scrapbook.com/gallery/?m=image&id=2212627&type=searchwords&s=sticker+storage&start=40&types=1,3,5
http://www.scrapbook.com/gallery/?m=image&id=2179841&type=searchwords&s=sticker+storage&start=60&types=1,3,5
http://www.scrapbook.com/gallery/?m=image&id=374119&type=searchwords&s=sticker+storage&start=200&types=1,3,5
http://www.scrapbook.com/gallery/?m=image&id=391763&type=searchwords&s=sticker+storage&start=200&types=1,3,5
Portable file:
http://www.scrapbook.com/gallery/?m=image&id=1243369&type=searchwords&s=sticker+storage&start=160&types=1,3,5
Basket:
Honestly there is not many options in this gallery besides the clip it up... tons of people like this concept so it must work. Try it you might like it. But there are still several options to the clip it up.
If it has a paper backing and requires you to peel & stick or rub it on it is time to clean it up and organize it.
I seriously have stickers from ... 15 years ago... I NEED TO PURGE. Please feel free to join me with this one.
Stickers/rub-ons/ bling - only have one storage issue. THEY MUST BE STORED FLAT. If you choose vertical storage or horizontal these are items that can not be bent. It usually is easier to keep them stored in the original package too. Just for safe keeping, to make sure nothing begins to peel off an image you may need later while it is jumbled around without the protective packaging.
You will be needing to decide how to sort them...
Stickers/Rub-ons - Themes is probably best. One sheet of stickers usually does not have just one color. But one sheet usually has just one theme on it.
Bling - This could be sorted by color, size or shapes/styles what ever you search for fist. There are the individual bling dots (for lack of a better term) the flourishes and the shapes like stars, flowers, etc. and the Alphas and letters.
Storage Options:
Clip it up options:
Store bought:
Mini - http://www.scrapbook.com/gallery/?m=image&id=2561279&type=searchwords&s=sticker+storage&types=1,3,5
Wall mount rod - http://www.scrapbook.com/gallery/?m=image&id=2601855&type=searchwords&s=clip+it+up&types=1,3,5
Swing wall arm mount -
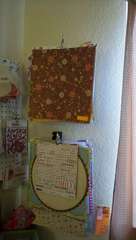
Table top:

http://www.scrapbook.com/gallery/?m=image&id=2561281&type=searchwords&s=clip+it+up&start=20&types=1,3,5
Home made:
Bubble gum machine - http://www.scrapbook.com/gallery/?m=image&id=2594225&type=searchwords&s=clip+it+up&types=1,3,5
I think this is home made: http://www.scrapbook.com/gallery/?m=image&id=2568755&type=searchwords&s=clip+it+up&start=20&types=1,3,5
For larger bags O' goodies:
Rod style:
http://www.scrapbook.com/gallery/?m=image&id=2544077&type=searchwords&s=clip+it+up&start=20&types=1,3,5
:evil: - http://www.scrapbook.com/gallery/?m=image&id=2491849&type=searchwords&s=clip+it+up&start=40&types=1,3,5
Trailer park style... hey you said it not me Dana: http://www.scrapbook.com/gallery/?m=image&id=2492061&type=searchwords&s=clip+it+up&start=40&types=1,3,5
Paper Towel rack:
Last but not least... CLIP IT UP HEAVEN... MUST SEE! - http://www.scrapbook.com/gallery/?m=image&id=2318993&type=searchwords&s=clip+it+up&start=60&types=1,3,5
How to make your own Clip it up clips...
things you need: http://www.scrapbook.com/gallery/?m=image&id=2530471&type=searchwords&s=clip+it+up&start=20&types=1,3,5
How to connect: http://www.scrapbook.com/gallery/?m=image&id=2530473&type=searchwords&s=clip+it+up&start=20&types=1,3,5
Bulletin Board with page protectors:
http://www.scrapbook.com/gallery/?m=image&id=2320501&type=searchwords&s=sticker+storage&start=20&types=1,3,5
Binder with page protectors:
http://www.scrapbook.com/gallery/?m=image&id=2151845&type=searchwords&s=sticker+storage&start=60&types=1,3,5
http://www.scrapbook.com/gallery/?m=image&id=1399005&type=searchwords&s=sticker+storage&start=140&types=1,3,5
Not quite a clip it up but a space saver:
Vertical paper holders:
http://www.scrapbook.com/gallery/?m=image&id=1862121&type=searchwords&s=sticker+storage&start=100&types=1,3,5
In a drawer (be very careful with this don't let them slide around brace it from the back of your stash to prevent them from laying down so they don't get mixed up and start peeling the stickers... messy) http://www.scrapbook.com/gallery/?m=image&id=1770873&type=searchwords&s=sticker+storage&start=120&types=1,3,5
Files:
http://www.scrapbook.com/gallery/?m=image&id=2212627&type=searchwords&s=sticker+storage&start=40&types=1,3,5
http://www.scrapbook.com/gallery/?m=image&id=2179841&type=searchwords&s=sticker+storage&start=60&types=1,3,5
http://www.scrapbook.com/gallery/?m=image&id=374119&type=searchwords&s=sticker+storage&start=200&types=1,3,5
http://www.scrapbook.com/gallery/?m=image&id=391763&type=searchwords&s=sticker+storage&start=200&types=1,3,5
Portable file:
http://www.scrapbook.com/gallery/?m=image&id=1243369&type=searchwords&s=sticker+storage&start=160&types=1,3,5
Basket:
Honestly there is not many options in this gallery besides the clip it up... tons of people like this concept so it must work. Try it you might like it. But there are still several options to the clip it up.
Subscribe to:
Posts (Atom)


