Friday, February 3, 2012

Angel Wings created for CHAW 2012 for Charity WIngs with Helmar

Why so long since I posted? Well two weeks prior to CHA my hubby's assignment out of town got postponed! Which meant I could go to CHAW 2012! So I left him with the kids... However prior to that I went from having a few things to do for my bookstore and my daughters B-day to having an ever growing list of to-dos. The great thing about it though was that most of them were creative projects and art.

This post is about one rather large project! I built functional angel wings to donate to the Charity Wings Organization. I may not have been able to do these wings justice but Elena sure could...

Here I am in the Helmar Booth with the wings open and closed.


Here they are from the back open:


Flash mob video where you can see them hold up to dance moves...


Here are the three people who made this a hit at CHA!Elena Lai Etcheverry, Tracy Weinzapfel Burgos, and myself in the middle. This is during the Live from CHA interview Elena had with Tracy from Helmar USA.


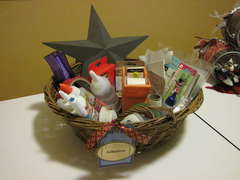
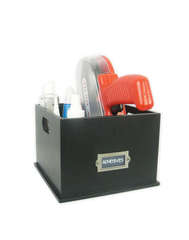
First lets take a quick look at the construction of the frame work... Supply list:
  • 1 - kids back pack (up-cycled in this case from last year)
  • 2 - 1" PVC pipes 2' long
  • 1 - piece of hobby board
  • Nuts and bolts and some brackets
  • 1 yard of white strap (from a fabric store) (it shows black here but for this project I switched it out to white)
  • 1/2 a yard of white the cheapest white fabrick to cut the shape of the wings
  • Wire
  • Tools to cut the wood, pvc pipe and fabric to the right shapes
  • fishing line
  • and of course some HELMAR USA glues - I used Acid Free and 450 Quick Dry.

Now lets talk about decorating it.  hundreds of hand made feathers from old books and pipe cleaners... 5 feather boas and some sparkle ribbon, gems, and fabric... and of course Helmar 450 Quick Dry and Premium Craft Glue.


 And then there was the building of the box my hubby took care of that.


Perfect fit. I hope you enjoyed a sneak peak!

 Have a Happy Helmar Day!

EDIT: Places you can find more images of these wings:
{My Sweet Earth} Susan K. Weckesser
Karen's Corner of the Web
Stabbed not counted or Crossed
Creativity Unleashed by Traci Bautista
Charity Wings


Photobucket

Challenge #2 Week #1 - FRIDAY PHOTOS AND FUN CHALLENGE

Challenge #2 Week #1 - FRIDAY PHOTOS AND FUN CHALLENGE - Photos & Memorabilia ( I will not re-post this every Friday however we will be working on it every Friday in February)

DUN DUN DUN... are you ready for this? It is a huge undertaking that we will be working on every Friday for the rest of this challenge. (accept this week for whatever reason it didn't post so it is now Sunday! SO SORRY!)

SET A GOAL: Some of you may be the type who want to sit down and get it all done at once. That is fine if that is your goal. Note: You will have Fridays for fun the rest of the month if you do this . However if you are like me I can only take so much of one thing for so long. SET A REASONABLE GOAL! It maybe working on photo organization for 1 or 2 hours, maybe it is to get 1 or 2 boxes organize tonight. Maybe you want to get an entire album planned out with your photos pulled and placed in the albums. No matter what your goal is... MAKE IT, DO IT and CELEBRATE IT... tell us you did it and move on to create something fun. There is a creative challenge at the end of this post by a Guest Challenger.

BEFORE BEGINNING: IF YOU HAVE MOSTLY HARD COPIES OF PHOTOS PLEASE FINISH THE OTHER CHALLENGES FIRST BEFORE STARTING THIS ONE. I want your space to be clean and free of small pieces of metal, chipboards and such items. These are you memories and the most precious part of our scrapbooking. Care for them well.

Photo Preservation:

Image Master's website -


    "PHOTO STORAGE . . .

    When possible, keep photographs in enclosures that protect them from light and dust and provide physical support during display or use. Chemically stable plastic or paper enclosures, free of sulfur, acids, and peroxides, are recommended. Plastic sleeves should be constructed of uncoated polyester, polypropylene, or polyethylene.

    For most photographic materials, unbuffered paper enclosures are preferred over buffered enclosures. Alkaline buffering is added to archival storage papers to absorb acidity from the stored material or the environment surrounding it. However, some photographs may be altered by the buffering in alkaline papers, so unbuffered paper is recommended for most processes.

    Film-based negatives, which can produce acidic gasses as they age, should be placed in archival, buffered enclosures and stored separately from other photographic materials. Store cased objects, such as daguerreotypes and ambrotypes, in their original cases or frames with the addition of custom-made, four-flap paper enclosures to reduce wear and tear on fragile cases. Place individually housed prints, negatives, and cased objects in acid-free, durable boxes that will afford further protection from light, dust, and potential environmental fluctuations.

    The storage of photographs in albums serves the dual purpose of organizing groups of images while protecting them from physical and environmental damage. Albums can be wonderful sources of historic and genealogical information. Preserve them intact when possible and store them in custom-fitted archival boxes. For the storage of family photographs, albums constructed with archival materials are available from conservation suppliers. Magnetic or self-adhesive albums can be detrimental to photographs and should not be used.

    HANDLING PHOTOGRAPHS . . .

    Most damage to photographs results from poor handling. A well-organized and properly housed collection promotes respect for the photographs and appropriate care in handling. When images can be located quickly, there is less possibility of physical damage. The enclosures should be designed in relation to the intended use of the photographs, as well as their type and condition. Establish handling procedures and adhere to them whenever photographs are being used. View photographs in a clean, uncluttered area, and handle them with clean hands. Wear white cotton gloves to lessen the possibility of leaving fingerprints and soiling the materials; however, gloves may reduce the manual dexterity of the user.

    Keep photographs covered when they are not being viewed immediately. Do not use ink pens around photographic materials. Mark enclosures with pencil only. If it is necessary to mark a photograph, write lightly with a soft lead pencil on the back of the image."


Now that we know how to store and handle photos... just a brief reminder... we need to sort them. Sorting them by event and chronological order is usually the most common.

I think I am going to sort mine by color... J/K. Some people sort them by person, family and events. Especially if they are doing albums for each child etc.

There are not many photo storage options out there I will link some products below. The key is to keep them in a dry dark place.

MEMORABILIA - Many of these items are not asid free or photo safe, though with paper in between them (acting as a barrier) and the photo you can scrap them onto the page.. I would suggest also storing them in a dry dark place for the sun and moisture can damage these as well.

The storage options for this could be the same as your photos. You may not be able to keep them all in the same boxes mixed together but you can put them on the same shelf in matching boxes so they are handy.

Cross referencing - Sorting memorabilia the same way you sort your photos will help with the easy of finding what you need when you need it.

If you have a piece of memorabilia for a certain date or event. Place a 4x6 piece of scrap photo safe paper in with the photos with a reminder that you have the memorabilia item in the other box. This will keep you from forgetting the memorabilia when you go to pull your photos for that event or person.

If you have tons of memorabilia you may want to do a page of just that. If you keep a log of what pages you need to create for what albums make sure you add these memorabilia pages to that log. This would be a great thing to use you binder for.

LABELING - Use dividers frequently. This is very important for ease of locating the photos you want. If you don't have any or you don't want to buy more then make your own out of some of your photo safe scraps. Add a tab at the top so you can easily see what you write on the label above the tops of the photos.

NOTE OF STORAGE PLACEMENT: I know there are only a few of you who have your scrap areas in the basement and have fear of flooding. I live in a flood zone with no basement and I want EVERYONE to be aware of this. God forbid if any of us have to deal with this but even a broken pipe can cause excessive water damage and I would hate for any of you to loose your photos or your albums. The higher the better. If you are in a place that never floods I would suggest only a foot or two minimum off of the floor but if you have a greater chance place place these items higher accordingly.

DIGITAL PHOTOS: Sorting would be the same way. Since you can't put a place holder next to the photos with memorabilia then maybe just adding a word document with a memorabilia log for you to check and save it within the file your coordinating photos are in.

BACK THEM UP BACK THEM UP BACK THEM UP... I don't care how you do it... external hard drive, USB memory stick, a photo hosting website, CD... ONCE YOU HAVE TAKEN THE TIME TO ORGANIZE IT PLEASE BACK THEM ALL UP!!!!!

Okay Ladies! Lets get BUSY!!!
Photobucket

Thursday, February 2, 2012

CHAW 2012, a bit about Charity Wings, Helmar and I

There is so much to show you all! CHAW (Craft and Hobby Association Winter show)  2012 was amazing! It was more then I could have expected. I am in the process of dealing with the hundreds of images I took this week so here are just a few. This is Elena, from Charity Wings Organization. They bring crafters, hobbyists and artists together to help their communities and other charities through events and auctions.


To raise awareness for charities that were present at CHA, Charity Wings organized a Flash Mob during registration  before CHA opened Sunday Morning. Elena wore my wings and I am on the right of her in the video (in the teal shirt). Here is the video. 

She's Crafty all right! We had so much fun!

Charity Wings did this event to raise funds and awareness for the fallowing charities... Crop for a Cure, Boys and Girls club, Operation Write Home and more.

The wings I made were donated to Charity Wings and will be displayed in future events. Elena wore then throughout most of the "LIVE from CHA" online streaming event. Where Elena interviews manufactures and  designers, she shows new products and tours the event for two days. Here is a photo of Tracy from Helmar during her interview. She introduced the designers and I answered a few questions about how the wings were made. With HELMAR ADHESIVES of course... hehe!


By the end of the event I felt like I needed to prop my eyes open or I would miss about a million more things. Every time I walked the floor I found more inspiring projects and new products I missed the last time! This is not a photo of me but is is most definitely what I must have looked like walking around trying not to miss anything!

Well I better get back to editing my photos and taking care of my family. I will post more later.

Happy Crafting everyone!


Photobucket

Wednesday, February 1, 2012

Scraproom Makeover/Organization - Adhesives

Challenge #1 Week #1 - Adhesives - This challenge is begin hosted and discussed on Scrapbook.com

Things to know:


The key here is to always make sure that what ever adhesive you are using you need to make sure it is Acid Free. (This includes you glitter glue!!) No point in working so hard creating a beautiful album of fabulous pages for your family to have forever just to run those pages over time with the wrong adhesive. Here are 10 different types of adhesives. If you have not herd of some please ask and I would be happy to share. There are probably more out there too so let's enlighten each other on the wonderful world of things that stick.

There are many different types of adhesives and they are used for many different things. Here is a good reference list. (excerpts of an article on http://www.xomba.com/10_types_scrapbooking _adhesives )

  • Dimensional - usually a foam center between two pieces of adhesive; gives dimension to your page, be it photos or embellishments.
  • Dots (also called tabs) - small pieces of adhesive, usually found in a roll or on cards, that are perfect for attaching small embellishments like buttons, chipboard letters, or acrylic items.
  • Liquid - often quick drying with an even consistency, good as a multi-purpose adhesive for scrapbooking.
  • Multi-purpose - handles multiple types of media used in scrapbooking (paper, fabric, chipboard, embellishments); a good choice for a beginner.
  • Permanent - when you want your photos and embellishments to stick forever, permanent is the way to go. Comes in a variety of formats (including dots, liquids, glue sticks, and sheets), and cannot be moved. Ever.
  • Re-positionable - allows you to move pieces of your layout for a short amount of time before they become affixed to the page. This also comes in a variety of forms.
  • Runners (also called tape runners) - easy application, allows for control over the amount used. These also work on a variety of media types.
  • Sheets - used to create stickers, often used with a machine. When used with a machine, great for die-cuts and paper letters.
  • Spray - use for "invisible" hold, for items like vellum or transparencies.
  • Stick - easy application, works well with a variety of surfaces and media. A very good choice for a beginning scrapbooker.
Storage Solutions: Basket or drawer on or in your desk, hanging them up on the wall in front of you, photo box etc.

Storage basket: Adhesive basket By Hanging By A Moment

Storage Crate: Altered Kasiercraft Storage Crate By Jill

Adhesive shelf: http://www.scrapbook.com/gallery/?m=image& id=254405...

Desk organizer: Slice and Adhesives Storage By Mercytiara

Drawer: Adhesive Drawer by AuntJo

Glue Caddy:  http://distressedscrapper .com/2011/09/06/altered-he lmar... has a post about storing it upside down and the Glue Caddy found on Etsy: http://www.etsy.com/search/handmade?search_submit=&q=glue+caddy&view_type=gallery&ship_to=US

The key with storing these is to have them within arms reach NO ONE can create any paper crafts without adhesives.

Tips:
  • Check for any that might need refills soon. Add them to your shopping list.
  • Clean up all tips and ones that have adhered themselves to something. Make sure they are all in ready to use condition.
  • Trash - all glue that is drying up or tapes that are no longer sticky even adhesives that you just simply don't like. You will just end up throwing it away later once it is dried up... so why store it until then?
  • Liquid glue - can have bubbles in it when you are trying to apply it to your work. To keep this from happening so much try storing it upside down... JUST MAKE SURE IT IS FULLY CLOSED so it does not leak... YIKES!!!
So lets clean up and organize these items, find a "within arms reach" spot for them and purge those unused or unusable.

You can do it!

PS... here is my adhesive basket this year:  I have an Helmar Habit I think! LOL!


 Photobucket