Saturday, June 23, 2012

Prisoner of Azkaban "Wanted Poster" Photo Booth Tutorial for Harry Potter Party Post #8

Hello all you Prisoners of Azkaban,

Today I am going to share with you a bit more of the Harry Potter Party. I think I would not have broken it all down into so many post if this was not a DIY Crafty blog. LOL!


Some, ferocious dog I have... he is a Wizard in Disguise... LOL! This is a DIY post on how to make your own Harry Potter Wanted Poster Photo Booth. Using my Cricut and Helmar Acid Free Glue!

Supplies:
Cricut and the Pantin School Book Cartridge (or anything similar)
Helmar Acid Free Glue
1 - foam core board
1 - fine tip and one large black Sharpie
1 - printed graphic of the black box with small white text (I grabbed this from a larger image of Serious Black's wanted poster online)

Here is your step by step instructions:

Step 1: Print the black rectangle with white text from the Serious Black Poster image. Cut it out.

Step 2: Cut a large square out of the foam core board leaving about a 3" boarder along the left and right sides.

Step 3: Use your Sharpie to draw a 1" black border around the opening.

Step 4: Cut out letters on your cricut. The top title ones are about 3" and the small letters on the bottom in black are 1".

Step 5: GENTLY remove the letters from your mat and be extremely careful with the negative space around the smaller 1" letters. You can throw away the smaller letters but keep the negative space outline to use as a template for the small letter.

Step 6: Adhere the Larger Cricut letters to the board using Helmar Acid Free Glue center the letters on each line.

Step 7: Adhere the black rectangle with white lettering with Helmar Acid Free Glue to the bottom of the poster, just under the outlined opening.

Step 8: Use your negative space letter outline from your small Cricut letters and trace them onto the board using your fine tip Sharpie.

I taped up the back of the poster along a floor lamp so it would swing back, due to the tight nook space I used for this photo booth. I draped some fabric from the remnant section of my fabric store and some Halloween black gauze I got at the $1 store last fall.  This sets up the background to the photos too. Propped a stool behind it for the kids to sit on and boom! Photo Booth! See some of the results below.


The next two are my kiddos Trinity and Tristan (the birthday boy)

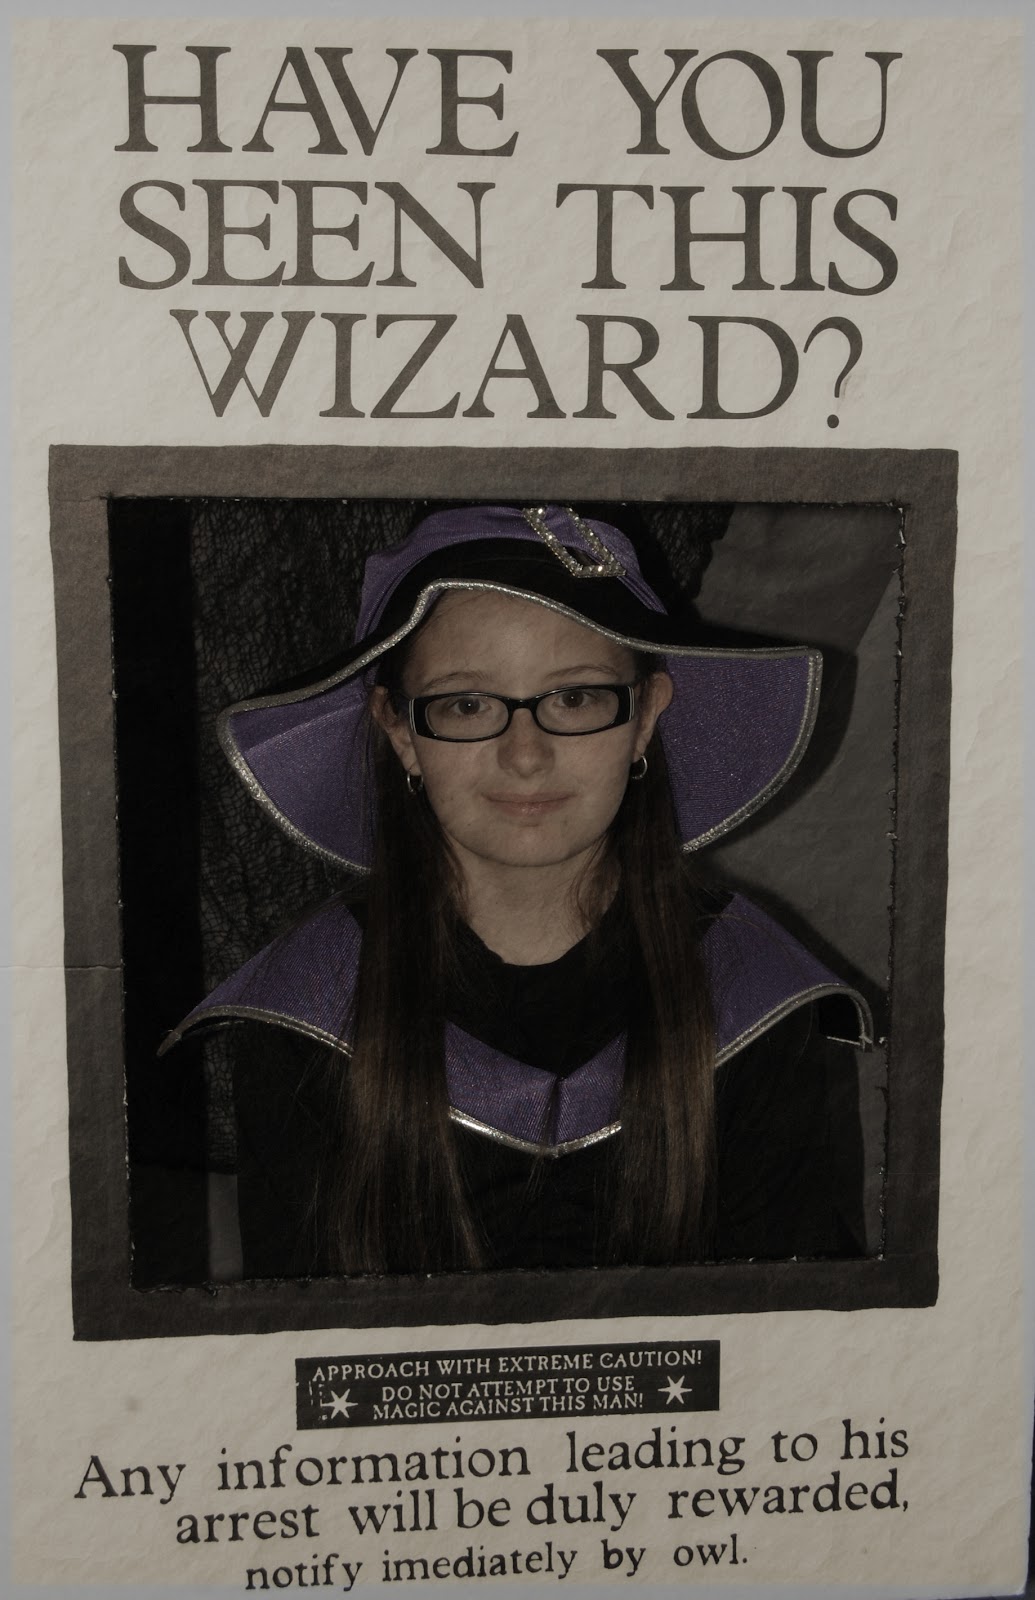
 I would have to say that this one is my favorite here.
A true Harry Potter fan!


For more Harry Potter Party Posts please see the links below. Thank you for your time. Leave a comment below if you have questions or would like me to know if you enjoyed this party. Thanks again!

Eats and Treats:
The Three Broomsticks - Butterbeer, Polly Juice Punch and more
Honeydukes Candy Display - 24 different candies
Owlery Cupcake Tower 
The Golden Snitch Cake 

Fun and Fancy:
Prisoner of Askaban Wanted Poster Photo Booth
DIY Olivander's Wands DIY

Party Decor and More:
Potions Cabinet Details DIY
Video of Helmar DIY projects for Harry Potter Party

Invitations and Printables:
Owl Post - Hogwarts Acceptance Letter Invitations mailed Owl Post 
Publications - DAILY PROPHET and the QUIBBER props 

Photobucket
 Pin It

Tuesday, June 19, 2012

Gringotts Display for a Harry Potter Birthday Party #7

Welcome readers and Harry Potter fans,


This is a brief post about the Gringotts Display I put up for the Harry Potter Birthday Party  (is a video link) for my son. We had taken so much time into making each display I wanted the kids to have to do something in all the spaces around the house. We decided instead of doing a pinata we were going to have Honeydukes Candy Store. In order for the "student" (guests) to shop there they would need money. And the Gringotts was the place to get it. Here is the with drawl slip I created for them to withdraw 5 gold Galleons to spend at Honeydukes. Though with almost 40 kids attending our party filling out this slip of paper became chaotic so we nixed the idea to save time and sanity. However, we would have used it if we had 1/2 the people so I thought I would share it.


The Gringotts sign was created by printing the circle logo of the Gringotts store as large as I could on a 8 1/2 x 11 sheet of cardstock, cut it out and pasted it on a $1 store plastic gold charger with Helmar 450 Quick Dry Glue.


The scale was borrowed from a neighbor. My community and friends really helped out with this. Saved me money by allowing me to barrow some decorations. Thanks KIM! 


The clock was a $1 bargain at a garage sale... don't know if it works but that was a good price for something pretty to look at. Also the "Coin Depository" was a garage sale find. I found Gold coins from a friend and at Oriental Trading Co. To thank Michele for letting me barrow her pirate treasure I gave her all the coins after the party was over.


For more of the Harry Potter party please see the links below. Thanks for your time and please leave a comment below to tell me how you like our party.

Eats and Treats:
The Three Broomsticks - Butterbeer, Polly Juice Punch and more
Honeydukes Candy Display - 24 different candies
Owlery Cupcake Tower 
The Golden Snitch Cake 

Fun and Fancy:
Prisoner of Askaban Wanted Poster Photo Booth
DIY Olivander's Wands DIY

Party Decor and More:
Potions Cabinet Details DIY
Video of Helmar DIY projects for Harry Potter Party

Invitations and Printables:
Owl Post - Hogwarts Acceptance Letter Invitations mailed Owl Post 
Publications - DAILY PROPHET and the QUIBBER props 
Photobucket


Pin It


Sunday, June 17, 2012

Father's Day quick Photo project with a fun Shadow

Hello,
Happy Fathers day to you all and the Fathers you know. This was a quick project I found on Pinterest from this blog post "32 Best Homemade Fathers Day Gifts" and we altered it due to the time of day we had to take this photos (the sun and it's always moving thing... sheesh!). 


Hope you all enjoy your day with the Father in your life. 

If you would like to join us on the Helmar Fathers Day blog hop here is the link.
Photobucket
 Pin It