Saturday, December 12, 2009

Four months!!!

Oh my how time passes, so fast. It really has been four months since my last post. I bet you all thought I fell of the face of the earth. Since my last post we have taken a two week vacation back home, closed on our first home, moved, my son has started a new school and we have a wonderful neighborhood with so many new friends. Time has not been on my side. I have not scrapbook since the move sadly. Though I have been creative in decorating the new house and for Christmas.


So until I am ready to begin to set up my Scrapbooking room I will be sharing my little creative home projects with you all. I will be sharing every step of creating my new scrap room when I get to it. I am hoping on beginning it in January.

Living Room - The after pic is with Christmas decor but it is warm and cozy and much better then before...

BEFORE:


AFTER:


How do you like the transformation? I love color and feel that I normally would never had picked this "covered wagon" color but I really love it in this space. I am currently working on the finishing touches in the downstairs bathroom. That will be posted soon.

Just a few more Christmas Pics of my sweet little ones and Santa... I love them so I have to share!


I hope you all had a wonderful Thanksgiving and your holiday season is full of blessings and little miracles.

Monday, August 10, 2009

Grace's Scrap Attic has a new look!

Good Monday morning everyone! I have been working on a new look around here at my scrap attic. Do you like it? I have lots of artists to credit to all the different elements in this design. I will grab them later today. Right now I need sleep . LOL. I have been up designing and tweaking this new look.

Can you all do me a favor and let me know if you only see the title "Grace's Scrap Attic" or the title "Grace's Scrap Attic, Thank you for sharing my journey though life. Look closely... you might find a treasure or two." I had some issues with the Header tonight. That would be a huge help. It has to do with your browser... please also let me know what browser you are using. Thanks again!

Hope your Monday is full of scrappy goodness.

Thursday, August 6, 2009

Sugar & Spice and some things nice...

Welcome to the Attic once again. Thanks so much for joining me!

Ok so now lets scrap talk. This layout was the third one I did for the I Am a Scrapaholic Kit Club. For the supplies please see the post below. This was one of my favorite moments of my daughter being so sweet... she wanted to bake cookies... so she snuck into the kitchen for no more then 10 min before I went looking for her and ... yup here ya go. She is baking NAKED! Notice the full body shots are missing. Hehe. She decided apple sauce, sugar and flour would make great cookies though she only got the sugar opened by the time I found her.


Background: Kraft cardstock with the flower sack paper. I cut out the logo and off centered it to the upper right of the page. I added a top and bottom boarders of red cardstock. I also cut the boarder from the flour printed paper and fancy cut it with my exacto knife. I then inked the edges of the read boarder and the logo.

Photo Mats: The main photo I mated with the same red as the top and bottom boarders. I inked the edges brown and then added some crocheted ribbon between the photo and mat.

Embellishments: are cardstock buttons and flowers.

Pretty simple layout but I really love the look and feel of it... not to mention I get a really good laugh looking at these photos and remembering that moment.

Today I have some news. I got to dabble in the digital arts a lot these past few weeks and I can share just a bit with you before the new reveal of it all on Saturday. You see Scrapbook News and Review is getting a makeover and with that makeover came the need for a new logo and other graphics... I got to play play play!... This is the only one I can show you now and I hope you come check out the new Issue and the sites new look this weekend.

I hope your day is good and your week is wonderful.

Thursday, July 30, 2009

Trinity - You are my sunshine...

What a crazy life I lead. I have to tell you all that you have my apologies for not keeping you posted on my creative journey as I have said I would. Life is pretty crazy around here. First off it is summer and the kids are home with me from school, we are house hunting, I have been working my little booty off for Scrapbook News and Review, teaching myself PSE7 (thank God for Youtube tutorials) and taking photo editing classes. I have been creating a lot for them but I like to post my creations after they are published so that takes a good 45-60 days before I can show you all.

Here is one of those that was published in the May issue. I really love this layout. I have to admit that it was for a kit club review and I truly disliked that orange floral patterned paper. However this just goes to show you that with a well coordinated kit club, the right photo and accessories you can make anything look good. I love this now!

The scrapbooking kit was part of a new article series we are doing over at Scrapbook News and Review. I love this idea. We get to review different kit clubs and let you see all the wonderful things about them. "I Am a Scrapaholic" was the kit club I had the honor to review. I have to say really loved the kit and all the goodies that came with it.

This is a picture of my darling daughter Trinity. It was taken this spring when we were attempting to get our family photos done. I snapped this one of her at the top of a slide. Though she had just started her way down it and moved out of the shot before my camera and it's slow shutter speed could snap the picture. The cropping is how I took it and the golden glow is from the yellow slide she was at the top of. I hated this pic on the screen of my camera but for what ever reason I did not delete it at that time. Once I got it up on my computer screen I saw it's true beauty and fell in love with this shot.

Lets get down to the nitty gritty shall we?

Background: I started off with the orange floral paper and layered on top of it with a blue cardstock then a white cardstock. This was a nice compliment to the blue leaves in the back ground paper. Using a edge punch from Martha Stewart I edged the white cardstock and added little red dots with my maker in every other small scallop. Adding little fancy cut cherries from scraps of another patterned paper from Jenni Bowlin (I think, see the list below from the kit contents) in the corners.

Next I used a Tim Holtz mask and some yellow, orange and red inks to create the anchor line of the layout and the background for the title. Gently blending these inks over the mask.

Paper mats and layers: Then layering a square block of a larger cherry pattern paper, the pendent shape red cardstock boarder and the orange butterfly ribbon (which I was not very fond of either) to create the completed anchor line. This gave it extreme visual texture and colors to counter the starkness from the white cardstock background. Having this anchor line to rest the photo on was key. After placing the photo in the correct place I chose to create more interest in the upper right section of the layout.

TIP- I never adhere any thing together until I am done layout out my page because of what I did here. Instead of cutting into a new piece of cardstock and paper... I took the background paper and the blue background cardstock and cut out these circles behind the upper right corner of the photo. I cut the blue with a scalloped edge scissors, HAHA yes those decorative scissors from the 90's... I still have them and use them frequently. I then added a doodle dot inside each scallop this time. I inked the edge of the pattern paper circle and layered them together. Yet it still did not seem like enough. I added in some long red stitches with DMC floss. I then took my gold pen and doodled a little circle at the hole where the floss enters the white cardstock... looks like a mini eyelet.

I mounted my photo onto a red piece of cardstock.

Journaling: "You are my sunshine, my only sunshine, you make me happy when skies are grey. You'll never know dear how much I love you. " This was all done on a journal box (something I don't use very often) from Jenni Bowlin.

Embellishments: The butterflies are die cuts that the kit club provided. They were fun to use and added movement and splashes of color to the page. The flowers were also included and I have never really found a use for white flowers but I really love how they turned out. I also like the centers that are from Jenni Bowlin again... hehe.

This I am a Scrapaholic kit products include:

6 sheets of 12x12 Jenni Bowlin Farmers Wife Collection:

4 Sheets Bazzill Cardstock: [2 each] Red Devil, Navy

American Crafts Black Rainboot Thickers

Jenni Bowlin Milk Cap Chipboard Buttons

Jenni Bowlin Maraschino Pearl Flowers

Jenni Bowlin Red Labels

Bazzill Kisses Just the Edges

Prima Marketing Taffy Daisy Dreams

Prima Marketing Wildflowers

Jenni Bowlin Blueberry Pearl Flowers

Maya Road Brown & Cream Sheer Journaling Tags

Prima Marketing Embroidered Canvas Tags

Maya Road Brown & Cream Sheer Journaling Tags

Making Memories Butterfly Twill Ribbon

I have to admit I sat there looking at all my scraps from the other two layouts (one seen to the left, you can read more about it by clicking on the picture to get to the post about this layout, and another layout to be posted soon) I did with this kit and was asking myself what to do with these... umm... well ugly papers and embellishments. The first two layouts I used everything I liked from the kit. The photo was the key and this truly is a sign of a great kit club. The I am a Scrapaholic club knows what they are doing if they can put together kits that are so well coordinated that even when people think their choices are not the prettiest they can still create with them and make something very beautiful. I have to say this is my favorite layout from these three and has been for some time. One I am definitely very proud of.

Thanks so much for sharing my creative journey once again. My questions for you are...

Have you ever used a paper you really don't like? If so was it for a challenge or from a kit club or just leftovers? Why did you use it and did you like the results?

Monday, July 6, 2009

New cover to SNR Mag and Spread the word Contest continues through tonight

I am always excited when I get to do something creative and though this is not about one of my scrapbook pages, I must share the excitement. This is Scrapbook News and Review's new magazine cover... and guess who designed it... go ahead guess. ME! Sorry, I just love showing off my work. This was created in word but thanks to a dear friend I know have to learn Photoshop Elements 7 and I will be able to make this even better next month. Do you like it?
The Art work is by: Delaina Burns and the Sketch by: Debbie Gaydos. Thank you both for great pieces of your creativity to inspire mine.

Now on to a little something I am going to be giving away. If you were fallowing much this weekend then you know I was part of an enormous blog hop. Anne House organized the Oh Say can you see blog hop sponsored by Scrapbook News and Review Card Universe. There were over 90 blogs participating and it was a HUGE success!

My blog freebie is still up for grabs tough through tonight if you leave me a comment on the post below, by tonight at 10 pm CST, that you have taken this graphic and spread the word to your friends about a very exciting event hosted by Scrapbook News and Review. It is part of the SNR Summer Event Series. SNR's Spring into Summer Event is this Saturday July 11th. Come join us, there will be eight classes taught by our staff members and I am one of them. So help me spread the word. You will get a chance to win one month free subscription to Scrapbook News and Review.

Thanks for taking the time once again to read about my creative journey... pst... do you think I should go Digi??? Come on you know I am itching to try digital scrapbooking... hehe. Na! I love my traditional style. Though I cant promise I won't dabble in it. Have a great Monday!

Saturday, July 4, 2009

"Oh Say Can You See" 4th of July Blog Hop

Heeeelllllllloooooo everyone! Happy 4th of July! I am Grace Lauer, Scrapbook News and Review's Marketing Director, which means I am a SNR STAFFER and I have part of the secret code further down within this post. I want to welcome you to yet another blog on the Scrapbook News and Review Card Universe's "Oh Say Can You See" 4th of July Blog Hop. It's a big one isn't it? The more to inspire you with!

Want to know when where it begins... click here. If you came from Helen Dooley's blog: http://tomorrowstreasure.blogspot.com/ you are on the right track! This is one large blog hop and I hope you are enjoying yourself. Lots of wonderful projects to make and learn from. What a wonderful way to get inspired on our countries birthday. I have a freebie for you and the piece of the code for the contest to win the 1 year subscription for Scrapbook News and Review!

I have a 4th of July fireworks card for you. This was a crazy card I created that was a little outside my box. Yet this was so fun to create and I had a blast mimicking a firework explosion. Here is a little explanation and instruction for you if you would like to create this card.


Out for Publication


4th of July card Instructions:
  1. 8 1/2" x 5 1/2" piece of white cardstock, fold in half with bone folder
  2. 3 3/4" x 5" piece of red cardstock
  3. Draw along the edge of red cardstock with gold ink pen
  4. Stamp 13 - 15 small 4th of July images with red pigment ink on extra white cardstock
  5. Heat emboss with red glitter embossing powder
  6. Color in with blue, red and gold markers
  7. Cut around images leaving 1/16" of white around embossed image
  8. Adhere all cut out images onto blue cardstock
  9. Cut around all images leaving 1/16" of blue around the white
  10. Cut 7-9 1" strips of white fibers
  11. Adhere red cardstock in the center of the folded card base
  12. Choose the main embossed image and adhere it to the center front of the red cardstock with two layers of pop dots
  13. Choose five embossed images and adhere them around the center image with one pop dot
  14. Adhere remaining embossed images with mono adhesive around the embossed images from the previous step
  15. Roll the 1" strip of fibers into a ball, try to keep the fibers out of the adhesive, and adhere under the popped up layers of embossed images.
  16. Spread extending fibers into place before adhesive drys.
I hope you enjoy creating a card similar to this. I can this design in several ways. How about creating a Birthday card or New Years card? I hope you have been inspired a bit not only here at my attic but during your journey through the largest blog hop SNR has ever had almost 100 blogs! Big kudos to Anne House for putting this all together with the support from the Scrapbook News and Review staff. Don't forget all the wonderful bloggers who have signed up and participated for this holiday event.

We are having a summer full of paper crafting goodness and just for this event I am going to give you a sneak peek of the class I will be teaching one week from today for Scrapbook News and Review's Spring into Summer Event. My class is

Now, I promised you some freebies! As you read before I am SNR's Marketing Director so I will ask nothing more of you then to spread the word of our up coming event. If you leave a comment here on my blog telling me that you have posted on your blog or Facebook or twitter... about Scrapbook News and Review's up coming Spring into Summer Event and leave me a link to where you posted it, you will be entered into a drawing for a ONE MONTH FREE subscription to Scrapbook News and Review! You will need to post this by 10PM CST on Monday July 6th. How easy is that? Just spread the word about this amazing event! There is a graphic below for you to share!
Next, for you I have your code... yes here it is... are you ready? ................ "NOT WHAT" got it? Do you know what it is yet? Continue to play our code game by hopping through our Scrapbook News and Review Card Universe's “Oh Say Can You See 4th of July Blog Hop”. Your next blog is...


Go check her out!

I would like to say thank you to all the heroes around the world. Here is a little something honoring my personal Hero and please take a moment to honor those who have been lost and who have fallen.

Thanks for viewing my blog I hope you have a wonderful Fourth of July!!!

Wednesday, July 1, 2009

Welcome Home Layout and a Reschedueled Class Event

This is one picture that I have been dieing to scrap. This is the moment that my Hubby came home to us from his last deployment. A memory to treasure for sure! The list behind the picture is of all the things we did to make sure his homecoming was one to remember. I will never forget this moment and the feelings we had that day upon his return. I hope that my children look back on this and remember something... from this day. After all they were pretty young.

This layout was created from an I Am a Scrapaholic's kit. I created this for a kit club review article that was in Scrapbook News and Review's May issue. I love this section of our magazine and how many wonderful ideas come from the same products. It is really a site to see.

Moving onto other great news. The Scrapbook News and Review's Spring into Summer Event is rescheduled for July 11th. We has some server issues over at Scrapbook News and Reviewlast weekend and had to postpone it. We believe all things come with hidden blessings though, and we hope that the delay will allow us to spread the news even further about this fantastic event. Remember I am teaching an layout class focusing on inking and Clearsnap products... have you ever "smooched" you embellishments? Come check it out! July 11th. Here is that information again. (pst... I got to design this graphic... hehe)
Class schedule is to be announced but there are some great new things posted up on the Scrapbook News and Review site... including a sneak peek for the Cosmo Cricket class... *cough* that I wrote *cough*. Go check it out!

Saturday, June 27, 2009

Server Problems for SNR postpone June Issue and Spring into Summer Event.

"Site Unavailable Until Monday Morning

As you can see by the present state of our site, we’re no longer online. Our site is completely inaccessible and will not be available until Monday morning, at the very earliest and the June issue as well as the Spring into Summer Event are now being rescheduled due to this unfortunate turn of events.

In our desire to be proactive and ensure nothing went wrong on the event date, it all spiraled out of control. Ever since our site was hacked a few months ago, it has experienced minor problems here and there. Since anytime we experience traffic of more than 40,000 unique daily visitors to the site, we experience “blips” or “surges” which essentially kicks off people who are 40,000 + 1 in line, and knowing our last event garnered roughly 46,000 visitors we decided it was best to switch to a larger server. Our hosting service advised it would take no longer than 8 hours to transfer all content and then another 4 for the DNS switch. I laugh at that because it was about as far from the truth as you can get. 16 hours later the transfer was still hobbling along. With unforeseen problems leftover from the hacker, the over 12,000 images and 1,300 articles we had to transfer moved at a ridiculously low speed and then eventually just stopped.

At this point, our site is completely shut down and displays a not-so-attractive “down for scheduled maintenance” sign that was certainly not scheduled. To say we’re disappointed would be putting it mildly. With countless man hours and above and beyond efforts made by staff members, the hardest part was telling them we were unable to hold the event as scheduled, but, as we’ve always believed, there’s always a silver lining in every cloud.To that end, we have some major announcements and incredible stuff headed your way.

Over the next two weeks you'll discover and fall in love with all of the amazing changes we're putting into effect and now that we'll soon be on a server with almost unlimited capabilities, we'll now be able to ensure you never have a problem getting to all the scrappy goodness on our site.

We're deeply sorry for any confusion or trouble this may have caused and please know we do not take any of this lightly. As a whole, SNR magazine stands together as a family and we stand by our word and our commitment to the scrapbooking community and this weighs heavily on our hearts, but there's always a silver lining in every cloud and we refuse to see this as anything but a positive. All good things come to those who wait and for your patience, we assure you, it will be worth the wait.

If you have any questions or concerns, please feel free to e-mail us. Fortunately, our e-mail accounts are on a different server so we still have access to you. Thank you for your patience and understanding and have an amazing weekend." ~ SNR

I will keep you all informed and updated. The event is to be rescheduled as far as I know.

Tuesday, June 23, 2009

Teaching a Class, Creating, and playing with the kids

Don't tell me OMGosh it has been over a week since my last post... bad blogger bad! Well I have quite a bit to tell you about so please go grab a nice drink, sit back and relax I hope you enjoy this informative, hopefully inspirational and hilarious video in my post.

Fist and foremost... Inka Dinka Do! Everyone, get ready to get your hands dirty. Come play with me and Clearsnap! We will enjoy creating a layout with some distressing and inking techniques with a touch of a stamping. You will not want to miss this!

I am announcing to you all that I am going to be teaching a class on Clearsnap products at Scrapbook News and Review's Spring into Summer Event this Saturday!!! I am so EXCITED! This will be my first ever online class to teach and above all things it is about an ink company!!! I am one of seven SNR staffers that are teaching each of the classes below. I we have been sharing tid bits of our classes with each other and OMGosh... so excited to be a part of this event! Note mine is at 5:00 EST on Saturday.

Class Event Hours (EST):
1:00 Cosmo Cricket
2:00 Lizzie Anne Designs
3:00 Teresa Collins
4:00 Prism
5:00 Clearsnap - Taught by ME!!!
6:00 Magenta
7:00 Prima
8:00 Crate Paper

EST - 1 p.m. to 9 p.m.
CST - 12:00 p.m. to 8:00 p.m.
MST - 11:00 a.m. to 7:00 p.m.
PST - 10 a.m. to 6 p.m.
Hawaii - 7:00 a.m. to 12:00 p.m.

Second - Here is my newest layout for The Scrappiest Blog. I loved Liz's sketch this week it got me thinking about these cute photos of my son and his first Science fair. I am so proud of him and this wonderful project. He selected the topic, tested all ten toys and typed up his report. All of that from a first grader. He did all the coloring on the board I just assembled it.

Will A Magnet Help Clean My Room?

By the way the conclusion is: "A magnet will not help me clean because most of my toys are plastic and wood." His words not mine. I had some fun getting more along the cartoon style of paper and elements on this layout. A bit out of my box but I enjoyed it.

Last but not least... Now that my kids are out of school we do a little bit of school work every day. Reading, writing and Crafts... of course... LOL you all thought I was going to say arithmetic. I mean ... look who is the teacher! LOL! This also is one of the reasons for lack of time to post. Okay, so anyway, Wednesday is our craft day and last Tuesday I found on clearance for One yes ONE dollar, these adorable little paper bag puppets. I bought them among many other crafts for a buck and the kids made these puppets for their craft day. Now my Hubby was out of town all last week so we turned it into a project for Father's Day. My oldest , Tristan, wrote up a story all by himself and him and my youngest, Trinity, drew the set and created the title pages. Now they made these puppets, the story and the setting all by them selves. All I did was tape up the houses and grass. I hope you enjoy our puppet show. I thought is was really cute when they performed it for Daddy on Father's Day afternoon.


I hope you all enjoyed today's post and that you have a wonderful rest of the week. Don't forget to come on Saturday for my class at www.scrapbooknewsandreview.com. Please, come it would be great support to have familiar faces in the crowd. I would love to know if you could make it!

Saturday, June 13, 2009

The Scrap Corner...

Ok so a while a go... in February I joined a challenge to create an organized scrap room. I only had one wall and a corner to utilize in our Master bedroom. Since then, as most of us do, I have acquired more then the little corner can handle. So Yesterday before my hubby left he informed me he would like it if he came home and his room was his again. So... off to move the scrap corner.

I have decided to take our small sectional couch (more like a love seat) and put it back into our room for a reading corner. This will free up an area in our computer/gaming room for the scrap stuff. Well, I just finished getting all the furniture out here and I have to say I am pretty proud of my rearranging. ;) Though it is kind of cramped in this room now at least I have the computer at my fingertips while I scrap...hehe. I can watch the kids play outside through the windows from in here and I can hang out with the Hubby at night while he gets his game on. Wooo Hoo that means more scrap time for me!!!

I have to keep it picked up more now though due to the fact that it is a public room. So when guests come over they get to see all my scrappy goodness and I don't want them to see how my "creative mind" works... best in a mess...LOL!

Monday, June 8, 2009

Hello, my name is Grace and I am a Craftaholic!


Oh my I am! I have to thank my friend, Maggi over at www.katamommydamacy.blogspot.com for putting together a wonderful Monday blogging tradition. She has found such a great group of gals that are craftaholics and has invited me to become one. To read the interview just click on this link and have fun learning a bit more about me. Also check out all the other Craftaholics on her blog. It has been great getting to know everyone of them. I hope you all have a wonderful day! Thanks so much again Maggi, I had a blast!

Here are a few more of my craft endeavors. The first one is one of about 30 paintings I did back in 2000. It has been a while since I have picked up a brush to paint an oil. The second one is a close up of some ribbon embroidery I thought myself to do for my wedding gown. My mother made the gown I embroidered it.


I

Monday, June 1, 2009

I have been busy!

I have not forgotten you all my life just has exploded lately. Busy, busy, busy me. So I have focused my creativity elsewhere this week and surprisingly enjoyed a week off from scrapping... WAIT DON"T LEAVE!!!! Now before you leave my blog because I said words that you can't imagine would com from my mouth... my projects are scrap related.

First off, I have to let you all know how honored that Scrapbook News and Review let me design the front cover to the May 2009 issue. I had such a blast working on this that I asked if I can do it again next month. So I spent hours in Microsoft word designing this front cover. I am really happy with it and even more impressed with myself for using a word processing program to put it together instead of a graphic one.
The artwork on the front cover is by two of our talented staff members, Irene Tan and Pamela Maas and the sketch is by Debbie Gaydos.


The other projects I have been working on is a photography challenge I am a part of. I have decided to practice and hone my photography skills by joining this challenge and working on it every week. The camera is probably the most important tool of a scrapbooker. Think about it. The camera is where our craft begins. Am I right?

This past week's assignment was to take a self portrait. here are a few of the ones I shot of myself. Got to love that ten second timer option on my camera. LOL. I can only imagine what the people on Main St. thought of me the other day. I was running back and forth between my lamp post and my car, where the camera was propped up on the open window sill of the passenger door. I need a tripod!

Three of these are the original shots and the last one has been edited due to the color in the third.


My question for you is how well do you know your camera? Have you tried to take self portraits?

Thanks for looking.

Monday, May 25, 2009

Daddy's Arms

My Daddy has to go away,

I pray he returns to me another day.

He tickles, hugs and kiss me at night.

My Daddy loves to hold me tight,

I feel safe and warm in his arms,

As I sleep silently with out harm.

My Daddy leaves soon across the sea,

God keep him and return him to me.

by L. Grace Lauer

This is one of my favorite photos of my daughter when she was two. We took the kids out for one last family day before my Hubby deployed in the summer of 2007. It was taken after a long day at our favorite local amusement park, The Nut Tree. Sadly due to the economy this little amusement park in our little town has since closed down. We stopped at the ice cream shop after a long day of playing and ridding rides. Trinity passed out in her Daddy's arms. My Hubby sat there for the longest time just enjoying holding her. It was quite a sweet moment, one I will never forget.

This layout was created with the week 14 sketch from The Scrappiest Blog. Liz does such a great job over there coming up with inspiring sketches for us all. Go check it out to see what the other Design Team members have created.

Monday, May 18, 2009

Four Year Old Princess

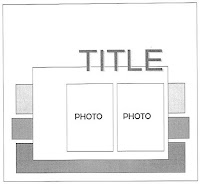
Happy Monday Everyone! I am so excited to show this layout to you. Like all of the layout I show you on Mondays this was inspired by a sketch from Liz over at The Scrappiest Blog. This weeks sketch was so much fun to create from. Though as I have said before I usually am not inspired by geometric shapes. I found this block style paper and got completely inspired. I was influenced by challenge from an online cyber crop over at Scrapparie.com. This challenge was to make your own patterned paper.
This is a photo of my sweet daughter licking the bottom of her candle from her birthday cake. Though the lighting in this photo is a bit off I love the photo itself. My daughter has been asking me to make her a pink page so I decided to do it monochromatic style with some influence from an Scrapbook News and Review publication call for May.

Journaling: (done in a pink Stampin' Up! marker)

Trinity is four years old. You call everything and everyone "Poppy" and you always have a "NooN" idea. You love to dance to Hawaiian music and practice rhythmic gymnastics. When in trouble you always give big hugs and kisses to get out of it. You are very expressive and have an explosive personality. You love to sing your own little made up songs. You zoom everywhere, my little social butterfly.

Ok so lets get rock'n on this description... it is going to be a long one!

Background: I started off with a white piece of 11 1/2" x 11 1/2" cardstock. Now I know it might be hard to believe but I did not have a light piece of pink patterned paper for this. So I created one. I know I said this was a monochromatic pink layout but ... hang in there here is what I did to create a pink bubble texture on this white cardstock. Note: Protect your counter and table by placing down a craft sheet or a protective table cloth.

1. I took a medium sized flat kitchen container about 9"x 7" and about 2" deep.
2. I added one cup of warm water
3. I added 1/2 a cup of liquid dish soap.

Yes yes I know ... you are thinking I am crazy on this one... stick with me here. I got this idea from a Crop Suey video. So you now have a dish with water so soapy you can wash dishes for a week. I then added several drops of red food dye.

4. Gently mix this in together.
5. I took a straw and blew into the water throughout the dish till they are about to over flow.

This created massive amounts of bubbles. Word of caution. Please ware eye protection...the bubbles pop and can get in your eyes. Once you have an almost overflowing dish of bubbles...

6. Take a paper towel and wipe it over the bubbles without touching the water at the bottom of the dish. This is to test the color of your water.
7. Let it dry. It will not take long and this will show you the true color of the water. Do not pop the bubbles on the paper towel either. Let them sit and pop on their own.
8. Add more color if you need too. Or water to lighten it. If you need to do this step test it again.

Once satisfied with the color then you will want to repeat steps 5 and 6 over and over (with the cardstock not the paper towel) till the paper is covered with the bubble texture. Try to add another color if you want to. Play around with this I loved it. I felt like my Mother was about to scold me not to blow bubbles in my soda, like when I was a kid. I even let my children play with this when I was done.

Taking a dark pink polka dot paper from Cosmo Cricket's Girl Friday line. I cut it into 4 - 1 1/2 " strips and punched one of the long sides with a Martha Stewart scalloped edge punch. I then adhered them to the back of my white bubble splattered cardstock. Making my finished edge 12" x 12". This also left me over 1/2 a sheet of the polka dot paper to use else where on the layout.

The next three layers were two DCWV (Die Cuts With a View) papers and one more of the bubble sheet. The back square layer (a medium pink) was cut at 9 1/2". The bubble square was cut at 9" both were then punched with a Martha Stewart edge punch. The block print patterned paper was cut at 7 3/4" and then gently inked with a pink. Center each layer on top of the other an place it off center and closer to the bottom of the large bubble background.

The Photo: This was printed as a 5"x7" and I cut it down to be a 5" square. I backed it with a square of the dark pink polka dot paper. Here is a tip. Knowing I wanted a punched edge only on one side I cut the height of the paper first. I had a piece 5 1/2" high by 12". I punched one of the 5 1/2" sides with my edge punch I used around the background paper. Then I measured and cut it square so I was left with a 5 1/2" square with one side punched. I did it this way because the edge punches cut off about 1/4" - 3/8". Punching first let me cut the width of this piece exactly the way I wanted it.

I embellished this photo with some glitter rub-ons on the corner. For one reason. My wonderful daughter had already stained her shirt and you could see it... so a rub on here and a rub on there. Tada! no more stain.

Embellishments: I used some glitter and bling pink flowers to be the main embellishment focus. I backed them with excess papers and cut them out. Then I also used a couple of Prima flowers to do back them also. I added some Prima bling and a some glitter rub-ons. As I was layering them up in the corner I decided to save a few of the small glitter flowers and one of the large ones to embellish the title.

The Title: The "FouR" was created with Colorbok chipboard covered with DCWV paper. I then glitter glued the different shades of pink in the patterned paper with pink and iridescent glitter glues by Studio G. I sanded the edges and colored it with a pink Stampin' Up! marker.
I stamped the "Year Old" in black on the excess bubble paper and colored it in with a Stampin' Up! marker and added iridescent glitter glue. I popped these up with pop dots.
I added the rub-ons thorough out the page and doodled on the flowers with my black fine point marker to tie in the black in the rub-ons and title a bit better.

I am all about making my own stuff I love how unique it makes my pages... either when I am making paper or creating my own embellishments.

Well thanks for hanging in there with me... phew! That was a long one. I hope you have the time to play with this extremely fun bubble technique! Let me know how it turns out!

I would love to know, in the spirit of creating my patterned paper it made me wonder if any of you have you ever created your own and if so how?

Saturday, May 16, 2009

Happily Ever After

Happy Saturday Everyone. Today I have been pretty busy. I am working on scrapbooking all weekend for a cyber crop with Scrapperie.com. I am loving the challenges. This one was for a tag team relay game for scrap lifting and oh my the fastest layout I have ever done!!! It took me less then an hour and a half! I would give you more details on this but I just wanted to share with you where I have been and a glimpse of what I have done this weekend. The crop does not end till Monday night so I will be pretty busy till then.
Oh on a side note I did get to run to Costco for food today... came home and decided to empty and clean my refrigerator... I hate doing that. However I feel I got something major accomplished other then scrapping ...lol. Have a great weekend!
I would love to know what your plans were this weekend. What did you do? Did you have fun? Who did you do it with? Love to hear from you all!!!

Monday, May 11, 2009

not forgotten...

Good Monday everyone! I was just going to post this for you all to see. I have created another sketch for Liz over at The Scrappiest Blog. This was our 12th sketch so far. 

I can not believe that we have been doing this for almost three months! This weeks sketch was pretty simple and I love that about her sketches. It leave room for creative interpretation. You should all go check out the wonderful layouts created by her design team. I love to see how we all came up with such different layouts. 


My layout is about remembering those soldiers who are POWs and MIAs. This was a picture of the table most military events have set up in honor and remembrance of them. The journaling card reads:

"AS YOU ENTERED THE BANQUET HALL THIS EVENING, YOU MAY HAVE NOTICED A SMALL TABLE HERE, IN A PLACE OF HONOR, NEAR OUR HEAD TABLE. IT IS SET FOR ONE (OR FOUR). PLEASE LET ME EXPLAIN. THE MILITARY CASTE IS FILLED WITH SYMBOLISM. THIS TABLE IS OUR WAY OF SYMBOLIZING THE FACT THAT MEMBERS OF OUR PROFESSION OF ARMS ARE MISSING FROM OUR MIDST. THEY ARE COMMONLY CALLED POW/MIA. WE CALL THEM "BROTHERS." THEY ARE UNABLE TO BE WITH US THIS EVENING AND SO WE REMEMBER THEM BECAUSE OF THEIR INCARCERATION."

"THIS TABLE SET FOR ONE (OR FOUR) IS SMALL -- SYMBOLIZING THE FRAILTY OF ONE PRISONER ALONE AGAINST HIS OPPRESSORS."

"THE TABLECLOTH IS WHITE -- SYMBOLIZING THE PURITY OF THEIR INTENTIONS TO RESPOND TO THEIR COUNTRY'S CALL TO ARMS. REMEMBER."

"THE SINGLE YELLOW ROSE -- SYMBOLIZING REMEMBRANCE -- DISPLAYED IN A VASE, REMINDS US OF THE FAMILIES AND LOVED ONES OF OUR COMRADES-IN-ARMS WHO KEEP FAITH AWAITING HIS RETURN, LEST WE FORGET. REMEMBER."

"THE RED RIBBON TIED SO PROMINENTLY ON THE VASE IS REMINISCENT OF THE RED RIBBON WORN UPON THE LAPEL AND BREASTS OF THOUSANDS WHO BEAR WITNESS TO THEIR UNYIELDING DETERMINATION TO DEMAND PROPER ACCOUNTING OF OUR MISSING. REMEMBER."

"A SLICE OF LEMON IS ON THE BREAD PLATE TO REMIND US OF THEIR BITTER FATE. REMEMBER."

"THERE IS SALT UPON THE BREAD PLATE -- SYMBOLIC OF THE FAMILIES TEARS AS THEY WAIT. REMEMBER."

"THE GLASS IS INVERTED, THEY CANNOT TOAST WITH US THIS NIGHT. REMEMBER."

"THE CHAIR -- THE CHAIR IS EMPTY -- THEY ARE NOT HERE. REMEMBER."

"REMEMBER, ALL OF YOU WHO SERVED WITH THEM AND CALLED THEM COMRADES. WHO DEPENDED UPON THEIR MIGHT AND AID AND RELIED UPON THEM, FOR SURELY, THEY HAVE NOT FORSAKEN YOU. (Quietly) REMEMBER."


I also wanted to share with you the purse I created to put my Mother's Gift into for Mother's Day. I finished this on Sat and she loved every inch of the mini album. I hope you all had a good Mother's Day and a wonderful weekend.

Thanks for shearing with me my creative journey.