Showing posts with label scrap room. Show all posts

Monday, February 27, 2012

Organize Your Ribbons and Fibers - Scraproom and Craft room Organization

Hello Organizers!
Challenge #12 Week #3 - Ribbons and fibers

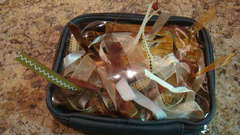
The biggest problem with these items is the potential of tangling and unraveling from the spool. The largest storage problem is the size that the spools take up. Because of these issues many scrapbookers remove the ribbon from their spools, especially if they collect a lot.

You will find most people sort them by color. However there are few that do it my MFG. It all depends on what way will be easiest for your brain to search and find what you need.

Storage Options for spools of ribbon:

Embellishment Center: http://www.scrapbook.com/gallery/?m=image& id=260185...

Cropper Hopper Embellishment Center:

Ribbon Storage By Candace M.

Handmade Ribbon Box: http://www.scrapbook.com/gallery/?m=image& id=259026...

SUPER CUTE CUPCAKE HOLDER: http://www.scrapbook.com/gallery/?m=image& id=253370...

SUPER CUTE CAKE STAND:
http://www.scrapbook.com/gallery/?m=image& id=245882...

SUPER CUTE BIRDCAGE:
http://www.scrapbook.com/gallery/?m=image& id=242602...

Craft locker: http://www.scrapbook.com/gallery/?m=image& id=759299...

Ribbon box: http://www.scrapbook.com/gallery/?m=image& id=108272...

Plastic Bins:
http://www.scrapbook.com/gallery/?m=image& id=124191...

Wire Shelves:
http://www.scrapbook.com/gallery/?m=image& id=142257...

Wire Prima Flower shelf used now for ribbon:
http://www.scrapbook.com/gallery/?m=image& id=239826...

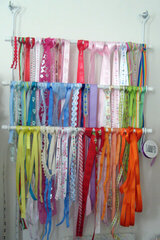
Curtain Rods: http://www.scrapbook.com/gallery/?m=image& id=238397...

Towel Rack (Behind the door): http://www.scrapbook.com/gallery/?m=image& id=197752...

In a Drawer:
http://www.scrapbook.com/gallery/?m=image& id=170872...

Vertical Pegs: http://www.scrapbook.com/gallery/?m=image& id=164391...

http://www.scrapbook.com/gallery/?m=image& id=892841...

Storage Options for removing them from the spools:

Pant Hanger (closet organizer): (This is mine)
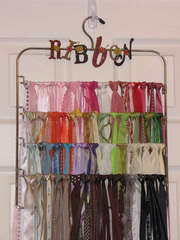
*PK GLITZ DT* Ribbon Rack Label By Hanging By A Moment

Easy Pulls Handmade:
My Edition of EZ Pull By Vh678

Ribbons on cards in a photo box: http://www.scrapbook.com/gallery/?m=image& id=259429...
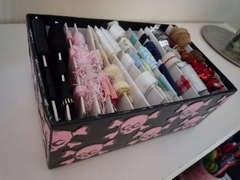
Ribbon box By SwedishDesign

SUPPER CUTE AND CLEVER RIBBON TREE: http://www.scrapbook.com/gallery/?m=image& id=258047...

Coat Hanger:
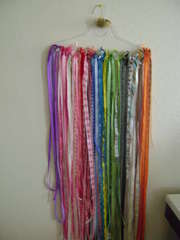
ribbon storage By Greenqueen

Towel Rack (behind the door):
Ribbon Storage By Sarah-Scraps

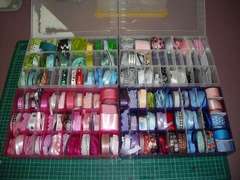
Embroidery floss plastic boxes:
Ribbon storage By Jennie_C_vetc

In Jars (though I would worry about creasing):
http://www.scrapbook.com/gallery/?m=image& id=159043...

Shoe rack (Door Hanger):
http://www.scrapbook.com/gallery/?m=image& id=142326...

Card and paper clips: http://www.scrapbook.com/gallery/?m=image& id=145223...

On Rings:
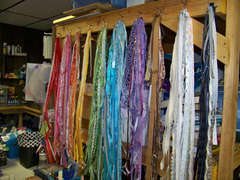
collected By Northernmemories

Close up of he rings:
http://www.scrapbook.com/myplace/index.php?mod=gallerie...

Clothes pins and Jars:  (this is mine)
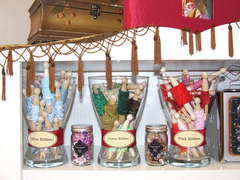
Fibers Storage By Hanging By A Moment
Photobucket
 Pin It

Monday, February 6, 2012

Challenge #3 - Week #1 - (Monday) Color Altering Items

Challenge #3 - Week #1 - (Monday) Color Altering Items - Inks, pens, mists and paints.

This is the day we sort out our colors! Any color altering items or ink.

Color Altering Items Challenge #2 By Hanging By A Moment

Lets discuss and figure out what we are going to do with these items.


  • Pens - Storing Scrapbook Pens and Markers (quoted from scrapbook.lifetips .com)
    "One of the most important things to remember when storing pens and markers is to store them horizontally so that the ink flows evenly. Most people may be inclined to buy containers that stand vertically, but storing them this way will make all the ink flow to one end. If the ink is at one end of the pen or marker they may not last as long or work as well. Storage drawers will allow the markers and pens to be stored horizontally. You can leave your markers in their original box and store them in a desk drawer or plastic organizer drawer.

    Another suggestion is to buy a marker storage case that holds pens and markers; these cases are portable and make it easy to keep all of your coloring and writing utensils in the same place for quick access."

    Once you have decided where to store them you will need to TEST every pen quickly to make sure they still work. Trash the ones that don't! Make a list in your binder of ones that need to be replaced.

    Sort pens by: Color or color families

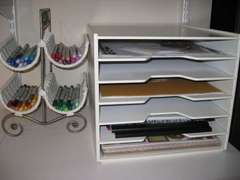
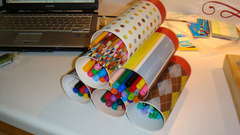
    Storage Solutions: Organized within a drawer, wine bottle holder, Altered Cylinder containers form the kitchen.

    ZIG Pen Storage and In-Progress Paper Shelves By Reyasunshine

    PVC PIPES - http://www.scrapbook.com/gallery/image/scrapro om/257893...

    Mason Jars - http://www.scrapbook.com/gallery/?m=image& id=222965...

    Crystal Light Containers: My Alteration Project! By Vh678

    Plastic 1$ pen boxes: http://www.scrapbook.com/gallery/?m=image& id=377743...

    Acrylic cups: http://www.scrapbook.com/gallery/?m=image& id=377743...

  • Ink pads and refills - (quoted from Scrapjazz)
    "Ink pads are best stored flat. Each pad is filled with liquid ink, and this ink can travel throughout the pad over time if not stored properly. For example, if you stored your ink pads vertically, over time the ink would drop to the bottom edge of the pad, and you would no longer be able to get a fully-inked image when you tried to use the full surface of your ink pad. For this same reason, it is highly recommended that you store your ink pads upside down (unless you have Stampin' Up they already are designed to do this). This will keep the ink flow at the surface of the pad, rather than allowing the ink to seep down to the bottom. This is especially important for dye-based ink pads, as this ink is thinner than some other inks and will migrate through the pad at a faster rate. Ink pads containing thicker inks, such as pigment ink, can be stored face up."

    How to sort your in pads? - By color, manufacture, ink type or size

    Storage solutions:


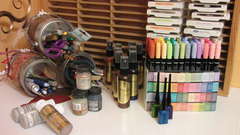
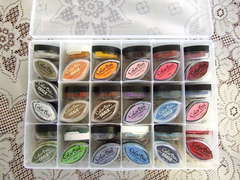
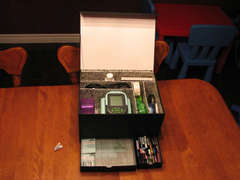
    Wooden Cassette holder - (top half of photo, its fuller now I will get a new pick when I am done with this challenge) Color Center By Hanging By A Moment

    Cat Eye Storage *response to forum thread* By Kanary

    custom built holder, store bought rotating caddies, or simply stack on a shelf (make several smaller stacks. This will make it easier to access without towers of inks toppling down when you need the bottom color.)

    Ink pads can be cumbersome at your workstation. Most people store them off to the side. Why not have a reference guide at your table so you know exactly what color you will need?

    This is a MUST SEE IMAGE of a great Color Swatch for your Inks.


  • Mists/Paints - These can be stored or displayed nicely on a shelf. Putting them in a color order would make it appealing. If you have the mini misters you can store them on a counter top in the store bought holder or have your resident handy man drill some holes into a block of wood and don't forget to alter it to match your space decor.

    Shadow Box storage: http://www.scrapbook.com/myplace/index.php?mod=gallerie...

    Mini Mister holder: http://www.scrapbook.com/gallery/?m=image& id=253612...

    Drawer Sorage: Though I love the organization of this option I don't like not seeing the colors of the mists. Maybe if you put a dot sticker (used for yard sale pricing, found at Walmart) You can spray it as a sample and stick it to the top of the lid.

    Shelf Unit... simply maid yet holds so much!


  • Other (?) - Did I miss anything? Please bring it to my attention.

REMEMBER:
Always leave room for your stuff to grow!!! Especially you collectors!

Have fun and hey! Maybe you can alter something to store your pens in... Get creative!Photobucket

Wednesday, February 1, 2012

Scraproom Makeover/Organization - Adhesives

Challenge #1 Week #1 - Adhesives - This challenge is begin hosted and discussed on Scrapbook.com

Things to know:


The key here is to always make sure that what ever adhesive you are using you need to make sure it is Acid Free. (This includes you glitter glue!!) No point in working so hard creating a beautiful album of fabulous pages for your family to have forever just to run those pages over time with the wrong adhesive. Here are 10 different types of adhesives. If you have not herd of some please ask and I would be happy to share. There are probably more out there too so let's enlighten each other on the wonderful world of things that stick.

There are many different types of adhesives and they are used for many different things. Here is a good reference list. (excerpts of an article on http://www.xomba.com/10_types_scrapbooking _adhesives )

  • Dimensional - usually a foam center between two pieces of adhesive; gives dimension to your page, be it photos or embellishments.
  • Dots (also called tabs) - small pieces of adhesive, usually found in a roll or on cards, that are perfect for attaching small embellishments like buttons, chipboard letters, or acrylic items.
  • Liquid - often quick drying with an even consistency, good as a multi-purpose adhesive for scrapbooking.
  • Multi-purpose - handles multiple types of media used in scrapbooking (paper, fabric, chipboard, embellishments); a good choice for a beginner.
  • Permanent - when you want your photos and embellishments to stick forever, permanent is the way to go. Comes in a variety of formats (including dots, liquids, glue sticks, and sheets), and cannot be moved. Ever.
  • Re-positionable - allows you to move pieces of your layout for a short amount of time before they become affixed to the page. This also comes in a variety of forms.
  • Runners (also called tape runners) - easy application, allows for control over the amount used. These also work on a variety of media types.
  • Sheets - used to create stickers, often used with a machine. When used with a machine, great for die-cuts and paper letters.
  • Spray - use for "invisible" hold, for items like vellum or transparencies.
  • Stick - easy application, works well with a variety of surfaces and media. A very good choice for a beginning scrapbooker.
Storage Solutions: Basket or drawer on or in your desk, hanging them up on the wall in front of you, photo box etc.

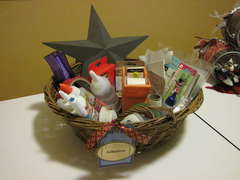
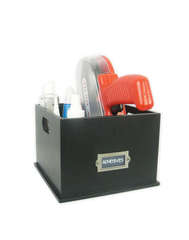
Storage basket: Adhesive basket By Hanging By A Moment

Storage Crate: Altered Kasiercraft Storage Crate By Jill

Adhesive shelf: http://www.scrapbook.com/gallery/?m=image& id=254405...

Desk organizer: Slice and Adhesives Storage By Mercytiara

Drawer: Adhesive Drawer by AuntJo

Glue Caddy:  http://distressedscrapper .com/2011/09/06/altered-he lmar... has a post about storing it upside down and the Glue Caddy found on Etsy: http://www.etsy.com/search/handmade?search_submit=&q=glue+caddy&view_type=gallery&ship_to=US

The key with storing these is to have them within arms reach NO ONE can create any paper crafts without adhesives.

Tips:
  • Check for any that might need refills soon. Add them to your shopping list.
  • Clean up all tips and ones that have adhered themselves to something. Make sure they are all in ready to use condition.
  • Trash - all glue that is drying up or tapes that are no longer sticky even adhesives that you just simply don't like. You will just end up throwing it away later once it is dried up... so why store it until then?
  • Liquid glue - can have bubbles in it when you are trying to apply it to your work. To keep this from happening so much try storing it upside down... JUST MAKE SURE IT IS FULLY CLOSED so it does not leak... YIKES!!!
So lets clean up and organize these items, find a "within arms reach" spot for them and purge those unused or unusable.

You can do it!

PS... here is my adhesive basket this year:  I have an Helmar Habit I think! LOL!


 Photobucket