Showing posts with label craft room. Show all posts

Monday, February 27, 2012

Organize Your Ribbons and Fibers - Scraproom and Craft room Organization

Hello Organizers!
Challenge #12 Week #3 - Ribbons and fibers

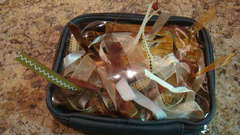
The biggest problem with these items is the potential of tangling and unraveling from the spool. The largest storage problem is the size that the spools take up. Because of these issues many scrapbookers remove the ribbon from their spools, especially if they collect a lot.

You will find most people sort them by color. However there are few that do it my MFG. It all depends on what way will be easiest for your brain to search and find what you need.

Storage Options for spools of ribbon:

Embellishment Center: http://www.scrapbook.com/gallery/?m=image& id=260185...

Cropper Hopper Embellishment Center:

Ribbon Storage By Candace M.

Handmade Ribbon Box: http://www.scrapbook.com/gallery/?m=image& id=259026...

SUPER CUTE CUPCAKE HOLDER: http://www.scrapbook.com/gallery/?m=image& id=253370...

SUPER CUTE CAKE STAND:
http://www.scrapbook.com/gallery/?m=image& id=245882...

SUPER CUTE BIRDCAGE:
http://www.scrapbook.com/gallery/?m=image& id=242602...

Craft locker: http://www.scrapbook.com/gallery/?m=image& id=759299...

Ribbon box: http://www.scrapbook.com/gallery/?m=image& id=108272...

Plastic Bins:
http://www.scrapbook.com/gallery/?m=image& id=124191...

Wire Shelves:
http://www.scrapbook.com/gallery/?m=image& id=142257...

Wire Prima Flower shelf used now for ribbon:
http://www.scrapbook.com/gallery/?m=image& id=239826...

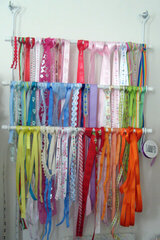
Curtain Rods: http://www.scrapbook.com/gallery/?m=image& id=238397...

Towel Rack (Behind the door): http://www.scrapbook.com/gallery/?m=image& id=197752...

In a Drawer:
http://www.scrapbook.com/gallery/?m=image& id=170872...

Vertical Pegs: http://www.scrapbook.com/gallery/?m=image& id=164391...

http://www.scrapbook.com/gallery/?m=image& id=892841...

Storage Options for removing them from the spools:

Pant Hanger (closet organizer): (This is mine)
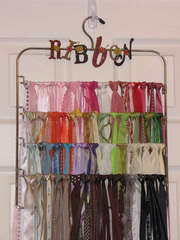
*PK GLITZ DT* Ribbon Rack Label By Hanging By A Moment

Easy Pulls Handmade:
My Edition of EZ Pull By Vh678

Ribbons on cards in a photo box: http://www.scrapbook.com/gallery/?m=image& id=259429...
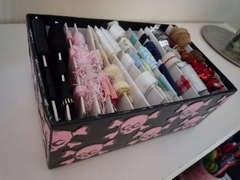
Ribbon box By SwedishDesign

SUPPER CUTE AND CLEVER RIBBON TREE: http://www.scrapbook.com/gallery/?m=image& id=258047...

Coat Hanger:
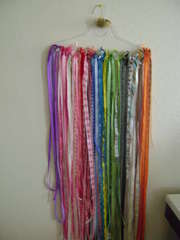
ribbon storage By Greenqueen

Towel Rack (behind the door):
Ribbon Storage By Sarah-Scraps

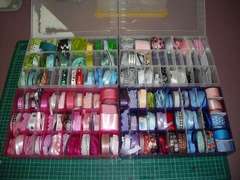
Embroidery floss plastic boxes:
Ribbon storage By Jennie_C_vetc

In Jars (though I would worry about creasing):
http://www.scrapbook.com/gallery/?m=image& id=159043...

Shoe rack (Door Hanger):
http://www.scrapbook.com/gallery/?m=image& id=142326...

Card and paper clips: http://www.scrapbook.com/gallery/?m=image& id=145223...

On Rings:
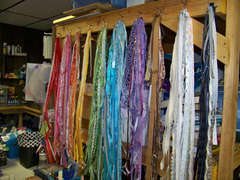
collected By Northernmemories

Close up of he rings:
http://www.scrapbook.com/myplace/index.php?mod=gallerie...

Clothes pins and Jars:  (this is mine)
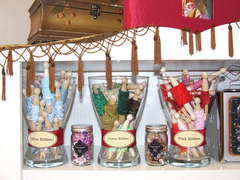
Fibers Storage By Hanging By A Moment
Photobucket
 Pin It
Sunday, February 26, 2012

Organize your Buttons/Metals, Eyelets, brads, etc. Challenge #11 Scraproom and Craft room

Challenge #11 Week #3 - Buttons/Metals, Eyelets, brads, etc.

I know some of you are done with this (woo hoo a night off for you). Today we are going after all our little pieces, Itty bitty embellishments.

Lets go over really quick all those types of little pieces.

Buttons: Some of us are at a loss of what to do with them so here is an article excerpt from Ezine @rticles it is written by Christine Perry

    Buttons are not just for clothing. It's unclear when scrapbooking with buttons began as a trend. Even in early scrapbook albums, it wasn't unusual to see a button placed on a scrapbooking page. Quite often it was a keepsake button, like from a vintage piece of clothing or a baby girl's first dress. As scrapbooking pages started to become more 3-D and scrappers looked for unique embellishments for their pages, buttons became more popular. Manufacturers started offering buttons to coordinate with their paper lines, and buttons with themes like Christmas and sports became available. Monthly scrapbooking kits and page kits often include complementary buttons as part of their packages. Consider these tips for using buttons on your pages.

    1. Buttons lined up together can make a border for your scrapbooking page layouts.

    2. Place buttons in your titles by using them to dot your "i"s. You can also use them as the center of letters like "o" and "p."

    3. Buttons can be secured to a page using embroidery floss by sewing it onto the page.

    4. Glue dots work very well to adhere larger-sized buttons to a page, as well as buttons that are not flat on the bottom.

    5. A few buttons make nice accents to anchor a ribbon border to a page. Again, glue dots will securely attach the buttons to the ribbon.

    6. Try placing a button on the flap of an envelope to decorate a simple page element.

    7. Flowers are still very popular on scrapbooking pages. Silk or paper flowers come in all sizes and colors now. A button makes a perfect center for a flower. An added benefit is that the button can hide the adhesive that typically shows through a paper flower.

    8. Take 4 small buttons and attach them to the 4 corners of a photograph. The buttons will look like they are holding the photo to the page.

    9. Create a bullet list for journaling. Use buttons as the bullets.

    10. Scrapbooking tags can be used for page elements, photo mats, and journaling blocks on a scrapbooking page. You can use a button to decorate the hole at the top of a tag.

    11. Try placing a button on a page and then hanging the string from a scrapbooking tag from it as an anchor.

    12. An antique, vintage or unusual button can be used individually on a page as a page element all its own. Try double matting the button to highlight it on your layout.

    13. Attach a button to a page with the holes empty, or thread some floss through the holes and tie it in a knot or bow for an added accent.

    14. Don't limit yourself to one size of buttons on your page layout. Mix sizes and styles of buttons. You could stay with the same color, but have a variety of different buttons in that same color on a single page.

    15. Buttons can be memorabilia. Save buttons from shirts, handbags, hats and other clothing that have sentimental value, but that you no longer can use. The buttons can be added to a scrapbooking page to remember the times when you wore those items. Baby buttons look cute on a baby page layout as well.


Metals: These will be your clips, hinges, keys, name plates, tabs, wire, frames, staples, tags etc. Anything that is metal (accept brads and eyelets). Some of you may not have any of these... I love adding metal to my pages but I always forget I have them. They are stuffed in the back of a drawer. Lets take some time to organize them.

Eyelets: These are great for lacing ribbon techniques or just adding color and texture to you page. They are the metal and have a hole in the middle. These items that take a cropadile or two tools to set them into your paper. They come in all shapes and several sizes. I have seen a few that don't have the hole in the middle but that is rare.

Brads: Are the ones with the two prongs on the back of the metal shape. They have no holes usually but I have seen them mimic eyelets every now and then. The prongs are pointy and can pierce the paper then be folded back behind the sheet to secure the item onto your page or card. They are colorful and can add a little extra pop to your work.

Beads: There are various beads being used in the scrapbooking world too. These are also used on flowers, strung with wire or even the micro beads that are adhered like glitter with adhesive to your project. Beads come in glass and plastic and can add a 3-D sparkle by catching the light with their commonly shinny surfaces.

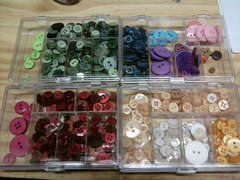
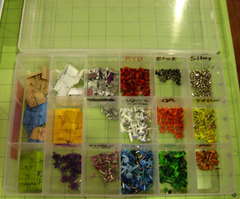
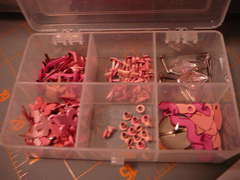
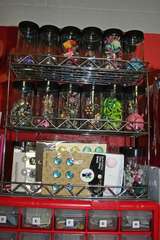
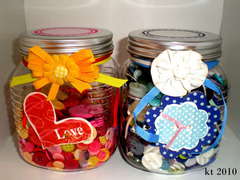
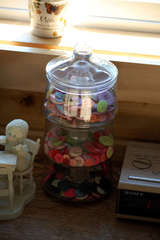
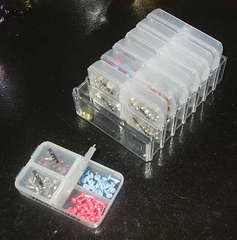
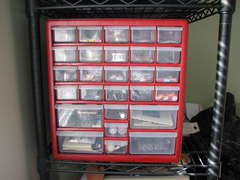
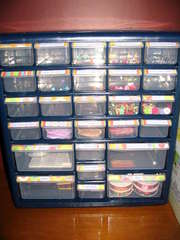
STORAGE SOLUTIONS: The majority of these are tiny and micro sized so we are going to be looking at much smaller options for storage today. You will need to decide if you want to sort them by color or by style, MFG, shape or size.

     
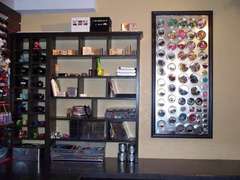
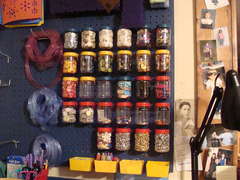
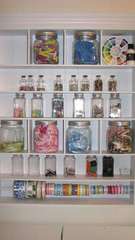
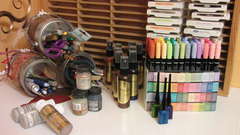
    Here is mine they have not changed from last year:


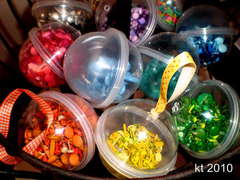
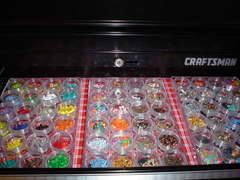
What I truly love about most of these is you can think outside the Box store and create a trash to treasure by using something you would find at a thrift store, garage sale, Craig list or for free from your kitchen. Even the metal storage tins on the metallic board. Try using a cookie sheet and some wedding treat tins, adding magnets on the back. Have fun!
  Photobucket
 Pin It
Sunday, February 19, 2012

Organize your Scraproom - Kits, Scrap paper, die cuts Challenge

Challenge #9 Week #3 PART 2 - Kits, Scrap paper, and die cuts

Several of you have already begun sorting a few of these categories. So we will be going over them quickly.

KITS: Most kits come packaged in large Ziploc or cellophane baggies. Kits are coordinated and work best if you can keep them together until you use them. They are great for crops those times when you want to produce something quickly. Since most kits will included a color scheme and multiple MGS I would suggest sorting them by theme or kit club you received them from.

You can create you own kits if you wish out of your stash or you can purchase them from various companies and kit-clubs online or at your LSS.

Storage Solutions:
See last challenge for standard paper storage... for example you can have a vertical cropper hopper just for kits, etc.

Clip it up: http://www.scrapbook.com/gallery/?m=image& id=229442...

A shelf: http://www.scrapbook.com/gallery/?m=image& id=222679...

Wire tower of drawers categorized by theme:
http://www.scrapbook.com/gallery/?m=image& id=140018...

SCRAPS: Scraps are a nuisance but since most of scrapbooks are part "collector" then we tend to save them for a rainy day or we pawn them off on our kids. LOL.

Scraps should be sorted like you sorted your PP and CS... if you did that by color then sort the scraps by color. If you did it by theme then ... sort your scraps by theme...etc.

BE REALISTIC!!! Only keep the scraps you know you will use... for example if you cut up 1/2 of a 12x12 piece of paper then you have a 6x12 scrap that can be used on a smaller page, run through a cricut or even to make cards. Don't keep (and I am guilty of this) a random shaped piece of paper big enough for one punch from a decorative punch. What I have come to decide is, if I want to save every little piece is this rule:

    It must be at least 4.25"x5.5" to keep in my sorted scraps or I take my punches and punch flowers or hearts or leaves etc. and sort those into my die cuts.

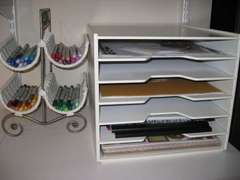
Fallowing this rule keeps my scrap storage organized by size and only usable scraps are saved. My punches and die cut shapes are there for me and my kids to purge at our leisure.

Storage solutions:
Storage Photo Box: If your determined to use the scraps as photo mats or cards then this will work for you: http://www.scrapbook.com/gallery/?m=image& id=245336...

Scrap storage By Lifeinthefastlane

File drawer (vertical storage): http://www.scrapbook.com/gallery/?m=image& id=228950...

File Container:
http://www.scrapbook.com/gallery/?m=image& id=139643...

Plastic drawers (horizontal storage): http://www.scrapbook.com/gallery/?m=image& id=222969...

Shelves: Ziploc: Scrap paper storage By Shirleyanne4557

Cropper Hopper: Ziploc:
Storage for Paper scraps. By Ande

Ziploc hanging on the back of the door: Scraproom Re-org - Photo 6 By Deend31

Scrapease file system: Scrap-eze - way to organize your scraps By TriciaH

Binders: (one of the most inexpensive ways to go)
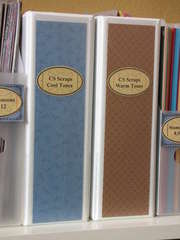
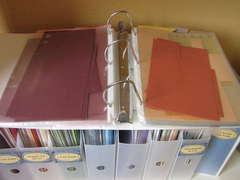
Scrap paper storage By Hanging By A Moment inside my scrap paper binders By Hanging By A Moment

DIE CUTS:
Extra die cuts and punches are another batch of little items to sort like chipboard. The majority of the time they are not too large (especially the extra punches). There are not many examples of how to store this on this site's gallery... here is an idea of a container I would use to store my smaller die cuts and extra punched papers... (like I said before I do tend to collect extra punched papers from my smaller scraps before I throw them away).

Plastic divided container: http://www.scrapbook.com/gallery/?m=image& id=315379...

Baseball card binder: http://www.vanillajoy.com/die-cut-shape-storage -idea.ht...

In this article: http://www.scrapjazz.com/topics/Organization/E mbellishm... they suggest that you do this...

    Storage Solution:
    To protect your die cuts and stickers and still keep them visible when you want flip through and access them, use clear storage pages. I used baseball card holders, 4 x 6 photo sleeve pages, 5 x 7 photo sleeve pages, full page protectors or special plastic pages made for accent storage. All these options were available at my local Wal-Mart and other discount stores. Any of these pages will fit in standard 3-ring binders.

Storage bins like these work great too: http://www.accucut.com/Die_Cut_Storage_Bins- c309-p2,309...

Does anyone else have a storage solution to share? I am hoping this will be an easy challenge for you all tonight since we are tackling our paper storage this week.

 Photobucket

Wednesday, February 15, 2012

Patterned Paper & Cardstock Organization Challenge

Challenge #8 Week #2 PART 1 - Patterned Paper/ Cardstock

Every single one of us has it... but is it working for you the way you have it organized?

THE KEY TO GOOD PATTERNED PAPER ORGANIZATION IS TO: have it organized to match your train of thought.

HORIZONTAL OR VERTICAL?(from http://www.creative-scrapbook-layout s.com/scrapbook_pap...

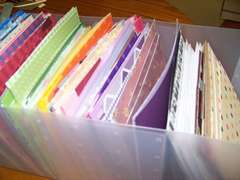
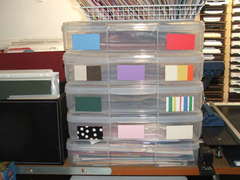
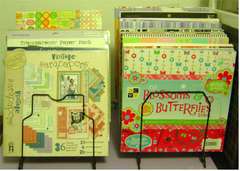
"Scrapbook Paper Storage Idea #1: Horizontal Paper http://www.scrapbook.com/gallery/?m=image& id=257936...

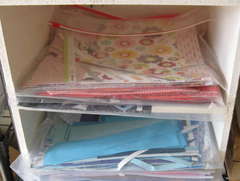
Most scrapbook stores will store their paper horizontally because they have the room for rows and rows of shelves and racks. Now, most of us don't have room for all those shelves, but horizontal storage is still a possibility with 12" x 12" plastic snap top cases. You can buy them individually or as part of a three-drawer or six-drawer cart, so you can make the most use out of your vertical space.

Racks: http://www.scrapbook.com/gallery/?m=image& id=257017...

Wire cubes: http://www.scrapbook.com/gallery/?m=image& id=226956...

Cubes: http://www.scrapbook.com/gallery/?m=image& id=251533...

Scrapbook Paper Storage Idea #2: Vertical Paper http://www.scrapbook.com/gallery/?m=image& id=258040...

Depending on your preferences, you can use traditional magazine storage files for 8.5" x 11" paper (or on your scrapbook table to store scrap paper), but you will have to get special storage files for 12" x 12" scrapbook paper. Vertical paper storage is best for cardstock or other papers that you will be accessing frequently because you can just slide the storage file out and pick the paper you need.

These paper holders also come with dividers, so you can store multiple colors within a singe file! Just one thing to keep in mind is that you will need very tall shelves if you plan on using these vertical storage files in a bookshelf."

Baskets: http://www.scrapbook.com/gallery/?m=image& id=250118...

Cubes vertical: http://www.scrapbook.com/gallery/?m=image& id=250438...

Files: http://www.scrapbook.com/gallery/?m=image& id=888475...

HOW TO ORGANIZE IT - Now that you have thought about WHAT to store them in lets talk about HOW...

Cardstock - seem simple enough, by color right or brand? But what about those patterned papers? Do you Separate your cardstock from your patterned paper? Or would it work better for you if you had all the pink patterned paper then pink cardstock together?

Patterned Papers -

    1) By color - Are you the type that reaches for the color first when you need something in your scraproom? Within each color do you organize it from lighter to darker colors?

    Cropper hoppers by color:
    Scraproom Re-org - Photo 5 By Deend31

    http://www.scrapbook.com/gallery/?m=image& id=130054...

    http://www.scrapbook.com/gallery/?m=image& id=210448...

    2) By Brand - do you have a great memory for brands. Do you think to your self when you are scrapping..."that rust and white flourish paper from the Everafter line that Cosmo Cricket put out would be perfect!" If so they by Brand and collection would be the way for you to organize.

    Great way to organize by collection and brand if you like to keep them in their stacks...
    Paper storage By Missqueen

    3) By Theme and Pattern - Are you a graphic scrapper? One who knows they need a stripe or a polka-dot paper to balance out the floral you just picked as the background paper. Or do you scrap by theme a lot. Maybe you create a lot of mini albums or you prefer ballet shoe paper for your little princesses recital page.


There ya go... these are the best ways to organize it... now you can do it in sub categories... say you want to organize it by Brand but within each brand you want it by theme or color. Maybe it is by color first and within that color it is by pattern and theme. That works too but one of these three will be the Main way you will organize with a possible sub category.

Consider size - do you sort the scraps (if you separate these from your full sheets we will go over how to store them latter this week) into your full sheets or maybe you buy 6x6 paper. Do you sort it into your 12x12? That is up to you. Just keep in mind that when you are working on a 12x12 page you can't always use the 6x6.

THINGS YOU SHOULD KNOW...

    1) never store in direct sunlight preferably a cool, dry place

    2)
    Store it completely separate from other supplies. If you mix them you are undoubtedly asking for creasing or tearing.

    3)When looking for storage make sure that you choose a container that fits a 12x12 piece of paper or a 8x8, if that is your size preference. Keeping the paper fitting snugly will keep it from getting bent or damaged.

    4)If you keep it organized it will lead to an easier scrapbooking experience. So make sure you keep it organized.


You can store them on shelves without organizational units. Keep in mind though that they will slip easily and have a chance of making a mess. Storing horizontally with out organizers creates the same problem. When you need one near the bottom all the others will begin to fall and it becomes one large balancing act.

**** Don't have the cash to fork out for these organizers? Try these almost free solutions -

Horizontal: http://www.scrapbook.com/gallery/?m=image& id=65087&...

Vertical: http://www.scrapbook.com/gallery/?m=image& id=123371...

Step by step instructions: http://www.wescrap.com/scrapbooking-resource s/tutorials...

JUST TO DROOL OVER....

Scraproom Challenge By Ande

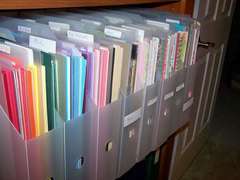
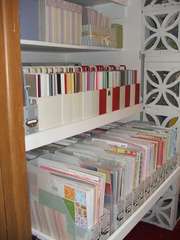
 Here is my patterned paper and cardstock. I organize by "P(pink cause I have a girl) ROYGBIV N(neutrals such as black, grey, white and shades of brown)" Patterned paper on the left of the divider and CS on the right in each cropper hopper. 12x12 on the top, 8.5 x11 on the bottom left and scraps and chipboard in the binders on the right.


 Photobucket

Monday, February 6, 2012

Challenge #3 - Week #1 - (Monday) Color Altering Items

Challenge #3 - Week #1 - (Monday) Color Altering Items - Inks, pens, mists and paints.

This is the day we sort out our colors! Any color altering items or ink.

Color Altering Items Challenge #2 By Hanging By A Moment

Lets discuss and figure out what we are going to do with these items.


  • Pens - Storing Scrapbook Pens and Markers (quoted from scrapbook.lifetips .com)
    "One of the most important things to remember when storing pens and markers is to store them horizontally so that the ink flows evenly. Most people may be inclined to buy containers that stand vertically, but storing them this way will make all the ink flow to one end. If the ink is at one end of the pen or marker they may not last as long or work as well. Storage drawers will allow the markers and pens to be stored horizontally. You can leave your markers in their original box and store them in a desk drawer or plastic organizer drawer.

    Another suggestion is to buy a marker storage case that holds pens and markers; these cases are portable and make it easy to keep all of your coloring and writing utensils in the same place for quick access."

    Once you have decided where to store them you will need to TEST every pen quickly to make sure they still work. Trash the ones that don't! Make a list in your binder of ones that need to be replaced.

    Sort pens by: Color or color families

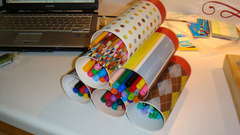
    Storage Solutions: Organized within a drawer, wine bottle holder, Altered Cylinder containers form the kitchen.

    ZIG Pen Storage and In-Progress Paper Shelves By Reyasunshine

    PVC PIPES - http://www.scrapbook.com/gallery/image/scrapro om/257893...

    Mason Jars - http://www.scrapbook.com/gallery/?m=image& id=222965...

    Crystal Light Containers: My Alteration Project! By Vh678

    Plastic 1$ pen boxes: http://www.scrapbook.com/gallery/?m=image& id=377743...

    Acrylic cups: http://www.scrapbook.com/gallery/?m=image& id=377743...

  • Ink pads and refills - (quoted from Scrapjazz)
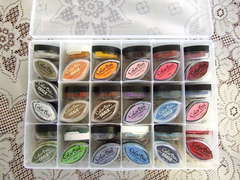
    "Ink pads are best stored flat. Each pad is filled with liquid ink, and this ink can travel throughout the pad over time if not stored properly. For example, if you stored your ink pads vertically, over time the ink would drop to the bottom edge of the pad, and you would no longer be able to get a fully-inked image when you tried to use the full surface of your ink pad. For this same reason, it is highly recommended that you store your ink pads upside down (unless you have Stampin' Up they already are designed to do this). This will keep the ink flow at the surface of the pad, rather than allowing the ink to seep down to the bottom. This is especially important for dye-based ink pads, as this ink is thinner than some other inks and will migrate through the pad at a faster rate. Ink pads containing thicker inks, such as pigment ink, can be stored face up."

    How to sort your in pads? - By color, manufacture, ink type or size

    Storage solutions:


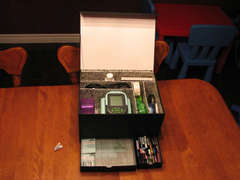
    Wooden Cassette holder - (top half of photo, its fuller now I will get a new pick when I am done with this challenge) Color Center By Hanging By A Moment

    Cat Eye Storage *response to forum thread* By Kanary

    custom built holder, store bought rotating caddies, or simply stack on a shelf (make several smaller stacks. This will make it easier to access without towers of inks toppling down when you need the bottom color.)

    Ink pads can be cumbersome at your workstation. Most people store them off to the side. Why not have a reference guide at your table so you know exactly what color you will need?

    This is a MUST SEE IMAGE of a great Color Swatch for your Inks.


  • Mists/Paints - These can be stored or displayed nicely on a shelf. Putting them in a color order would make it appealing. If you have the mini misters you can store them on a counter top in the store bought holder or have your resident handy man drill some holes into a block of wood and don't forget to alter it to match your space decor.

    Shadow Box storage: http://www.scrapbook.com/myplace/index.php?mod=gallerie...

    Mini Mister holder: http://www.scrapbook.com/gallery/?m=image& id=253612...

    Drawer Sorage: Though I love the organization of this option I don't like not seeing the colors of the mists. Maybe if you put a dot sticker (used for yard sale pricing, found at Walmart) You can spray it as a sample and stick it to the top of the lid.

    Shelf Unit... simply maid yet holds so much!


  • Other (?) - Did I miss anything? Please bring it to my attention.

REMEMBER:
Always leave room for your stuff to grow!!! Especially you collectors!

Have fun and hey! Maybe you can alter something to store your pens in... Get creative!Photobucket

Wednesday, February 1, 2012

Scraproom Makeover/Organization - Adhesives

Challenge #1 Week #1 - Adhesives - This challenge is begin hosted and discussed on Scrapbook.com

Things to know:


The key here is to always make sure that what ever adhesive you are using you need to make sure it is Acid Free. (This includes you glitter glue!!) No point in working so hard creating a beautiful album of fabulous pages for your family to have forever just to run those pages over time with the wrong adhesive. Here are 10 different types of adhesives. If you have not herd of some please ask and I would be happy to share. There are probably more out there too so let's enlighten each other on the wonderful world of things that stick.

There are many different types of adhesives and they are used for many different things. Here is a good reference list. (excerpts of an article on http://www.xomba.com/10_types_scrapbooking _adhesives )

  • Dimensional - usually a foam center between two pieces of adhesive; gives dimension to your page, be it photos or embellishments.
  • Dots (also called tabs) - small pieces of adhesive, usually found in a roll or on cards, that are perfect for attaching small embellishments like buttons, chipboard letters, or acrylic items.
  • Liquid - often quick drying with an even consistency, good as a multi-purpose adhesive for scrapbooking.
  • Multi-purpose - handles multiple types of media used in scrapbooking (paper, fabric, chipboard, embellishments); a good choice for a beginner.
  • Permanent - when you want your photos and embellishments to stick forever, permanent is the way to go. Comes in a variety of formats (including dots, liquids, glue sticks, and sheets), and cannot be moved. Ever.
  • Re-positionable - allows you to move pieces of your layout for a short amount of time before they become affixed to the page. This also comes in a variety of forms.
  • Runners (also called tape runners) - easy application, allows for control over the amount used. These also work on a variety of media types.
  • Sheets - used to create stickers, often used with a machine. When used with a machine, great for die-cuts and paper letters.
  • Spray - use for "invisible" hold, for items like vellum or transparencies.
  • Stick - easy application, works well with a variety of surfaces and media. A very good choice for a beginning scrapbooker.
Storage Solutions: Basket or drawer on or in your desk, hanging them up on the wall in front of you, photo box etc.

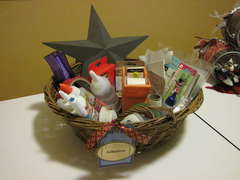
Storage basket: Adhesive basket By Hanging By A Moment

Storage Crate: Altered Kasiercraft Storage Crate By Jill

Adhesive shelf: http://www.scrapbook.com/gallery/?m=image& id=254405...

Desk organizer: Slice and Adhesives Storage By Mercytiara

Drawer: Adhesive Drawer by AuntJo

Glue Caddy:  http://distressedscrapper .com/2011/09/06/altered-he lmar... has a post about storing it upside down and the Glue Caddy found on Etsy: http://www.etsy.com/search/handmade?search_submit=&q=glue+caddy&view_type=gallery&ship_to=US

The key with storing these is to have them within arms reach NO ONE can create any paper crafts without adhesives.

Tips:
  • Check for any that might need refills soon. Add them to your shopping list.
  • Clean up all tips and ones that have adhered themselves to something. Make sure they are all in ready to use condition.
  • Trash - all glue that is drying up or tapes that are no longer sticky even adhesives that you just simply don't like. You will just end up throwing it away later once it is dried up... so why store it until then?
  • Liquid glue - can have bubbles in it when you are trying to apply it to your work. To keep this from happening so much try storing it upside down... JUST MAKE SURE IT IS FULLY CLOSED so it does not leak... YIKES!!!
So lets clean up and organize these items, find a "within arms reach" spot for them and purge those unused or unusable.

You can do it!

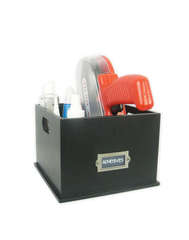
PS... here is my adhesive basket this year:  I have an Helmar Habit I think! LOL!


 Photobucket