Challenge #11 Week #3 - Buttons/Metals, Eyelets, brads, etc.
I know some of you are done with this (woo hoo a night off for you). Today we are going after all our little pieces, Itty bitty embellishments.
Lets go over really quick all those types of little pieces.
Buttons: Some of us are at a loss of what to do with them so here is an article excerpt from Ezine @rticles it is written by Christine Perry
I know some of you are done with this (woo hoo a night off for you). Today we are going after all our little pieces, Itty bitty embellishments.
Lets go over really quick all those types of little pieces.
Buttons: Some of us are at a loss of what to do with them so here is an article excerpt from Ezine @rticles it is written by Christine Perry
- Buttons are not just for clothing. It's unclear when scrapbooking
with buttons began as a trend. Even in early scrapbook albums, it wasn't
unusual to see a button placed on a scrapbooking page. Quite often it
was a keepsake button, like from a vintage piece of clothing or a baby
girl's first dress. As scrapbooking pages started to become more 3-D and
scrappers looked for unique embellishments for their pages, buttons
became more popular. Manufacturers started offering buttons to
coordinate with their paper lines, and buttons with themes like
Christmas and sports became available. Monthly scrapbooking kits and
page kits often include complementary buttons as part of their packages.
Consider these tips for using buttons on your pages.
1. Buttons lined up together can make a border for your scrapbooking page layouts.
2. Place buttons in your titles by using them to dot your "i"s. You can also use them as the center of letters like "o" and "p."
3. Buttons can be secured to a page using embroidery floss by sewing it onto the page.
4. Glue dots work very well to adhere larger-sized buttons to a page, as well as buttons that are not flat on the bottom.
5. A few buttons make nice accents to anchor a ribbon border to a page. Again, glue dots will securely attach the buttons to the ribbon.
6. Try placing a button on the flap of an envelope to decorate a simple page element.
7. Flowers are still very popular on scrapbooking pages. Silk or paper flowers come in all sizes and colors now. A button makes a perfect center for a flower. An added benefit is that the button can hide the adhesive that typically shows through a paper flower.
8. Take 4 small buttons and attach them to the 4 corners of a photograph. The buttons will look like they are holding the photo to the page.
9. Create a bullet list for journaling. Use buttons as the bullets.
10. Scrapbooking tags can be used for page elements, photo mats, and journaling blocks on a scrapbooking page. You can use a button to decorate the hole at the top of a tag.
11. Try placing a button on a page and then hanging the string from a scrapbooking tag from it as an anchor.
12. An antique, vintage or unusual button can be used individually on a page as a page element all its own. Try double matting the button to highlight it on your layout.
13. Attach a button to a page with the holes empty, or thread some floss through the holes and tie it in a knot or bow for an added accent.
14. Don't limit yourself to one size of buttons on your page layout. Mix sizes and styles of buttons. You could stay with the same color, but have a variety of different buttons in that same color on a single page.
15. Buttons can be memorabilia. Save buttons from shirts, handbags, hats and other clothing that have sentimental value, but that you no longer can use. The buttons can be added to a scrapbooking page to remember the times when you wore those items. Baby buttons look cute on a baby page layout as well.
Metals: These will be your clips, hinges, keys, name plates, tabs, wire, frames, staples, tags etc. Anything that is metal (accept brads and eyelets). Some of you may not have any of these... I love adding metal to my pages but I always forget I have them. They are stuffed in the back of a drawer. Lets take some time to organize them.
Eyelets: These are great for lacing ribbon techniques or just adding color and texture to you page. They are the metal and have a hole in the middle. These items that take a cropadile or two tools to set them into your paper. They come in all shapes and several sizes. I have seen a few that don't have the hole in the middle but that is rare.
Brads: Are the ones with the two prongs on the back of the metal shape. They have no holes usually but I have seen them mimic eyelets every now and then. The prongs are pointy and can pierce the paper then be folded back behind the sheet to secure the item onto your page or card. They are colorful and can add a little extra pop to your work.
Beads: There are various beads being used in the scrapbooking world too. These are also used on flowers, strung with wire or even the micro beads that are adhered like glitter with adhesive to your project. Beads come in glass and plastic and can add a 3-D sparkle by catching the light with their commonly shinny surfaces.
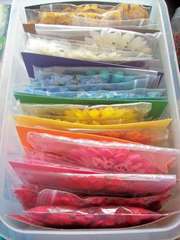
STORAGE SOLUTIONS: The majority of these are tiny and micro sized so we are going to be looking at much smaller options for storage today. You will need to decide if you want to sort them by color or by style, MFG, shape or size.
- Plastic Floss Container:
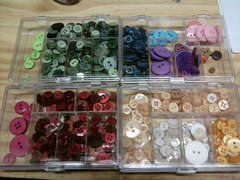 Buttons By Mrs. Tristan
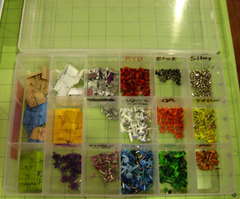 Brad storage By Shirleyanne4557
This is well altered and supper cute: http://www.scrapbook.com/gallery/?m=image& id=179320...
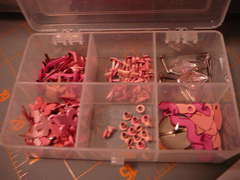 Inside the Fishing Tackle Embellie Storage By Flintridgescrapper
Vending Machine containers:
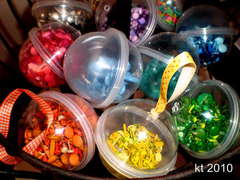 {B - Brads} By KellyCali
Flower Pots: http://www.scrapbook.com/gallery/?m=image& id=252373...
Brad House (supper cute!!! With screw on jewelry containers): http://www.scrapbook.com/gallery/?m=image& id=221376...
Bead Stackers:
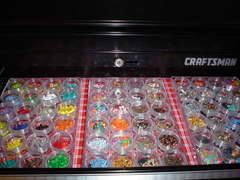 My Brad Storage By Teaching_Angel
http://www.scrapbook.com/gallery/?m=image& id=819749...
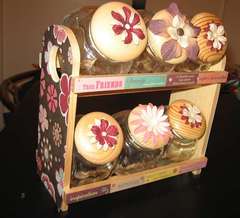
Spice rack (these small jars are perfect for these little items):
 {B - Brads} By KellyCali
http://www.scrapbook.com/gallery/?m=image& id=221150...
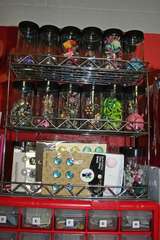 Brad storage By Nmackin
Bead storage box: http://www.scrapbook.com/gallery/?m=image& id=197765...
Magnetic Wall mount with tins:
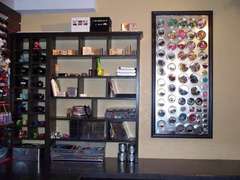 storage and magnetic wall By Gayle3131
Metal Container with tins: http://www.scrapbook.com/gallery/?m=image& id=175621...
http://www.scrapbook.com/gallery/?m=image& id=132418...
Pegboard: http://www.scrapbook.com/gallery/?m=image& id=159793...
http://www.scrapbook.com/gallery/?m=image& id=128082...
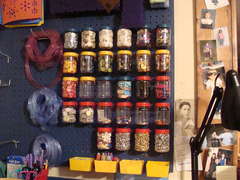 pegboard jars By J3Mel
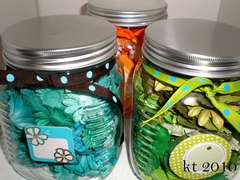
Food Jars: http://www.scrapbook.com/gallery/?m=image& id=159042...
 Button Storage By Crafty Mom Of 5
MM Jars:
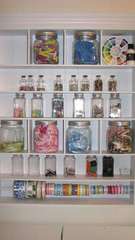 Embellishment Center By Maria RNC
Jar (I have to admit I am totally loving what Kelli is doing in her space):
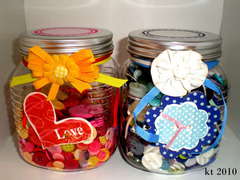 {B - Buttons} By KellyCali
Starbucks Frap Jars: http://www.scrapbook.com/gallery/?m=image& id=157296...
Apothecary jars: http://www.scrapbook.com/gallery/?m=image& id=194218...
Jars - Mixed all of them and sorted by color: http://www.scrapbook.com/gallery/?m=image& id=135827...
Unique candy dish:
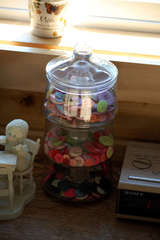 new button storage By Sueml
Cropper Hopper: http://www.scrapbook.com/gallery/?m=image& id=137404...
Pill Container:
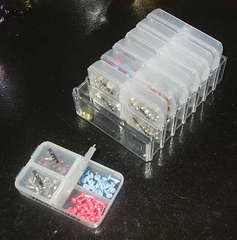 More very small storages By Severina Snape
Small drawer tool organizer:
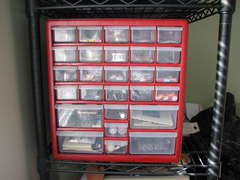 My Embellis Storage By ReadySetDistress
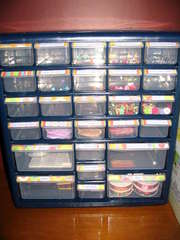 Brad and eyelet storage By Scrappy Shanah
Drawer dividers: http://www.scrapbook.com/gallery/?m=image& id=155414...
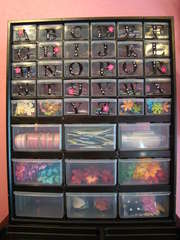
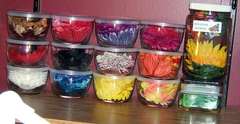
- Here is mine they have not changed from last year:

What I truly love about most of these is you can think outside the Box store and create a trash to treasure by using something you would find at a thrift store, garage sale, Craig list or for free from your kitchen. Even the metal storage tins on the metallic board. Try using a cookie sheet and some wedding treat tins, adding magnets on the back. Have fun!

Pin It








 Posts
Posts


