Showing posts with label Acid Free. Show all posts

Sunday, August 19, 2012

How to recover a clipboard (Teacher Gift)

Happy Sunday to you all! I have a new post up on the Helmar Design Team Blog  How to recover clipboards A Helmar How To Tutorial.

Blog Title photo Clipboard and decoupage Helmar L Grace Lauer

Well it is fall again and school is in (around here) and here is what our teachers go this year. A clipboard personalized with their last names and decoraged with Authentique paper using Helmar adhesive.

Here is the final projects.

Clipboard and decoupage teacher gift Authentique paper Helmar L Grace Lauer

Head on over to the Helmar Blog and leave me some love, or just a comment... hehe.
Have a Happy Helmar Day!


Photobucket

Saturday, June 23, 2012

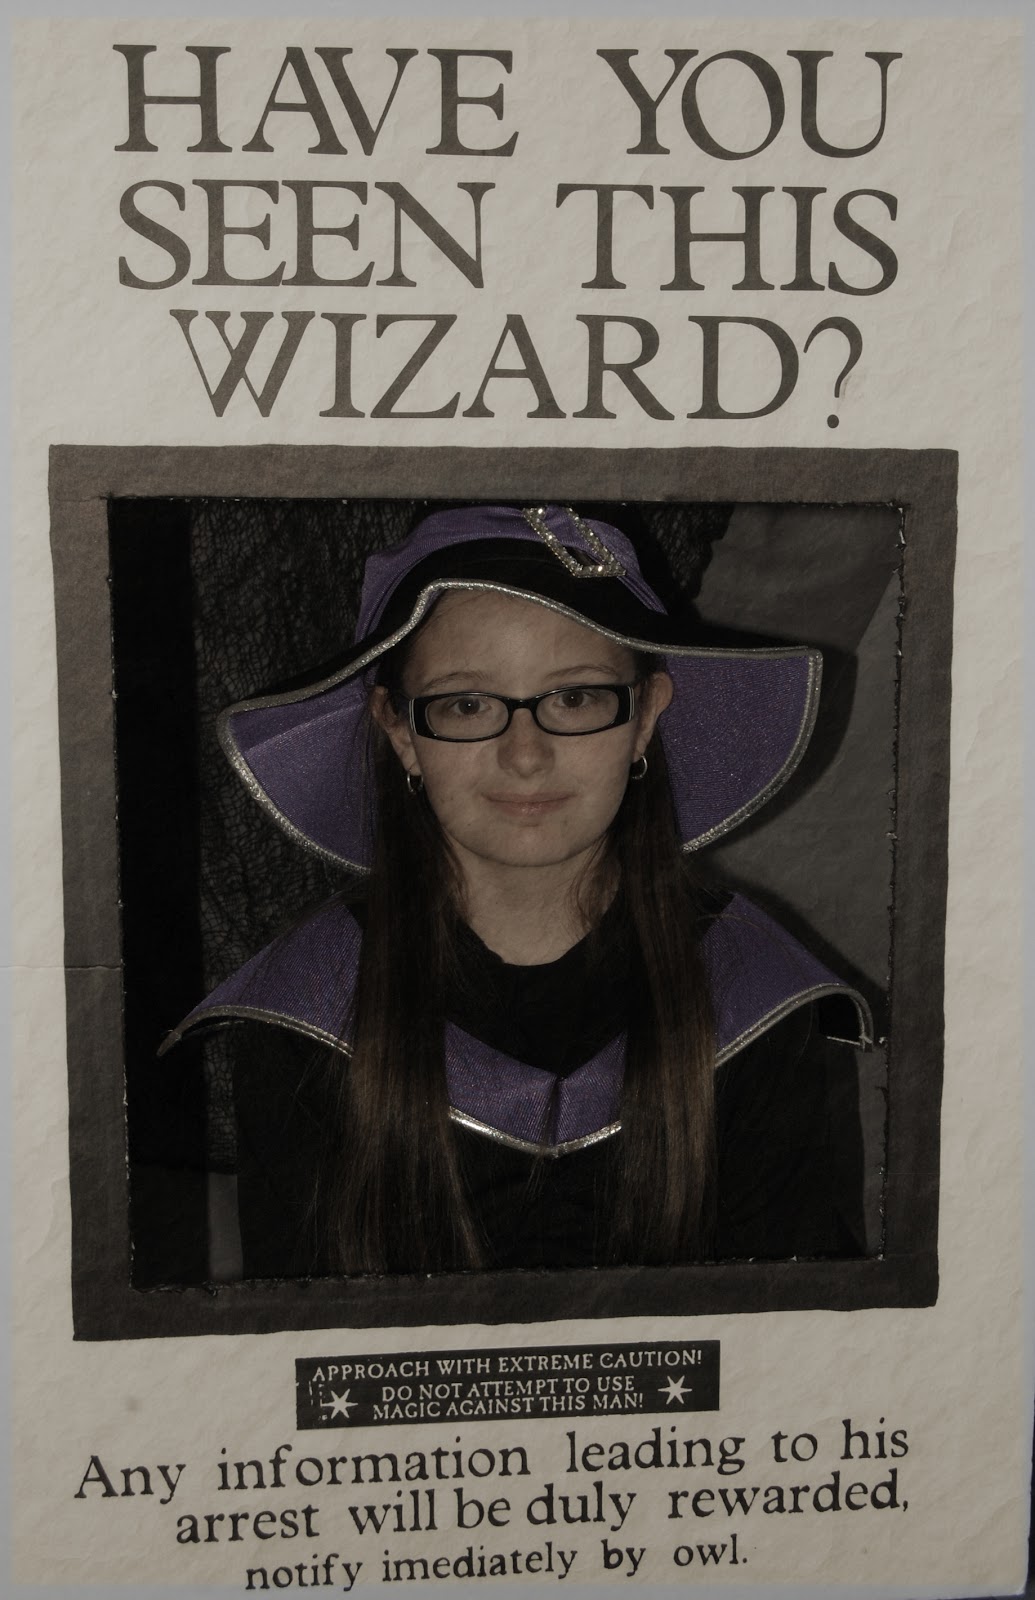
Prisoner of Azkaban "Wanted Poster" Photo Booth Tutorial for Harry Potter Party Post #8

Hello all you Prisoners of Azkaban,

Today I am going to share with you a bit more of the Harry Potter Party. I think I would not have broken it all down into so many post if this was not a DIY Crafty blog. LOL!


Some, ferocious dog I have... he is a Wizard in Disguise... LOL! This is a DIY post on how to make your own Harry Potter Wanted Poster Photo Booth. Using my Cricut and Helmar Acid Free Glue!

Supplies:
Cricut and the Pantin School Book Cartridge (or anything similar)
Helmar Acid Free Glue
1 - foam core board
1 - fine tip and one large black Sharpie
1 - printed graphic of the black box with small white text (I grabbed this from a larger image of Serious Black's wanted poster online)

Here is your step by step instructions:

Step 1: Print the black rectangle with white text from the Serious Black Poster image. Cut it out.

Step 2: Cut a large square out of the foam core board leaving about a 3" boarder along the left and right sides.

Step 3: Use your Sharpie to draw a 1" black border around the opening.

Step 4: Cut out letters on your cricut. The top title ones are about 3" and the small letters on the bottom in black are 1".

Step 5: GENTLY remove the letters from your mat and be extremely careful with the negative space around the smaller 1" letters. You can throw away the smaller letters but keep the negative space outline to use as a template for the small letter.

Step 6: Adhere the Larger Cricut letters to the board using Helmar Acid Free Glue center the letters on each line.

Step 7: Adhere the black rectangle with white lettering with Helmar Acid Free Glue to the bottom of the poster, just under the outlined opening.

Step 8: Use your negative space letter outline from your small Cricut letters and trace them onto the board using your fine tip Sharpie.

I taped up the back of the poster along a floor lamp so it would swing back, due to the tight nook space I used for this photo booth. I draped some fabric from the remnant section of my fabric store and some Halloween black gauze I got at the $1 store last fall.  This sets up the background to the photos too. Propped a stool behind it for the kids to sit on and boom! Photo Booth! See some of the results below.


The next two are my kiddos Trinity and Tristan (the birthday boy)

 I would have to say that this one is my favorite here.
A true Harry Potter fan!


For more Harry Potter Party Posts please see the links below. Thank you for your time. Leave a comment below if you have questions or would like me to know if you enjoyed this party. Thanks again!

Eats and Treats:
The Three Broomsticks - Butterbeer, Polly Juice Punch and more
Honeydukes Candy Display - 24 different candies
Owlery Cupcake Tower 
The Golden Snitch Cake 

Fun and Fancy:
Prisoner of Askaban Wanted Poster Photo Booth
DIY Olivander's Wands DIY

Party Decor and More:
Potions Cabinet Details DIY
Video of Helmar DIY projects for Harry Potter Party

Invitations and Printables:
Owl Post - Hogwarts Acceptance Letter Invitations mailed Owl Post 
Publications - DAILY PROPHET and the QUIBBER props 

Photobucket
 Pin It

Thursday, June 14, 2012

Harry Potter Publication Props - Quibbler and The Daily Prophet Post #6


Good Monday Morning Readers,

Today I am going to share with you the props I made for my son's Harry Potter Party. I made 4 of each of the two popular publications mentioned in the book, The Quibbler and The Daily Prophet. Both were very easy to make and they add another detail to the party just having them lay around. My daughter made The Daily Prophets and she is seven years old.

Here are the Quibblers. I printed out covers and backs on cardstock and glued them to old magazines with Helmar Acid Free Glue! This gave them dimension and a real feel of an actual publication. If you opened them though you would find old expired coupons mostly.


 The Daily Prophets were very easy. I printed the top 1/2 of a image of the front page of multiple titles from all different movies. Then wrapped them around an old newspaper and tied them with twine.


Here they are dispersed throughout the party:

In the Great Hall with the Golden Snitch Cake... more to come in a future post about that.


Here is a Daily Prophet it the Gringotts display:


Need some light reading when your in the loo?  We provided two types to suit the political taste of all our guests.

One last thing... the photo header is an image from the Gryffindor Common Room. where one of each of these were displayed on the center ottoman.

For more posts about our Harry Potter Party see these links below,

Eats and Treats:
The Three Broomsticks - Butterbeer, Polly Juice Punch and more
Honeydukes Candy Display - 24 different candies
Owlery Cupcake Tower 
The Golden Snitch Cake 

Fun and Fancy:
Prisoner of Askaban Wanted Poster Photo Booth
DIY Olivander's Wands DIY

Party Decor and More:
Potions Cabinet Details DIY
Video of Helmar DIY projects for Harry Potter Party

Invitations and Printables:
Owl Post - Hogwarts Acceptance Letter Invitations mailed Owl Post 
Publications - DAILY PROPHET and the QUIBBER props 
Photobucket
 Pin It

Wednesday, February 29, 2012

Moss and Book page hanging wall art - Decorating on a Dollar

Hello everyone,

I am still wrapping up all the "homework" I have from CHA I have been having some creative fun this past week. Moving into spring and starting to gear up for Easter how about you? Us crafty types start early... got to leave time to make those fantastic projects, right?

Today I bring you a very large, yet simple and sweet, wall art project.

Bless this nest wall art

Here was my favorite part... moss is messy but I found this Super Moss Mat (a flat roll) at my local craft store and when you use Helmar 450 (click for tutorial post) with it... OH MY GOODNESS, it was SO EASY AND FAST!

Helmar and super moss

Here is a close up. You can see the "N" is one of the 3D letters and the "E" and "S" are chipboard and are flat.
Bless this nest wall art closeup_L Grace Lauer_Helmar

I actually went through and curled all the page corners forward to give it some playfulness and then I was done.

Bless this nest wall art_L Grace Lauer_Helmar 450 Acid Free

I hope you have enjoyed this post. Please feel free to let me know your thoughts in the comments below or if you are working on any spring projects I would love to see them.

Have a Happy Scrappy Day!

Photobucket
 Pin It