Showing posts with label Glitter. Show all posts

Thursday, October 24, 2013

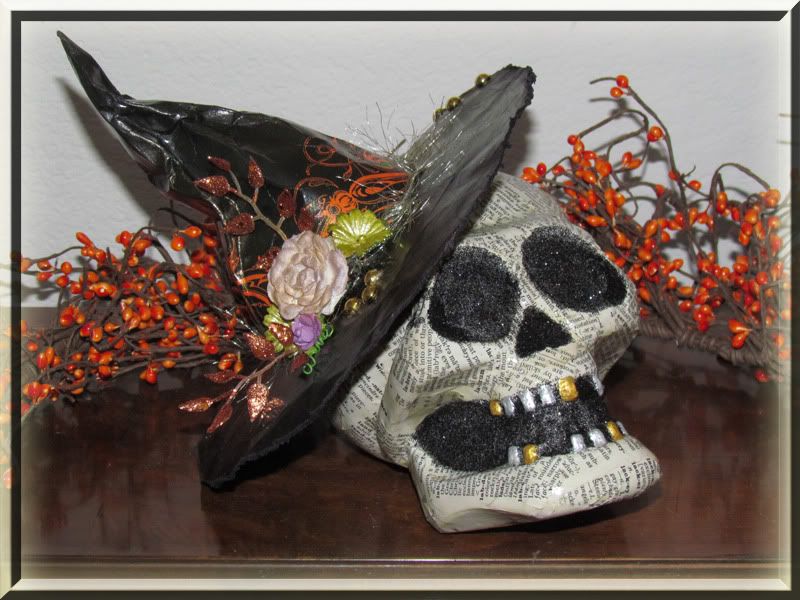
Uniquely Grace: Spooktacular Skull - dollar store find!


Uniquely Grace: Spooktacular Skull
Tutorial: It's that time of year again... time to get crafting for the holidays! My favorite is Christmas but I always go in order... something ab...

Throwback Thursday - is something I am going to try. I have so many ideas on my blog I want to re-share them with you all!
Photobucket

Wednesday, March 27, 2013

Upcycling Wine Bottles Creating Centerpieces

Upcycling is all the rage these days for many reasons, it brings a whole new meaning to "One man's trash is another man's treasure." You can save money on supplies and decor. Help the landfill issues and reduce you carbon footprint. No matter what your reason to reduce, recycle or reuse if you are going to make something beautiful from junk then you need to have the proper adhesives. Check out these center pieces I created from wine bottles for a local fundraiser event.


To read more about these projects and a tutorial please click on this link...

Upcycling Wine Bottles - Decorating on a Dollar with Helmar


via helmarusa.typepad.com
Photobucket
Certified Helmar Educator

Wednesday, November 21, 2012

Elegant Handcrafted Angel Ornament

Handcrafted and handmade angle ornaments are all beautiful in their own right. Yet I struggled with this design. I wanted mine to have the elegance and beauty we all associate with angels. I believe I was able to capture that within this final design.

(If you are here to view the HELMAR & MAY ARTS BLOG HOP scroll down it is the post below this one. Thanks!)

Gold and Silver adorns the wings and states words representing the spirit of an angelic presence and holiday season, HOPE, PEACE, BELIEVE, JOY, NOEL and FAITH.

The wings are sealed with Helmar Crackle Steps One and Two. Then finished off with coordinating inks and embellishments like feathers and crystal. Helmar 450 Quick Dry Adhesive was sued to adhere the feathers and phrases.


Thank you so much for your time today! If you like what you see make sure you fallow my blog ------> over on the right side column here. Don't forget to leave a comment to let me know what you like or any ideas, questions and thoughts you may want to share.
Photobucket


Certified Helmar Educator


Sunday, November 18, 2012

Peacocks for Christmas? Ornaments? Tree Topper and more?

Yes... I actually had the idea this year to create the window display in my little book store I work with and then someone told me "Peacocks and Christmas, those don't go together!". I should know better than to let someone squash my artistic vision too quickly... BECAUSE this season... PEACOCKS are EVERYWHRE... yes ... especially for CHRISTMAS! Pier1, Walmart, Michael's, Marshalls and other stores are decorating for this holiday in blues, teals greens and dark golds, mimicking the peacocks and feather type ornaments are all over the shelves... should have stuck with my gut. UGH!

Yet... prior to seeing these everywhere my daughter decided (about 9pm on Halloween night) she wanted a peacock tree in her room this holiday season. Making Ornaments is a tradition in our house... this year is the "year of the Peacock" according to my daughter who now want's everything Peacock. We discussed it some more and this is what we came up with.

Ornament #1: Helmar Gemstone Glue with a fine tip applicator was used to draw and glitter the eye feather on the outside of the ornament. 


Ornament #2: Helmar Premium Craft Glue was used along the back to glue all the pieces to the gold plaster filigrees.


Ornament #3: No adhesives used

Tree Topper plans: We bought one large clip on peacock bird ornament and we will be adding more feathers and some floral picks to spruce it up.

I will post more as we get the tree up and decorated after Thanksgiving. Hope you all have a wonderful Sunday! Thanks for checking out my blog. Leave a message in the comments below. I love hearing if people like my work. If you have a question please make sure you leave an email for me to answer. Thanks!Fallow me here ---------------------------------------------------------------->
Photobucket
Helmar Educator - Education Team

Saturday, July 14, 2012

Fabric Flowers for a Special Wedding using Helmar Glue

Good Morning all, L. Grace Lauer here!

Make Fabric and Paper Flowers Tutorial Header image

A wonderful wedding projects for my baby sis' wedding day, "Congrats to Sheay and Tom" I am so happy for you both from the bottom of my heart.

The tutorial on how to make flowers from polyester fabric with Helmar glue is located on my blog post on the Helmar blog, called:

"Love is in the Air, Helmar helps make fabric and paper flowers for a Wedding"

WARNING! Lots of photos!... tea, coffee and a snack may be required to survive through this post... LOL!

Hair piece #1 - Bridal flower (this one is made from the remnants of her dress when she got it altered) for more info on how to make this see my blog post on the Helmar Blog)

Bridal Flower Hair Piece Helmar Sheay Cono


Stop looking at the cute couple (hi Sheay and Tom) look at the beautiful flower in her hair! (This photo is courtesy of Sarah Christine Photography in Fort Collins, CO, I highly recommend her!) I know you all are looking at them, it's okay, isn't my baby sister beautiful? From head to....

Sheay and Top with flower in her hair

TOE!
Bridal Shoe Accessories: The flowers attached with safety pins (so they could be removed for her to be able to ware these shoes after the wedding) to these sweet comfortable Tom's brand wedge heals. (This photo is courtesy of Sarah Christine Photography in Fort Collins, CO) for more info on how to make this see my blog post on the Helmar Blog)

Sheays shoes

Flower Girl Accessories! Hair pieces #2 and #3 -  This is a photo of my daughter's hair piece. I had so much fun working on all the flower girl's items... my mom was even there to help!  We made everything from their hair to their belts to their flowered poms have Helmar all over it! Here is my precious little daughter and her hair piece. (This photo is courtesy of Sarah Christine Photography in Fort Collins, CO)

Trinity Hair piece Helmar

Their poms on the other hand withstood some friendly battles with the Ring Bearer the poms had no mishaps and stuck together like all my Helmar projects do. (This photo is courtesy of Sarah Christine Photography in Fort Collins, CO)

Flower Girl poms wedding walk

The Ring Bearer Boutonniere - The flower is nothing but card stock! (For more info on how to make this see my blog post on the Helmar Blog)

Ring Bearer boutineer paper flowers Helmar wedding 
Matron of Honor and Mother of the bride hair flowers - Now since I was the Matron of honor at this wedding I did not get photos of my hair but these were the hair pieces I had the stylist twist into my side fishtail french braid. (This photo was taken prior to the gluing process on the burned flowers...) the pearls are Swarovski Pearls from Art Beads.com

Mini fabric Flowers in progress bridal wedding hair

Here are three of these little guys clustered in the Mother of the Bride's Hair. (For more info on how to make this see my blog post on the Helmar Blog)

Kerri and her hair

Well that's all folks! I hope you were able to finish your beverage and snack in time. I hope you all have a Happy Helmar Day and please leave a comment below! Thank you for your time!
Signature
 Pin It

Friday, March 2, 2012

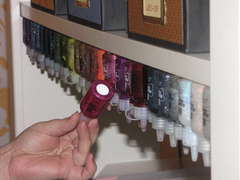
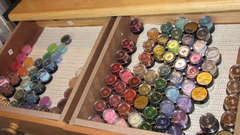
Organize your glitters, glitter glues, flocking, embossing powders and beads

Hello organizers,

CHALLENGE #14 WEEK #4 - Glitter, Glitter Glue, Flocking, Embossing Powders, Micro Beads etc.

I am not sure if you all know but I am a glitter fanatic! LOL. To put it lightly. I have over 100 shades of glitter and embossing powders. I have almost 40 different colors of glitter glues. I am a bit obsessed about the sparkle I think ... LOL.


REMEMBER: Always leave room for your stuff to grow!!! Especially you collectors!Photobucket
 Pin It

Tuesday, February 14, 2012

Love framed art with one Spellbinder die and Helmar

Here is a little project to share on Valentines day! I so just love this one. It was made from one Spellbinder die set, the pear. I used the bottom of each pear to make the petals of the rose and the background with the book pages. Helmar 450 Quick Dry is the key adhesive to this project and I just love how it's holding up. I used Helmar Gemstone Glue and a brush to paint the white chipboard frame and then glittered it. 


 Have a Happy Helmar Valentines Day Everyone!

PS. If you like what you see and want to see more please fallow my blog. Please leave a comment if you really like this project. Thanks.
Photobucket

Monday, January 16, 2012

Better Late then Never - Christmas Book Page Trees

Better late then never! Here are some images of some book page trees I made this year for the Christmas Season. Enjoy!

These of course were put together with Helmar Adhesives and went together with ease. I used Helmar 450 Quick Dry all over a paper mache tree form to hold the book pages on and I applied Helmar Gemstone Glue with a brush to adhere all the glitter. 


Photobucket

Monday, December 26, 2011

Making the Holiday Colorful with Helmar and Faber-Castell

Making the Holiday Colorful with Faber-Castell

Good Day everyone!
Today I am so excited to share with you my experience working with some of the wonderful products by Faber-Castell and Helmar together. This decoration you just lay on the branch of your tree. If you make it out of cardstock it can be hung by adding a ribbon or cord onto the back.


Cmas Flower for faber Castell

But first here is a fun fact about Faber-Castell ... 2011 is a milestone year for Faber-Castell USA as they celebrate the 250th Anniversary of Faber-Castell and 35 years of Creativity for Kids! TWO HUNDRED AND FIFTY YEARS!!!! WHO DOES THAT? Faber-Castell does, that's who! Can you imagine being part of such a great business/company that you have the opportunity to celebrate 250 year anniversary? Kudos to you Faber-Castell and by the way your products rock! I love working with them!

To see a tutorial of how to make this please visit Making the Holiday Colorful with Faber-Castell Helmar's blog. There you will find inspiration daily and some wonderful projects and product.
Photobucket

Tuesday, March 1, 2011

Grungy Glitter Technique

Good morning everyone!

I found this new-to-me technique while working with some chipboard. I always felt glitter was so pretty it needed to have a full and solid coat but did you know that sometimes a little goes a long way? I thought I would dive into a couple of techniques over the next few projects that would add just the right amount of glitz.

In this LO I also used some Bronze, Ritzy Ditzy Glitz and spritzed the bottom corners of the center pink paper to add more "Grunge".

For a good solid coat of glitter on chipboard I have always used Wonder Film. It makes a spectacular finish. But on this layout I was distressing a lot with my inks and felt it I wanted a distressed title due to the subject matter (this is a pet that is no longer with us). So I took out my Helmar Gemstone Glue (It wont cloud Gemstones and I figured it would be a good glue to use with glitter) put a little pile of it on my splat mat and started painting it onto my letters with my finger. Making sure to get different thicknesses and not always getting the edges. Dusting it immediately with chocolate Glitter Glitz made this title just the way I want it. Still tons of glitz but with a kinda grungy, distressed look around the edges.

I am so organized now in my scrappy space that I have been able to make my projects so much faster. Finding everything I need where it should be saves so much time it allows me to play with my products a bit more. Below I am showing you some of the ribbon and doily flowers I made for this LO. Hope you enjoy!

Happy Scrapping and hope you get some time to be creative today! Share with me the link if you do. I love to see peoples projects!

~ Grace ~

Wednesday, February 16, 2011

A Glittery Confection

This glittery confection was created to house some our valentine treats. They are favor boxes adorned with P K Glitter Glitz. The cricut and P K Glitz Sticky Paper provide the means to an easy assembly and impressive display.


Want to see how it is made? Check out the video tutorial on my YouTube channel.


The Cricut Design Studio allowed these heart shaped windows to be cut inside the cake favor box pattern and the lids as well. P K Glitter Glitz in Crimson and Golden Cadillac provide the sparkle and glitz.


It was enough to make your mouth water and with these tempting chocolate cake favor boxes as the means to pass out our favorite chocolate treats, it was a fitting combination.

EDIT: This post was highlighted on Party Time Tuesdays Your Daily Dose blog on February 6th, 2014.

Leave a comment below and have a fantastic Valentines Day!

Tuesday, February 8, 2011

Dynamic Duo!

Dynamic Duo? Yup, I have a pair that are just amazing together. They are as different as oil and water but when it comes down to it they make things in this life more beautiful. Here is a layout to prove it.


I am so excited to tell you about my Dynamic Duo... no not my kids! My Ritzy Ditzy Glitz and my P K Glitter Glitz, of course! My kids we call "T & T Dynamite"... but that is for another post all together. Lets take a closer look...


Ok fine... I will chat for a second about my sweet darlings...

Trinity likes Pink, Tristan likes Blue
Trinity will eat almost anything, Tristan is a picky eater.
Trinity is a social butterfly, Tristan is happy all by himself most of the time.

See what I mean... Oil and Water. The "T & T" well that stand for their names... and the "Dynamite" well that is because when they are in room together for a while it looks like some dynamite exploded in there.

Alright enough chatting about my rugrats. I hope you like this LO and I wish you a Happy Scrappy day!

~ Grace ~

Saturday, January 22, 2011

The post party bliss... a fashionista pink and black party

It feels so good to cuddle up with the hubby after the party festivities are all done and just enjoy the memories from the day. Watch a little TV and pass out on the couch with a smile of satisfaction on my face.

I love throwing a good party. From the first impression of the invitations to the last memory of the kids taking home the goody bags. Everything in between especially the cake!


This will be a long post about my Darling Daughters Birthday party... so if you love to hear about the process I go through then grab a cup of tea or coffee and fallow along with me. There will be ton of visuals so it might not be as long as it seems... hehe.

It all starts about a month before the party when it takes me about a week to get my kids to decide on a party theme. Then another week to design ad make the invitations to match the party supplies they have picked out. Trinity went with a Fashionista theme. Here are the supplies.


So from this what better way to say fashion then making some purse invitations?


When ever their birthday falls on a schooldays I also make cupcakes for the kids to take to class. These were fun using the ribbons around the black paper wrappers.


From there I have about a week where I am decorating the goody bags and making the decor for the party, planning games and finding screaming deals on the prizes. This year I made a few wall decorations a manikin bodice, some perfume bottles, a shoe and a chandelier. My favorite was the chandelier... probably because I glitzed it out with some glitter and it was 3D!!!


And the goody bags were designed so the girls could put their names on them when they walked in to the party. There was only a few stickers and a lip gloss in each one. As they did a craft or played a game they each got a prize. The prizes were necklaces, bracelets, or rings from Clair's. Don't worry I got a great deal on them all, 10 for $10 and some were even less when I got sets for a $1 and I broke up the sets into more then one gift, Christmas clearance helped also. HEHE.


Now I am down to the week of and the days before. At this point I am seriously designing the cake and getting all the supplies for it and balloons and streamers.

I new the cake had to be pink and black but I was stumped on the ideas for it. I had the opportunity to speak with the Mother of a friend of mine, who by chance decorates cakes for a living. She drew up a sketch of her ideas and I just loved it. She turned me on to a recipe for Modeling Chocolate and WOW... no yucky fondant needed!


I baked the cake and froze it two days before the party and spent the day before icing it and creating the elements for it. I also baked over 60 mini cupcakes and decorated them as well. That night I cleaned a bit and again the next morning too. Then an hour before the party I put all the pieces on the cake and set out all the food and made the punch.


There are so many little details I that I put on here. I just love doing that. Here on the front I recreated the TL logo out of black modeling chocolate and then sprinkled it with black sugar crystals to mimic the glitter on on the front of the purse.


Here is a pic of the back side and if you look closely you can see there is a clasp for the pearl necklace and a flower behind the purse.


The other detail I love are the little pearl candies all over. There are pink and cream ones in several places.


We had 14 girls attend (over twice the amount we ever have) I guess that is due to her being in school this year vs. just friends of the families. The girls showed up and we had a movie on in the background to help them have something to occupy their minds while we switched from one craft/game to the other. We made bracelets, decorated necklaces, Designed and colored fashion outfits, they all got nail stickers put on, we played a game of limbo, broke a bottle of nail polish... J/K it was a pinata shaped like a nail polish bottle. Ate cake and ice cream, opened presents and added bling strings to the girl's hair. Whew!!! What a party it was and we all had such a blast. Thanks to the few Moms that stayed and offered to help, it went off without a hitch... and the hubby was off the hook helping make jewelry and do nails... LOL.

Over all the party was a hit and I even heard some of the girls say that this was the "best party ever", "I am having so much fun" and "this is the best day of my life"... hehe. I loved that last one, mostly because it wasn't my daughter that said it and it was just one of her guests.

Trinity had a wonderful time and was so thrilled that everyone came. She was enjoying being little miss popular.

Happy Birthday to my darling daughter, Trinity! I can't believe she is six already!

I hope you enjoyed seeing into my crazy and creative mind. Have a wonderful weekend. Oh and if you have any birthday posts, please feel free to share... my son's is coming up in May and he is already set on a Star Wars theme. Hehe.


~ Grace ~

More Birthday Party Invitations I have created:

Boy Birthday Invitations:
- Minecraft Birtyday Party Invitations
- Harry Potter Hogwarts Invites
- Lego Bionicle Mask of Light

Girl's Birthday Invitations:
- Angelina Ballerina Birthday Party Invitations